Using the Launchpad Pro,
Ableton Live and Hardware
With a little knowledge the Launchpad Pro and Live become
a great team for controlling your external hardware devices,
such as synthesisers, drum machines, and so on.
As mentioned in the previous section, we recommend
using the Live layout (selected automatically when Live
detects the Launchpad Pro) if you want to add external
hardware devices to your Ableton set. There are two basic
methods for setting up the Launchpad Pro, Live and external
hardware, as follows.
Using the Launchpad Pro’s MIDI Ports
First, make sure you set the Setup page’s MIDI Out pad to
‘Off’ (unlit). Live will then be in control of sending MIDI, so
that you are not also playing the hardware directly from the
Launchpad Pro itself, thus sending MIDI twice to
your hardware.
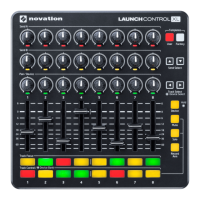
With the Launchpad Pro connected to your computer via
USB, run a MIDI lead (MIDI DIN-5 with adaptor) from the
Launchpad Pro’s MIDI Out port into your hardware unit’s
MIDI In port.
Connecting the Launchpad Pro’s ‘MIDI Out’ (left) to your
hardware’s ‘MIDI In’ (right).
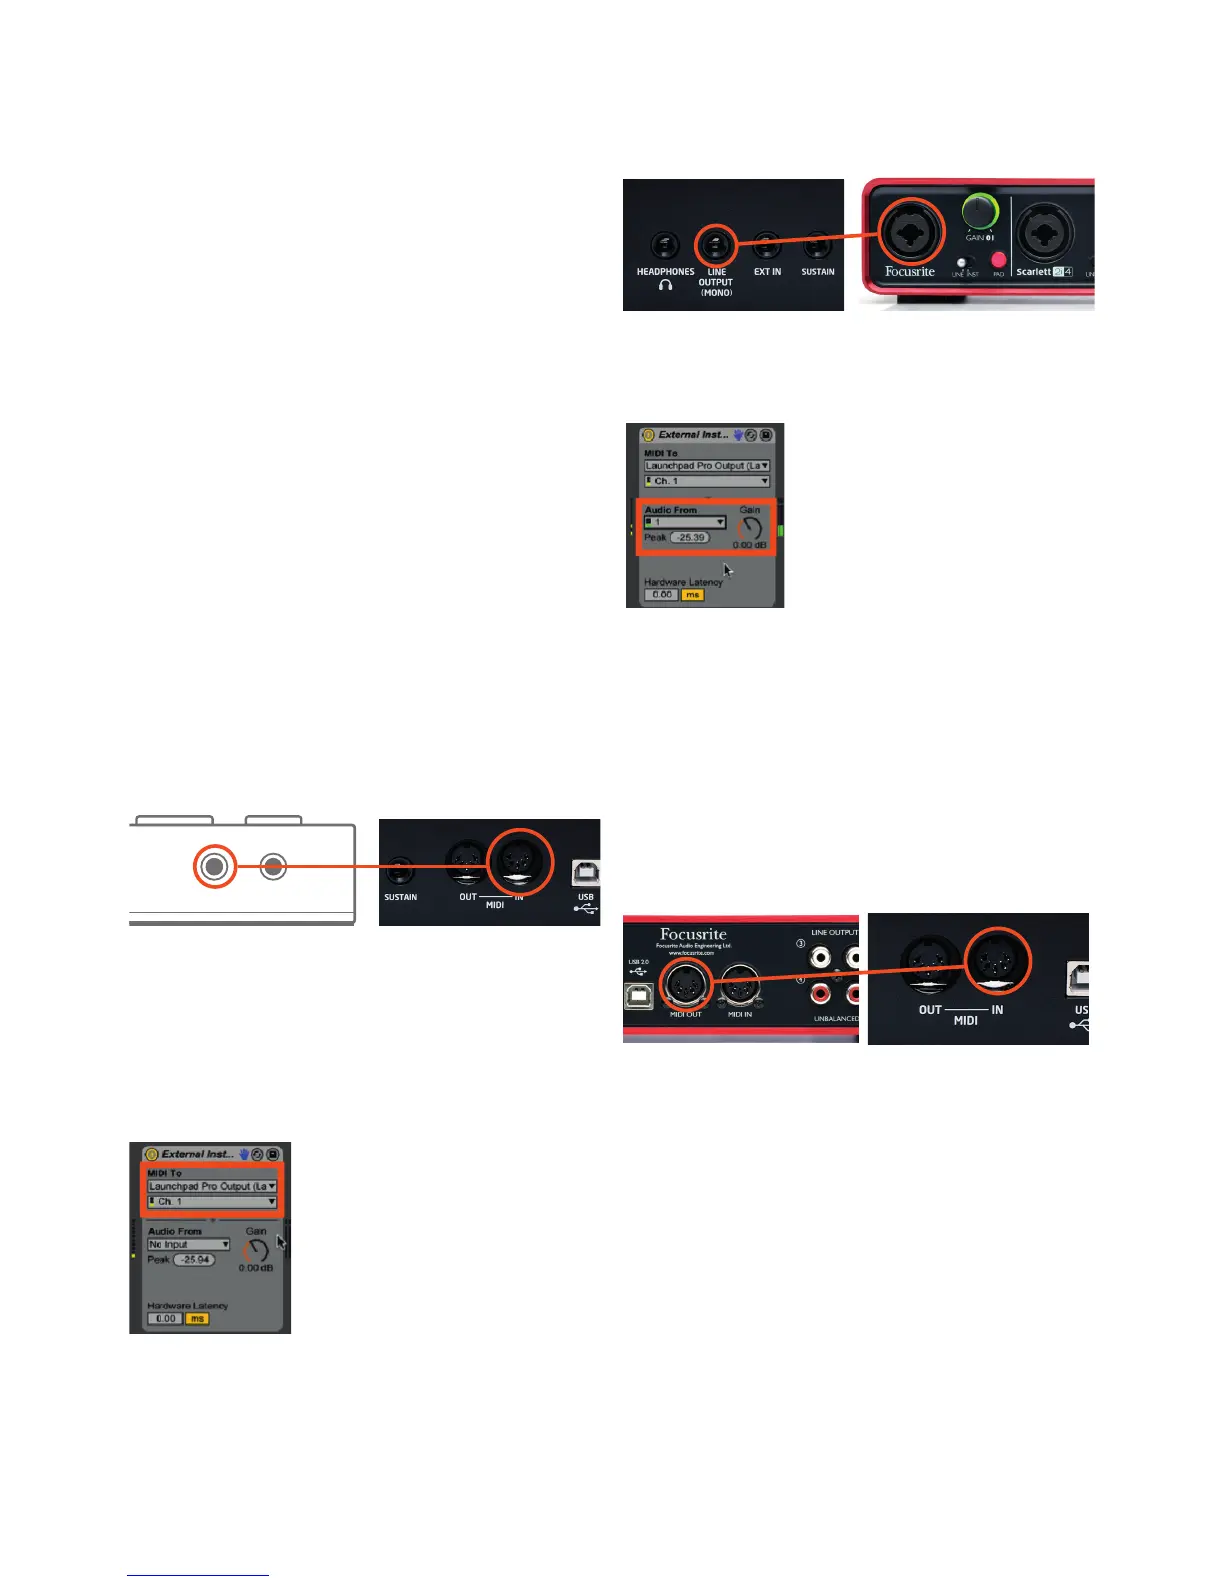
Next, place Live’s External Instrument (found in the
‘Instruments’ folder) on a MIDI track. In the top ‘MIDI To’
chooser select ‘Launchpad Pro Output (Launchpad Pro
(MIDI Port))’.
External Instrument sending MIDI through the Launchpad
Pro’s MIDI Port.
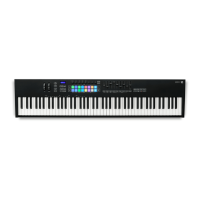
To get your hardware’s sound back into Live connect the
Line Out on the back of your hardware unit into an input on
your audio interface.
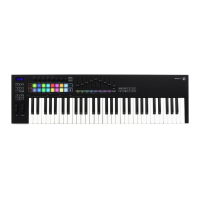
With that done successfully, select the input, in the ‘Audio
From’ section, that is receiving the audio signal from your
hardware.
External Instrument’s ‘Audio From’ chooser.
See the ‘Quick Tip’ in the next section for a short guide on
recording your results.
Using Your Audio Interface’s MIDI In/Out
With the Launchpad Pro connected to your computer via
USB, run a MIDI lead (i.e., a MIDI DIN-5) out of your audio
interface (e.g. Focusrite Scarlett.) into your hardware unit’s
MIDI In port.
Connecting your interface’s ‘MIDI Out’ (left) to your
hardware’s ‘MIDI In’ (right).


![Preview: Novation Launchpad Mini [MK3]](https://data.easymanua.ls/products/284351/200x200/novation-launchpad-mini-mk3.webp)