5Programming with IPD-E
5.1Basic programming procedure
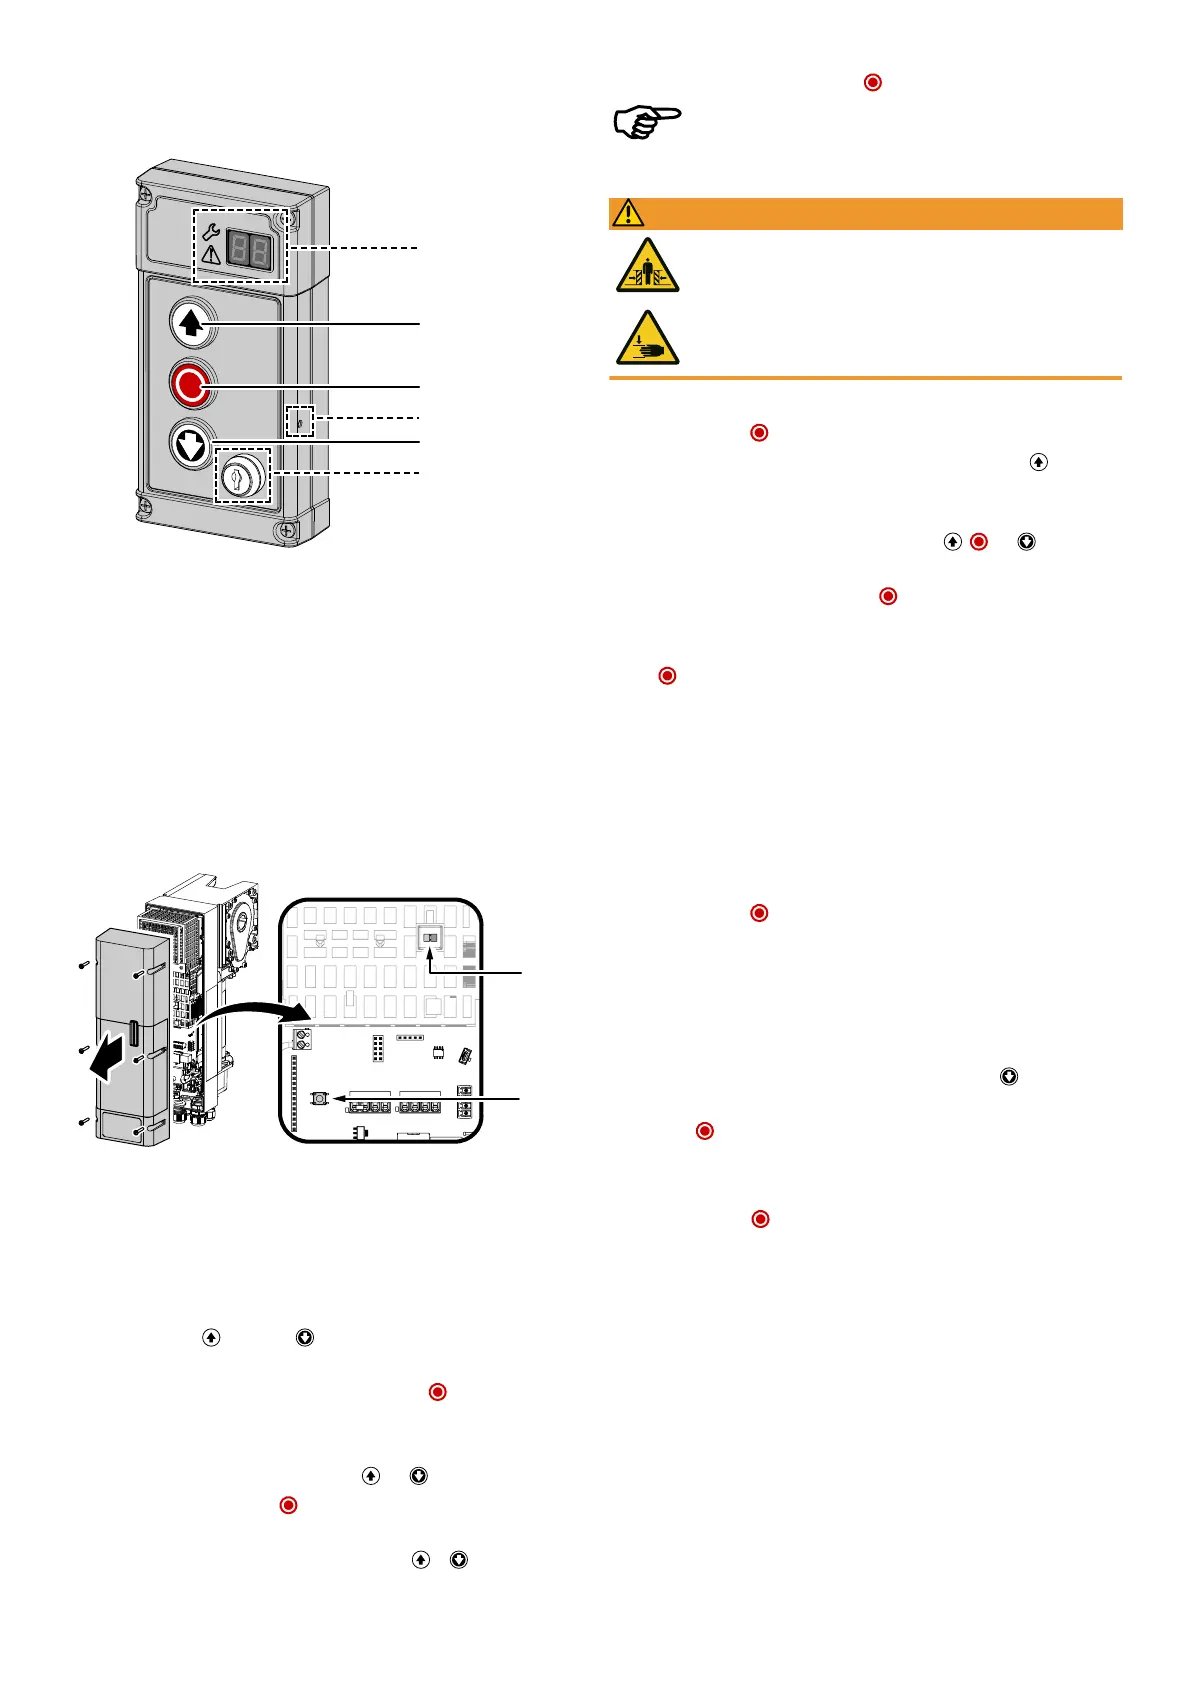
1 7-segment display (IPD-S only)
Status/programming
2 OPEN button
3 STOP button
4 PROGbutton (IPD-S only)
5 CLOSE button
6 Key switch (variants IPD-E KS / IPD-S KS only)
The DCC door drive without IPD-S is programmed via the PROGbutton of the door
drive. Open the housing cover by loosening the six screws on the housing cover (see
description in the Assembly and installation chapter). The housing cover is se-
cured against falling off with a cord and can be left hanging from it.
The DCC offers an LED-controlled basic settings menu. Proceed as follows to carry
out programming settings:
1. To activate the configuration menu, press and hold the PROGbutton until the
LED on the DCC changes from blue to flashing red.
ð The configuration menu is activated and the red LED indicates which menu item
is currently active by flashing periodically.
2. Navigate with the (OPEN) and (CLOSE)buttons of the control device to
select the desired menu item1–10.
3. Confirm the selected menu item by briefly pressing the button(STOP).
ð The number of times the blue LED is periodically flashing indicates the currently
selected parameter.
4. Navigate to the desired parameter using the and button.
5. Confirm the selection with the button to accept the setting parameter and
return to the configuration menu.
6. To exit the configuration menu, repeatedly press the or button until the
red LED flashes quickly.
7. Confirm the selection with the button to exit the programming.
After 120seconds of inactivity, the configuration menu is exited.
5.2Menu1 Setting the door end positions
WARNING
Crush hazard and risk of being struck by the closing door
Ensure that no closing edge or photoelectric sensor monitoring is active
whilst the end positions are set.
The door end positions OPEN and CLOSE must be set directly in succession.
1. Briefly actuate the button. The red LED flashes continuously.
2. In order to define the door end position OPEN, press and hold the button until
the door is completely open.
ð If the door moves in the wrong direction, a reversal of the direction must be im-
plemented. Press and hold the button combination , and for5seconds
until the red LED goes out briefly and then repeat step2.
3. Confirm the set position by pressing the button for a long time. After con-
firming the door end position OPEN, the red LED flashes slowly.
4. Move to the door end position OPEN and confirm the desired position by pressing
the button. After confirming the door end position CLOSE, the configuration
menu is exited automatically.
ð The red LED is illuminated. The drive is in current learning mode.
5. Carry out a complete, failure-free opening and closing cycle.
5.3Menu2 Radio settings
Programming radio hand-held transmitters (menu item2)
You are provided with the possibility of programming 40"KeeLoq" hand-held trans-
mitter channels.
1. Briefly actuate the button. The LED flashes blue. The programming mode is
activated for 30seconds.
2. Actuate the button of the hand-held transmitter that is to be programmed.
ð The blue LED flashes fast to indicate that the hand-held transmitter has been
successfully taught.
3. To program any additional hand-held transmitters, repeat the procedure from
menu item1 or exit the configuration by briefly pressing the button until the
red LED flashes quickly.
4. Press the button.
Deleting radio hand-held transmitters (menu item2)
To delete all programmed hand-held transmitters, please proceed as follows:
1. Press and hold the button for 5seconds.
ð The successful deletion of the hand-held transmitter is confirmed by the blue
LED flashing quickly.
Novoferm|9