Chapter4
Operation and Application
Manual of NCH02
- 44 -
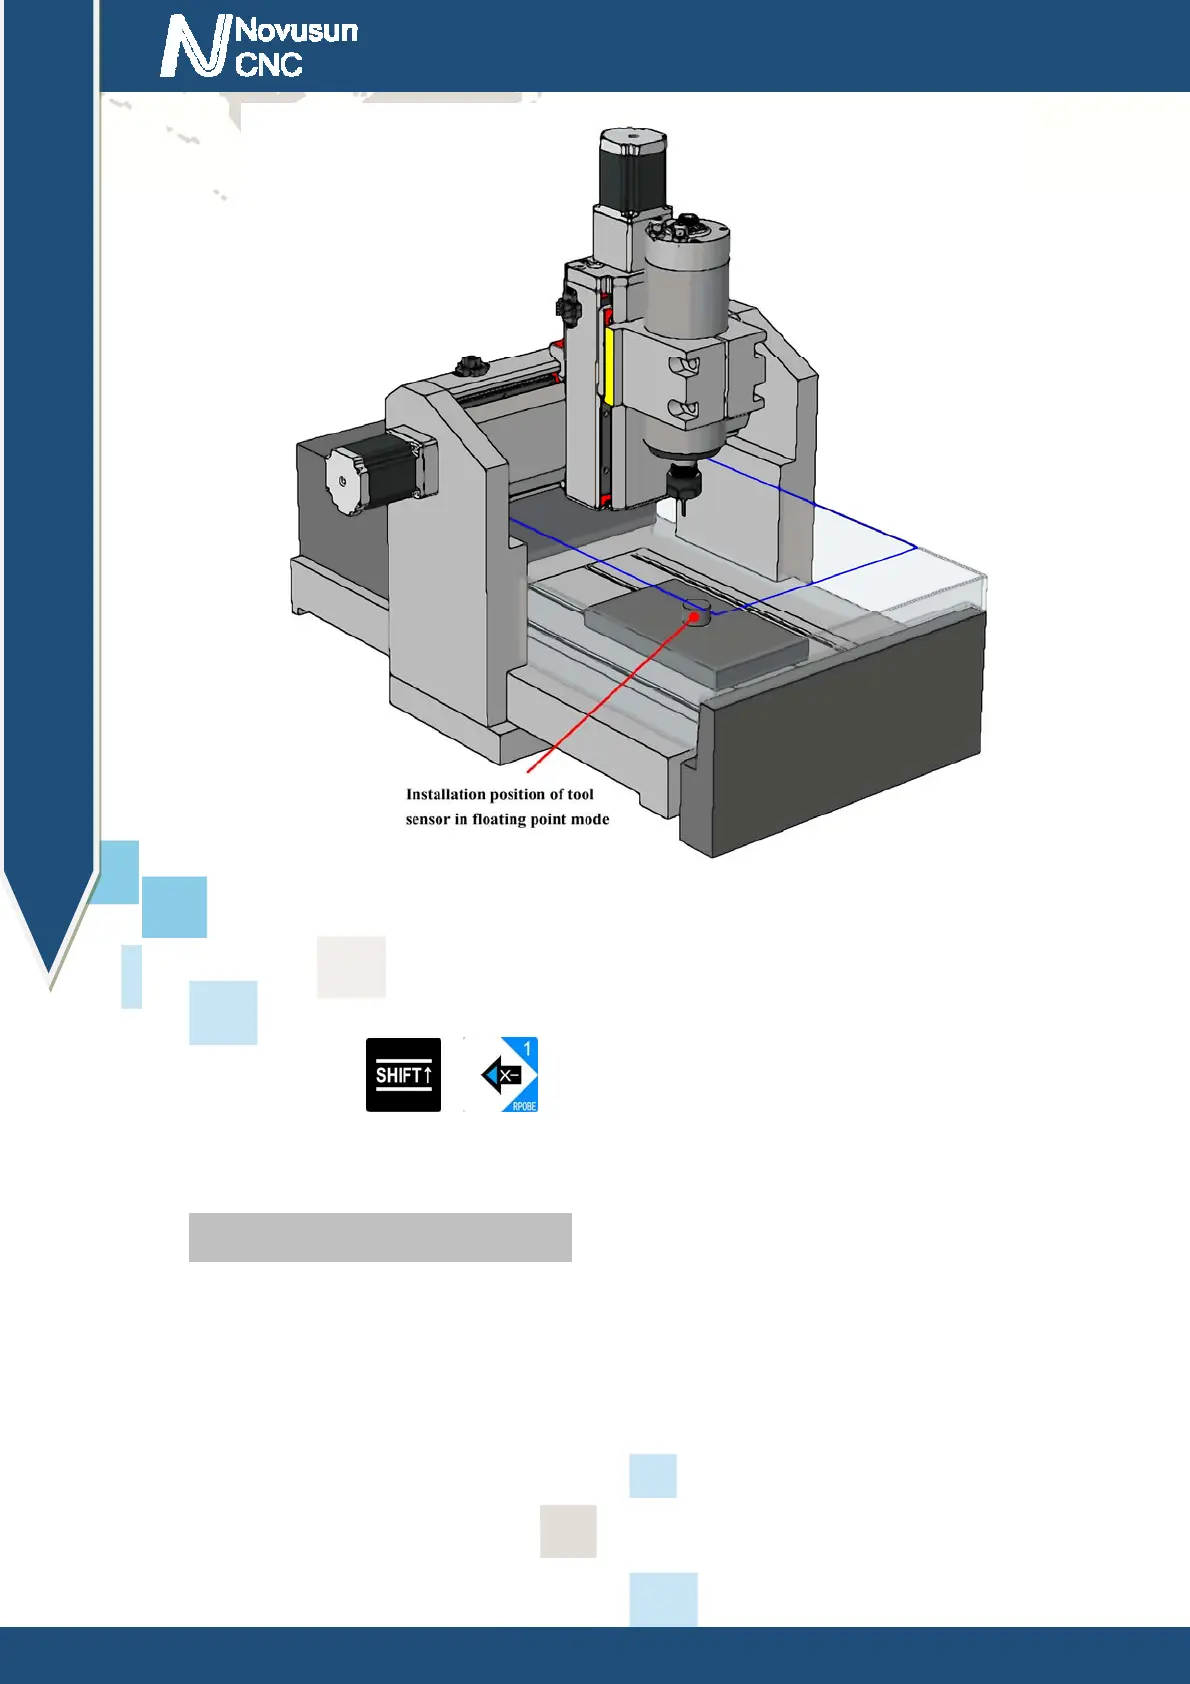
Figure4-8. Tool sensor installation position in floating-point probe mode
After completing the configuration we return to the main page, the tool sensor on the surface
of the workpiece, we only need to manually (MPG) move the spindle nose just above the tool
sensor, and then press + , the system will automatically start probe, after the
probe completion of the Z axis will be automatically lift off the tool sensor plane 10mm.
4.3 Workpiece zero point
After the probe is completed , the next step is confirm workpiece zero point, we want to
carve a product, first get the G code, to ensure the workpiece zero position of the G code file .
Some G code file set the workpiece center as the workpiece zero, some set a workpiece the
corner as the workpiece zero. Here is an example of a positive center on the surface of the
www.nvcnc.net

 Loading...