44
6 Operation of WPD Series
6 – 1 Mounting and Removing the Attachment
CAUTION
● Be sure to slide the Safety Lock on the Hand Switch of the Motor to the OFF position when mounting or removing the Attachment.
● Refer to the Operation Manual of the Motor.
● Remove the Cutting Accessory before mounting or removing the Attachment to prevent personal injury.
● After mounting the Attachment, make sure that it is correctly connected to the Motor.
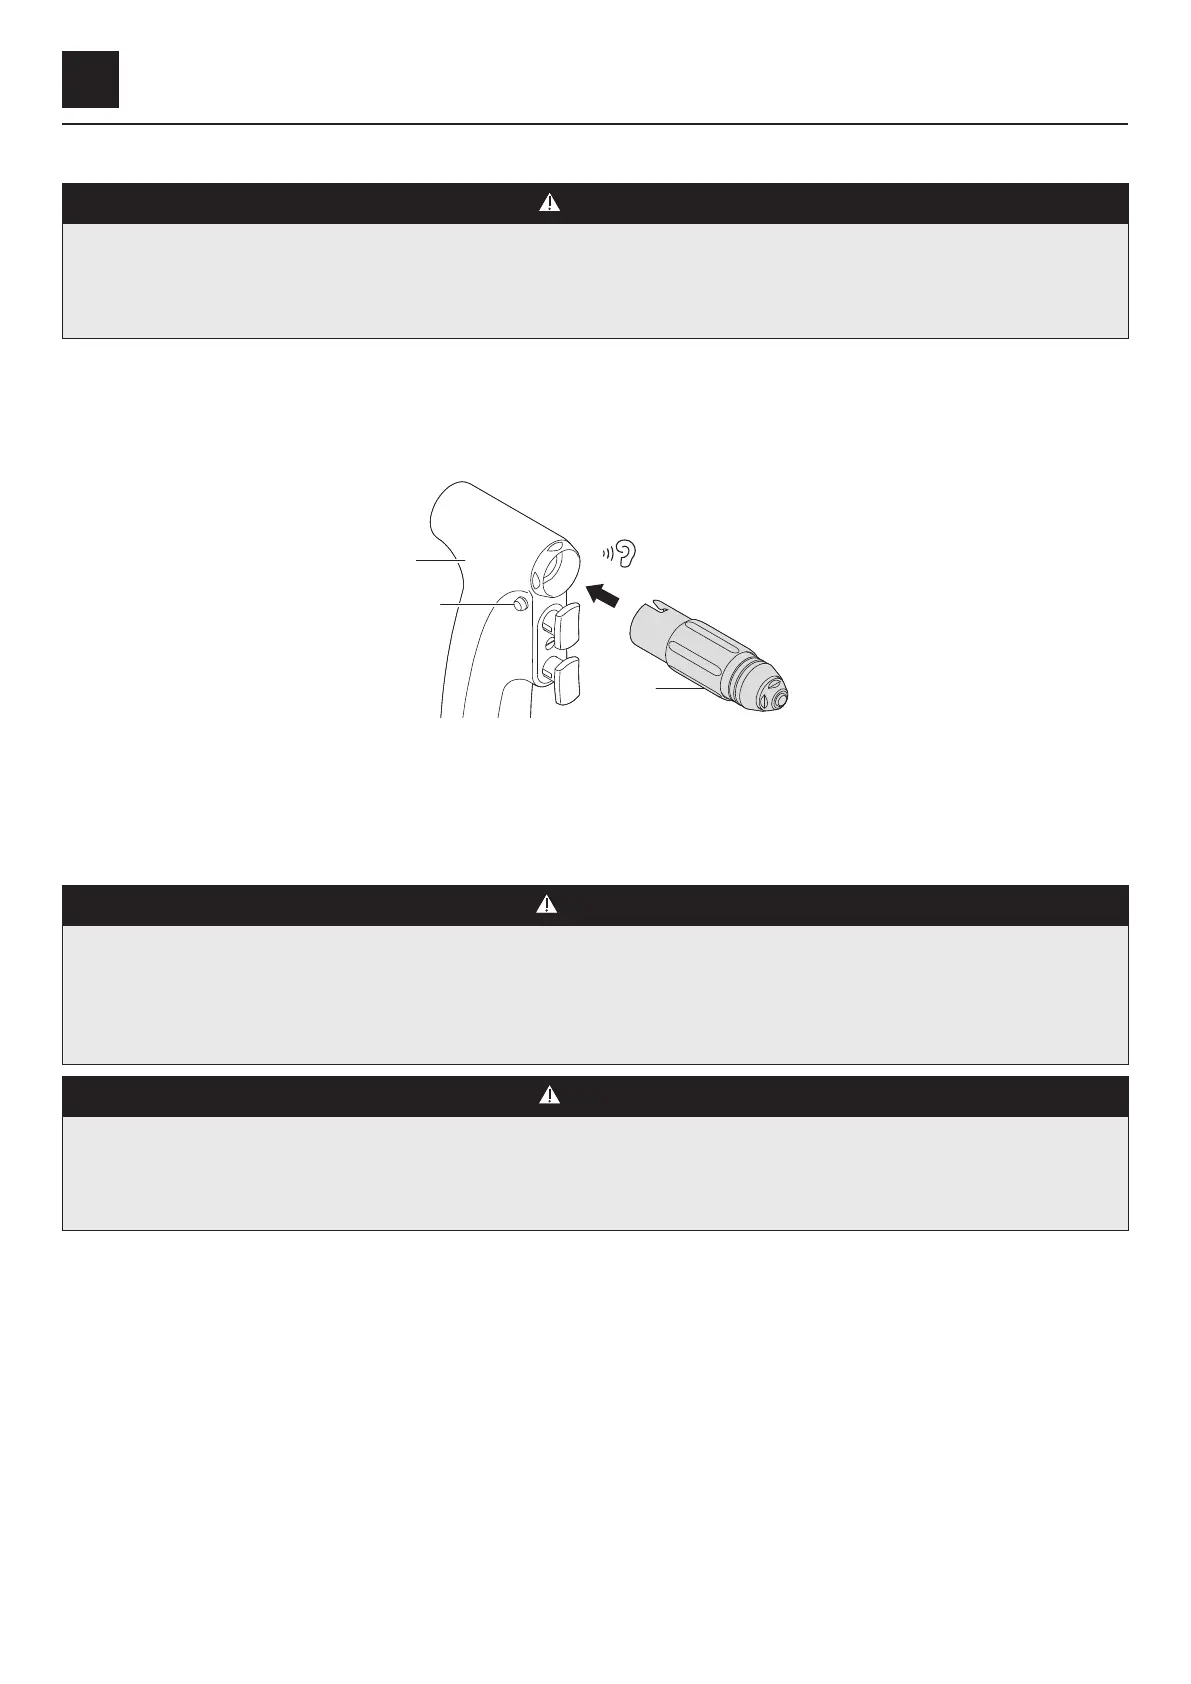
6 – 1 – 1 WPD Series Attachment
_ Mounting
Align the arrow marks of the Attachment Ⓐ and the Motor Ⓑ, then push the Attachment in until it clicks.
Ⓐ
Ⓒ
Ⓑ
_ Removing
Pull the Attachment Ⓐ straight out while pressing the Release Button of the Motor Ⓒ.
6 – 2 Mounting and Removing the Cutting Accessories (Optional)
WARNING
● Be sure to use the NSK recommended Cutting Accessory for each Attachment (see "3 – 3 Part Names and Specifications").
When using an unrecommended product, it cannot be firmly fixed. This may lead to the product coming off during the surgical
operation.
● DO NOT rotate the Attachment if the chuck of the Attachment is open. Doing so may cause thermal injury and/or damage to the
product due to heat generation of the Attachment.
CAUTION
● After mounting the Cutting Accessory and locking the chuck, pull it lightly to confirm that it is securely connected to the Attachment.
● Before use, confirm that the Cutting Accessory does not come off by operating the Attachment.
● DO NOT operate the Attachment when the Cutting Accessory is not mounted.
● Before mounting or removing the Cutting Accessory, be sure to stop the Attachment completely.