3. ENGINE
3-
1. Install hose pincher from LH side
2. Install hose pincher from RH side
2. Lift front of vehicle to extend suspension.
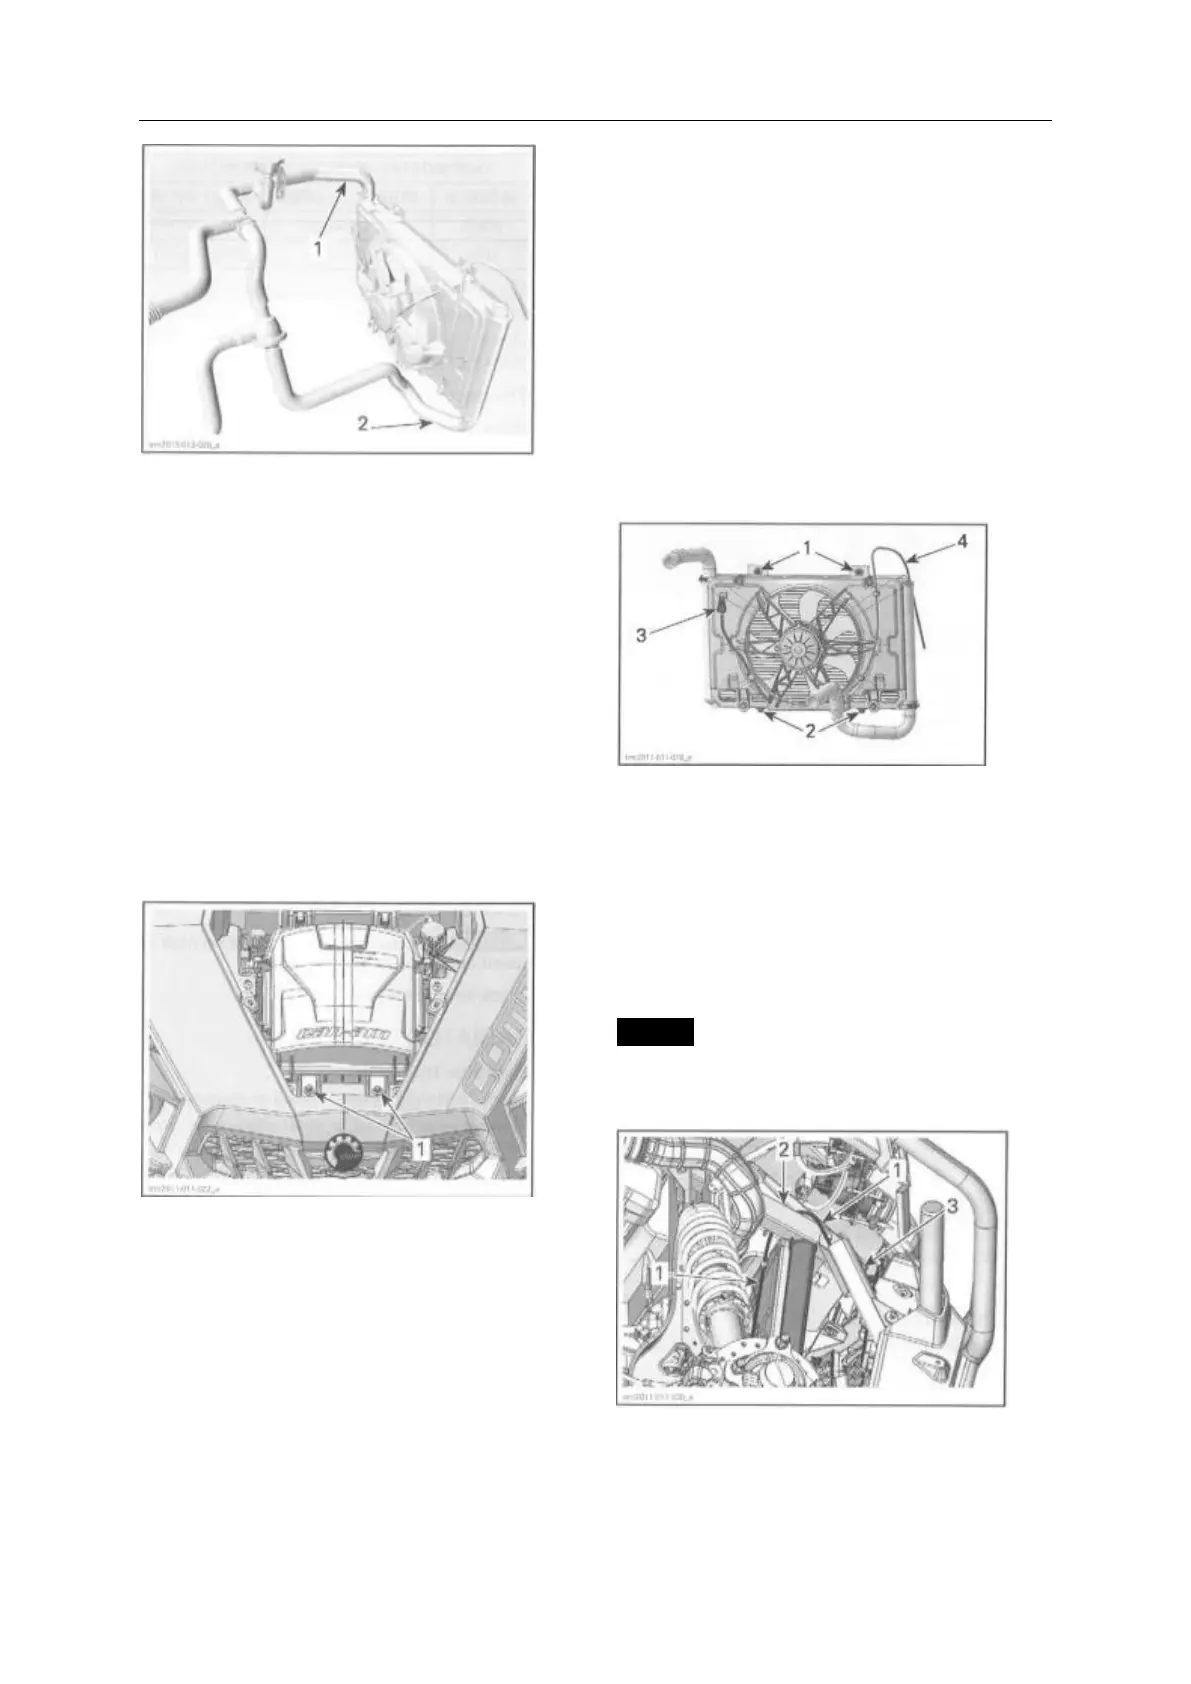
3. Remove the following parts from the radiator:
- Radiator inlet hose (LH upper)
- Radiator outlet hose (RH lower)
- Radiator mounting screws (2 at top of radiator).
4. Disconnect cooling fan electrical connector.
5. Remove cooling fan vent hose from frame.
6. Remove the2 forward air filter housing
mounting screws.
NOTE: This will make room for lifting the radiator
off its lower mounting bushings.
1. Forward air filter housing mounting screws to
remove
Model Equipped with a Winch
7. Remove the winch, refer to LIGHTS , GAUGE
AND ACCESSORIES subsection.
All Models
8. Lift radiator and tilt its lower end towards the
front of the vehicle.
NOTE :Turning steering to LH stop or removing
LH front wheel assembly provides greater access
for radiator removal.
9. Carefu1ly remove radiator through LH wheel
well.
Radiator Installation
1. For installation, reverse the removal procedure
however, pay attention to the following details.
2. install the rubber bushings between bottom of
radiator and radiator support.
3. Ensure the vent hose on the cooling fan motor
is properly routed as illustrated.
RADIATOR – REAR VIEW
1. Radiator mounting screws
2. Lower mounting bushings
3. Radiator fan electrical connector
4. Fan motor vent hose
NOTE: Cooling fan vent hose must pass over the
top RH frame member, then be inserted down into
the RH vertical bumper tube.
NOTICE If the vent hose on the cooling fan motor
is not properly routed, the fan motor may be
damaged due to improper venting.
1. Cooling fan vent hose
2. RH top frame member
3. RH vertical bumper tube