Chapter 4 47
Installation
6. Lift off the detector body and place it on a clean, lint-free lab tissue.
7. Take care not to dislodge the large aluminum washer (Part #288050) loosely
attached to either the bottom of the detector body or to the top of the detector
base. If this washer is damaged or worn, replace it with a new one.
8. If a new combustor is to be installed, ensure that the combustor support
corresponds with the combustor. If it does not, refer to Chapter 6, “Mainte-
nance,” for a description of how to replace the combustor sleeve (Part
#283093C), combustor support (Part #280461C for 2-mm I.D. combustor;
Part #280453C for 3-mm I.D. combustor), and the combustor support washer
(Part #288076).
Installing the GC Column Without Using the Column
Positioning Tool
The column must be reinstalled whenever the combustor support is changed or if
peak tailing, poor peak shape, or poor reproducibility are observed. To minimize
degradation of the column tip, do not operate the detector at temperatures that
exceed the recommended maximum temperature of the capillary column. For good
chromatographic performance by the PFPD, the end of the capillary column must
be square and extend 0.5 mm to 1.5 mm beyond the upper end of the combustor
support.
1. Refer to the appropriate GC injection manual for general instructions on how
to install a capillary column into the injector port.
2. Slide the GC column nut (Part #223057) onto the end of the capillary column.
Slide a Q/qy" ferrule that matches the outer diameter of the column onto the
end of the column, with the tapered end facing into the GC column nut (see
Figure 4.13).
3. With the ferrule and nut on the column, insert the column end into the detec-
tor base. Gently push the column up until it is just beyond the top of the
combustor support. Loosely fasten the nut into the end of the detector base.
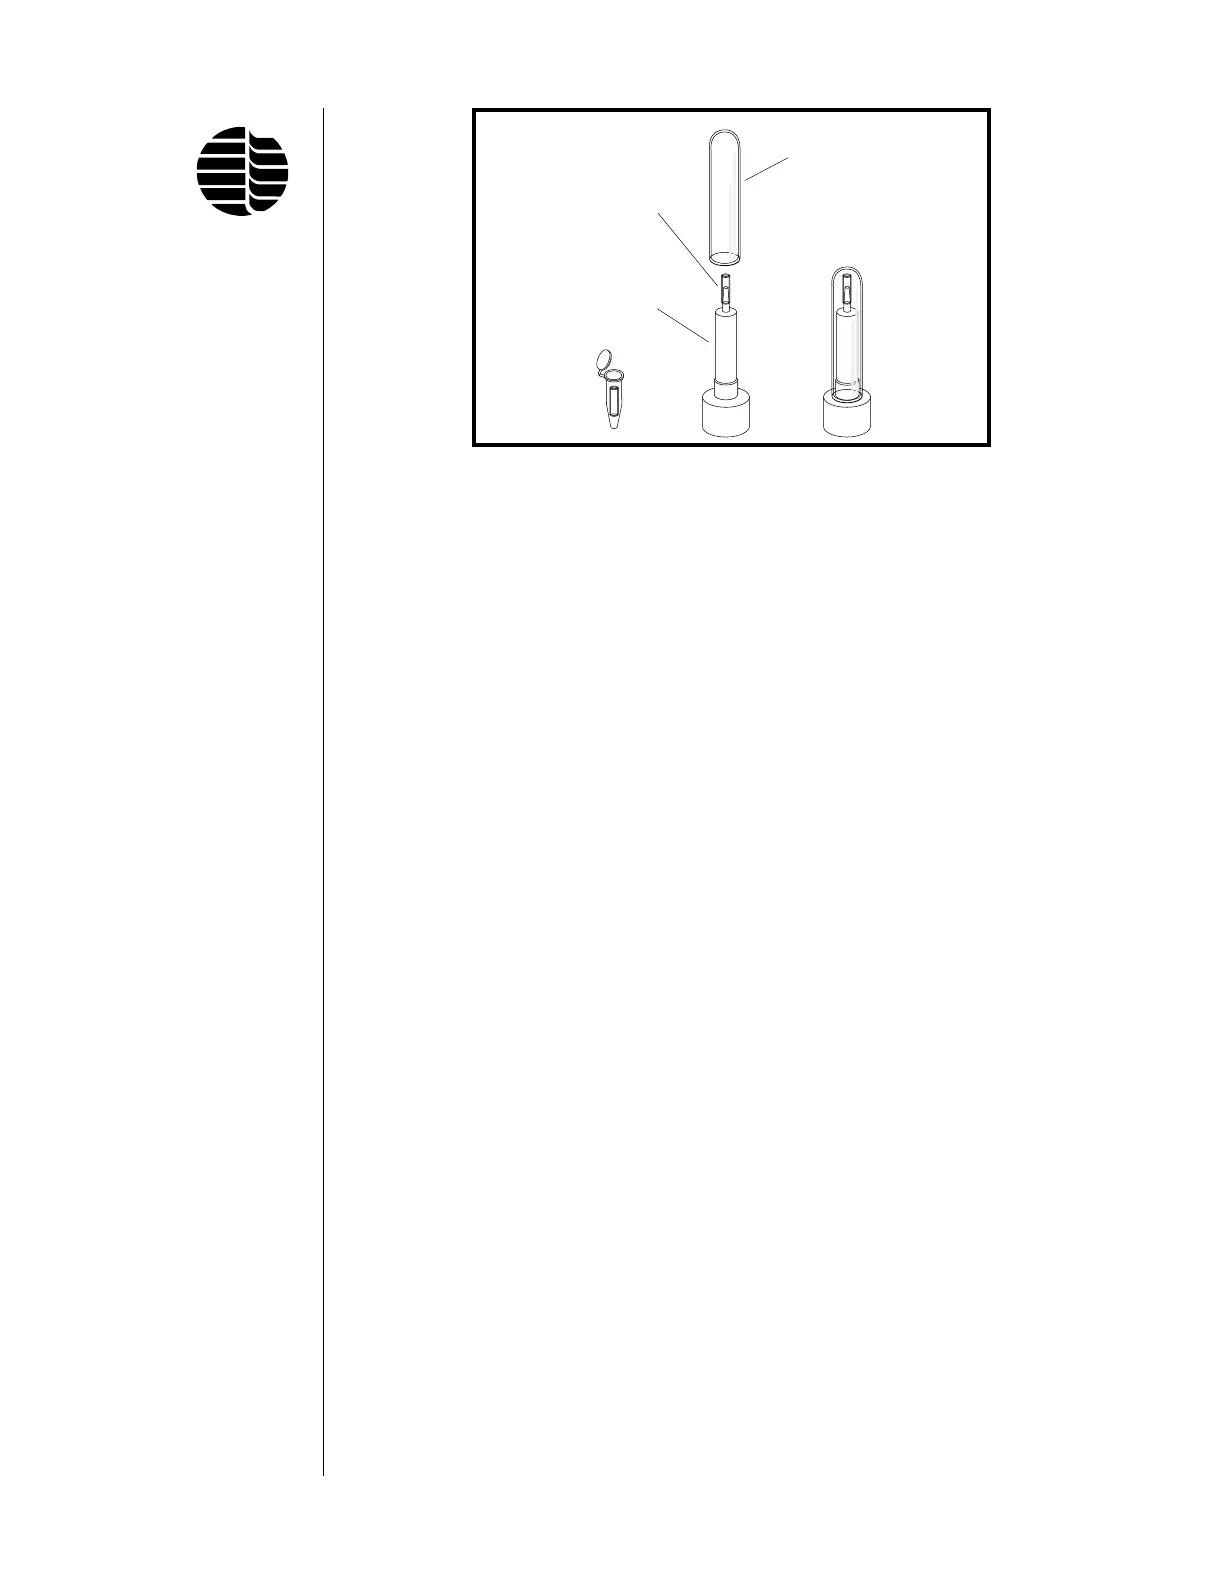
Figure 4.12. Extractor Tool
Protective Sheath
Combustor
Combustor
Extraction Tool
 Loading...