42615101TH Rev.8 77 /
Oki Data CONFIDENTIAL
2
1
2
1
A
A
B
Claws A
Claw A
Fig.1
Fig.2
Fig.3
Claw B
Claws C
Claws C
Claws B
Hole A
Hole A
Claw A
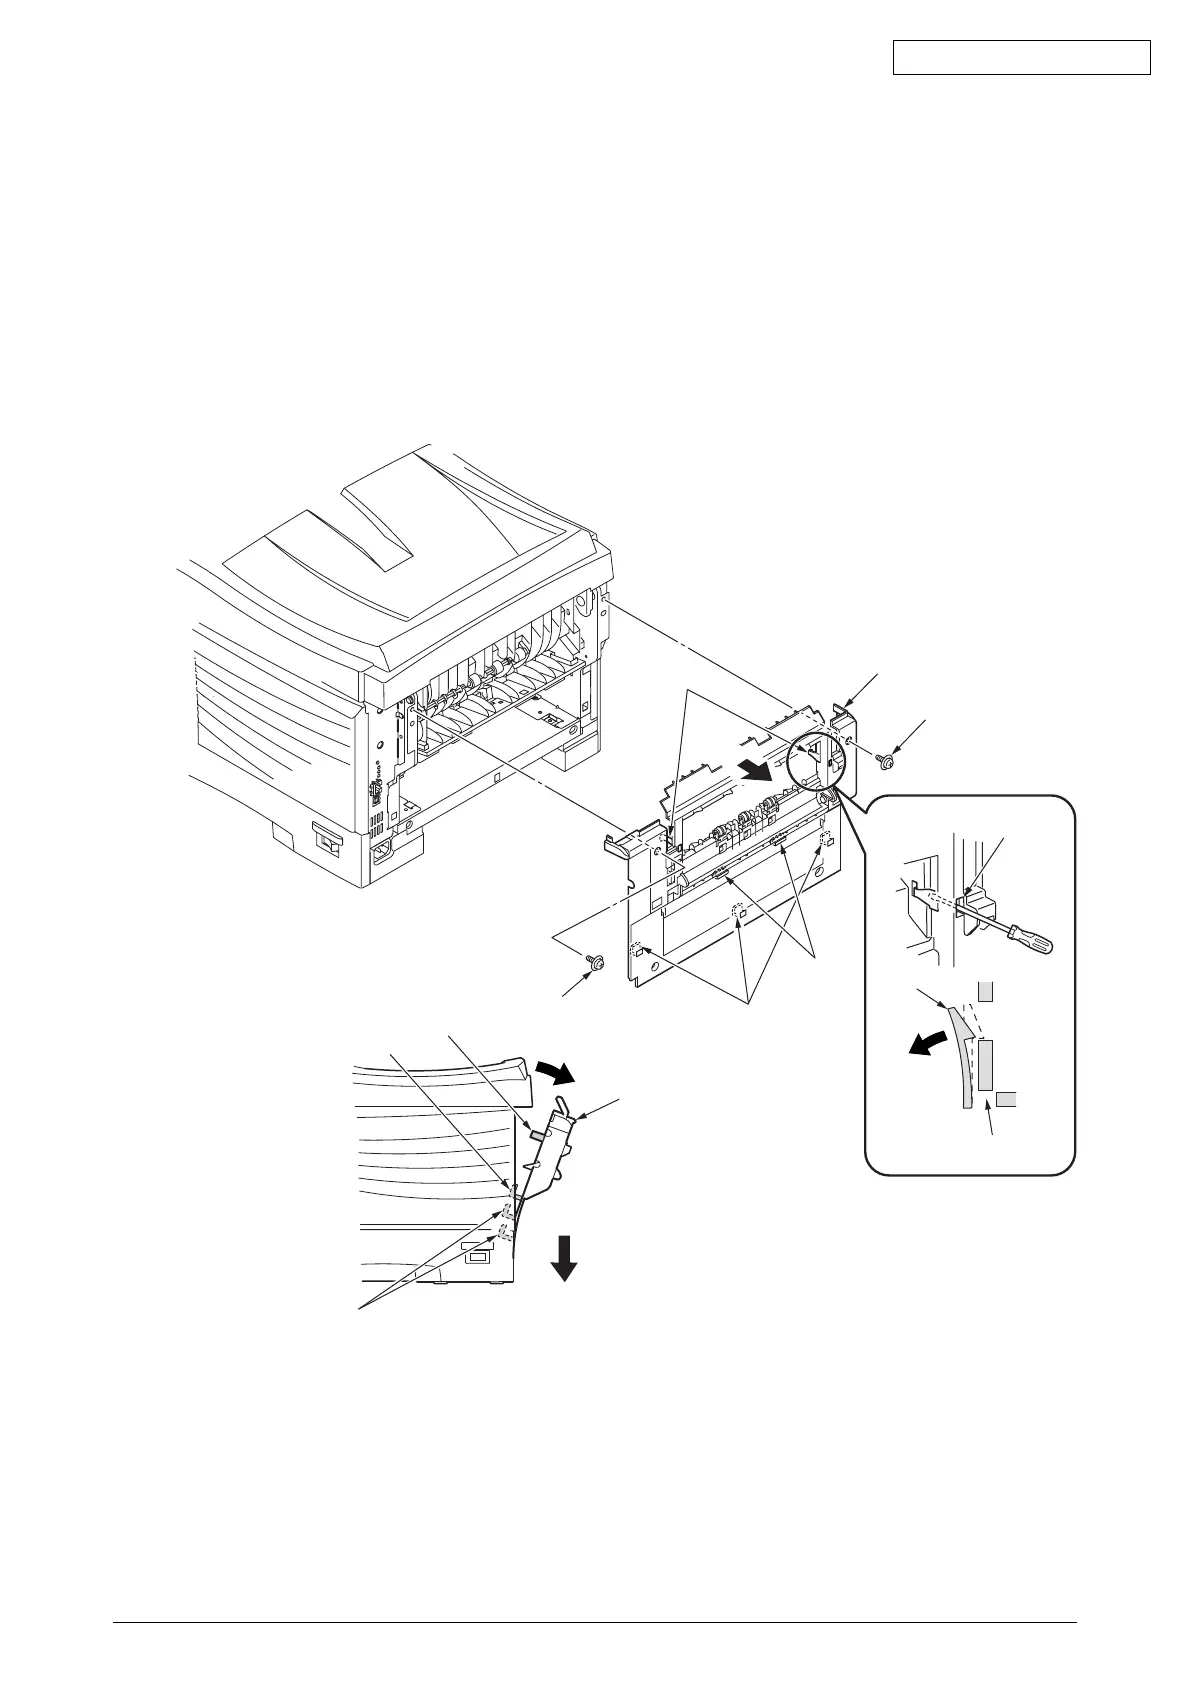
4.2.4 Rear Cover
(1) Slide out the face-up tray.
(2) Remove the two screws (golden) 1.(Tool No.1)
(3) As shown in Fig.2, insert a flat- blade driver (Tool No.3) into the hole A to disengage the claw A,
at each of the two places.
(4) Disengage the two claws B and pull in an arc the rear cover 2 in the direction of the allow A.
(5) As shown in Fig.3, push the lower part of the rear cover 2 in the direction of the allow B to
disengage the three claws C, then detach the rear-cover.
Figure 4-2-4 Rear Cover
 Loading...