42615101TH Rev.8 81 /
Oki Data CONFIDENTIAL
1
2
6
3
4
7
5
×
6
Claws A
C
4
M
Y
K
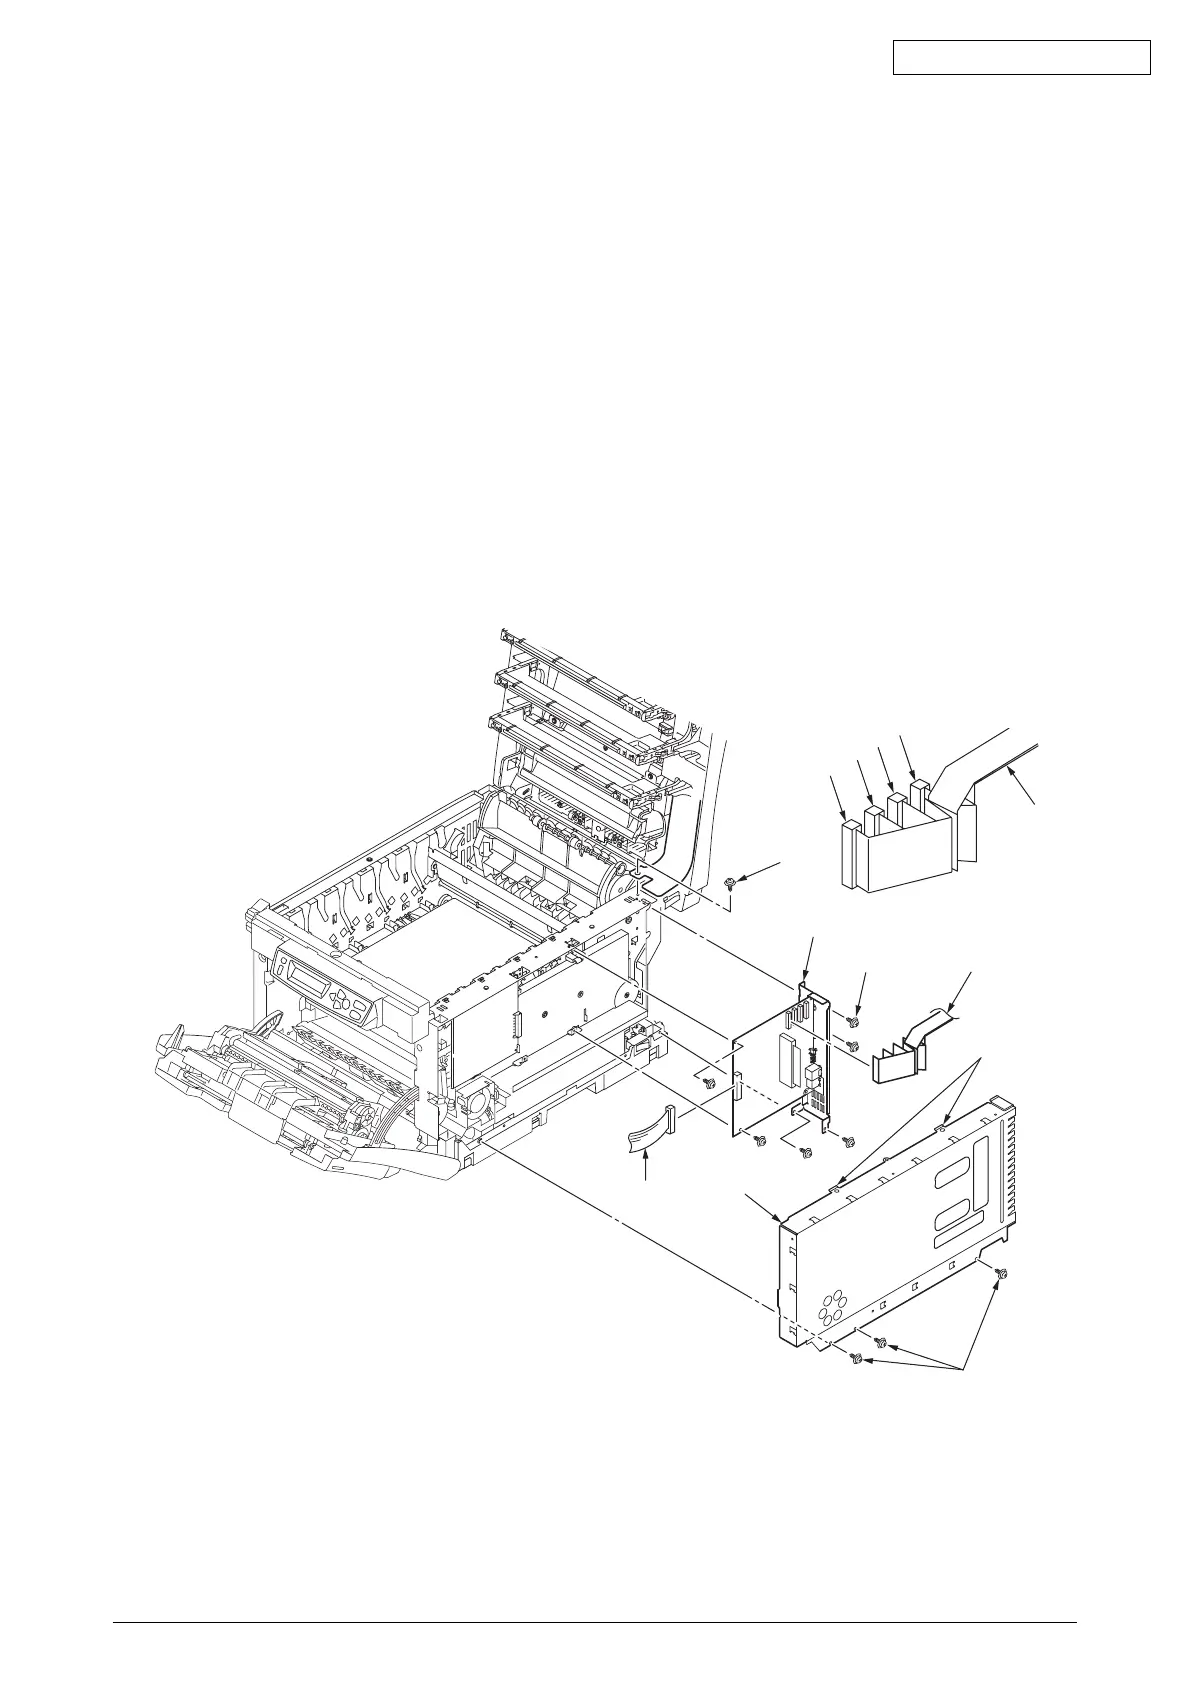
C5200/C5150/C3200n
(1) Open the top cover.
(2) Remove the right side cover (see section 4.2.2).
(3) Unscrew the three screws (golden) 1, disengage the claws A and remove
the plate-shield assy (GDI) 2.(Tool No.1)
(4) Remove the screw (golden) 3 and then the head cable 4.(Tool No.1)
(5) Remove the six screws (golden) 5 and the cable 6, then detach the controller PCB 7.
(Tool No.1)
C3100 :ARC-2 or SPY-2 PCB
C5200 :ARC-3 or SPY-3 PCB
C5150 :ARC-4 or SPY-4 PCB
C3200 :SPY-5 PCB
C3200n :SPY-6 PCB
Figure 4-2-6-3 Controller PCB (C5200/C5150/C3200n/C3200/C3100)
* After the controller PCBs of printers are replaced with new ones, the model names of the
printers must be programmed and PJL must be downloaded onto the new ones (controller PCBs
are programmed with the printer model name C5200 by default).
 Loading...