- 110 -
5. Maintenance
9
Remove the toner cover.
10
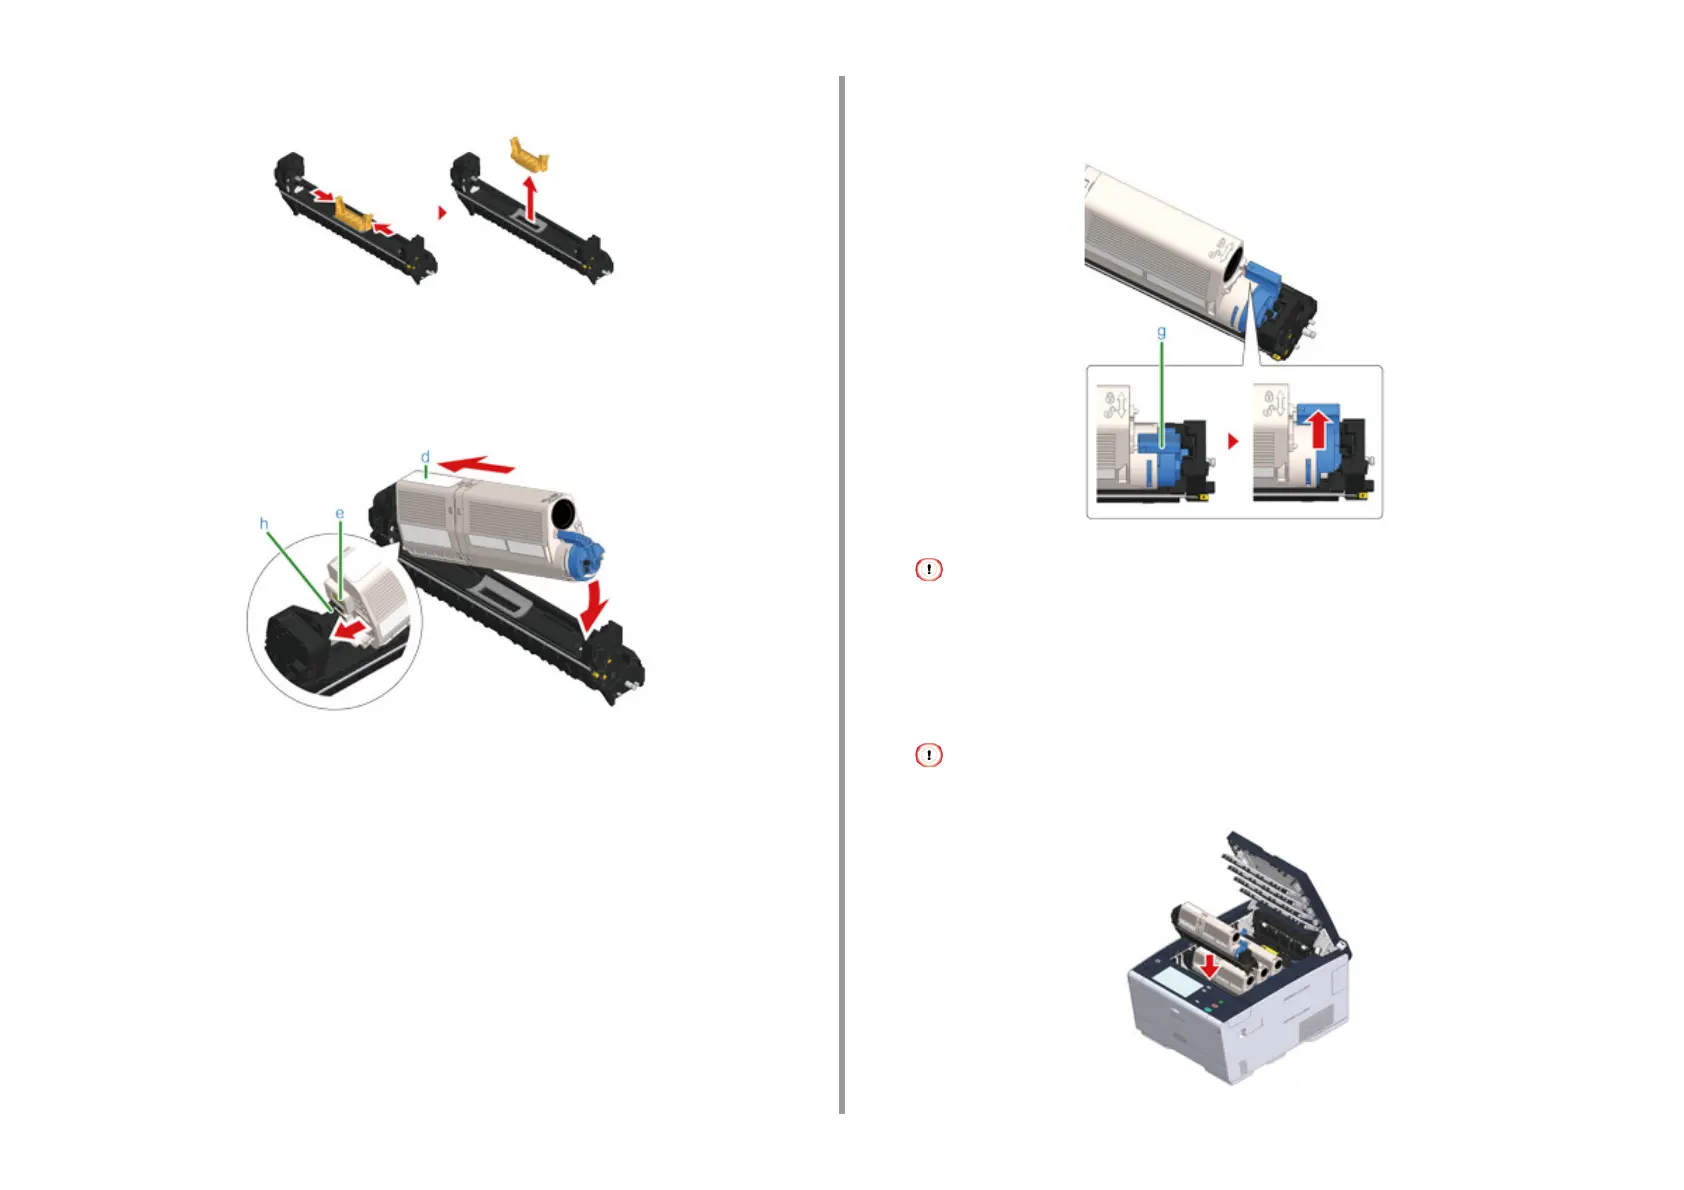
Insert the toner cartridge (d) removed in step 6 by aligning its left side
indentation (e) with the protrusion (h) on the image drum so that the toner
cartridge and image drum color label align. Then insert the right side gently
into place.
11
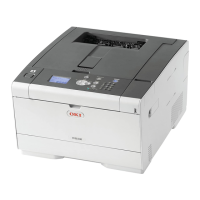
Hold the cartridge, pinch the tip of blue lever (g) of the toner cartridge, and turn
forward until the tip aligns on the lug of the cartridge.
If you close the output tray without turning the blue lever when installing the toner cartridge into the image drum,
it may cause a malfunction. Be sure to turn the blue lever until its top aligns on the lug in the back of the toner
cartridge.
12
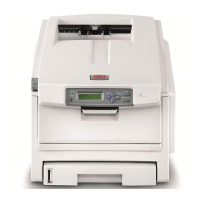
Check the label color of the new image drum and place the drum into the
machine.
While setting consumables, be careful not to hit them to the LED head.