Installing additional memory > 117
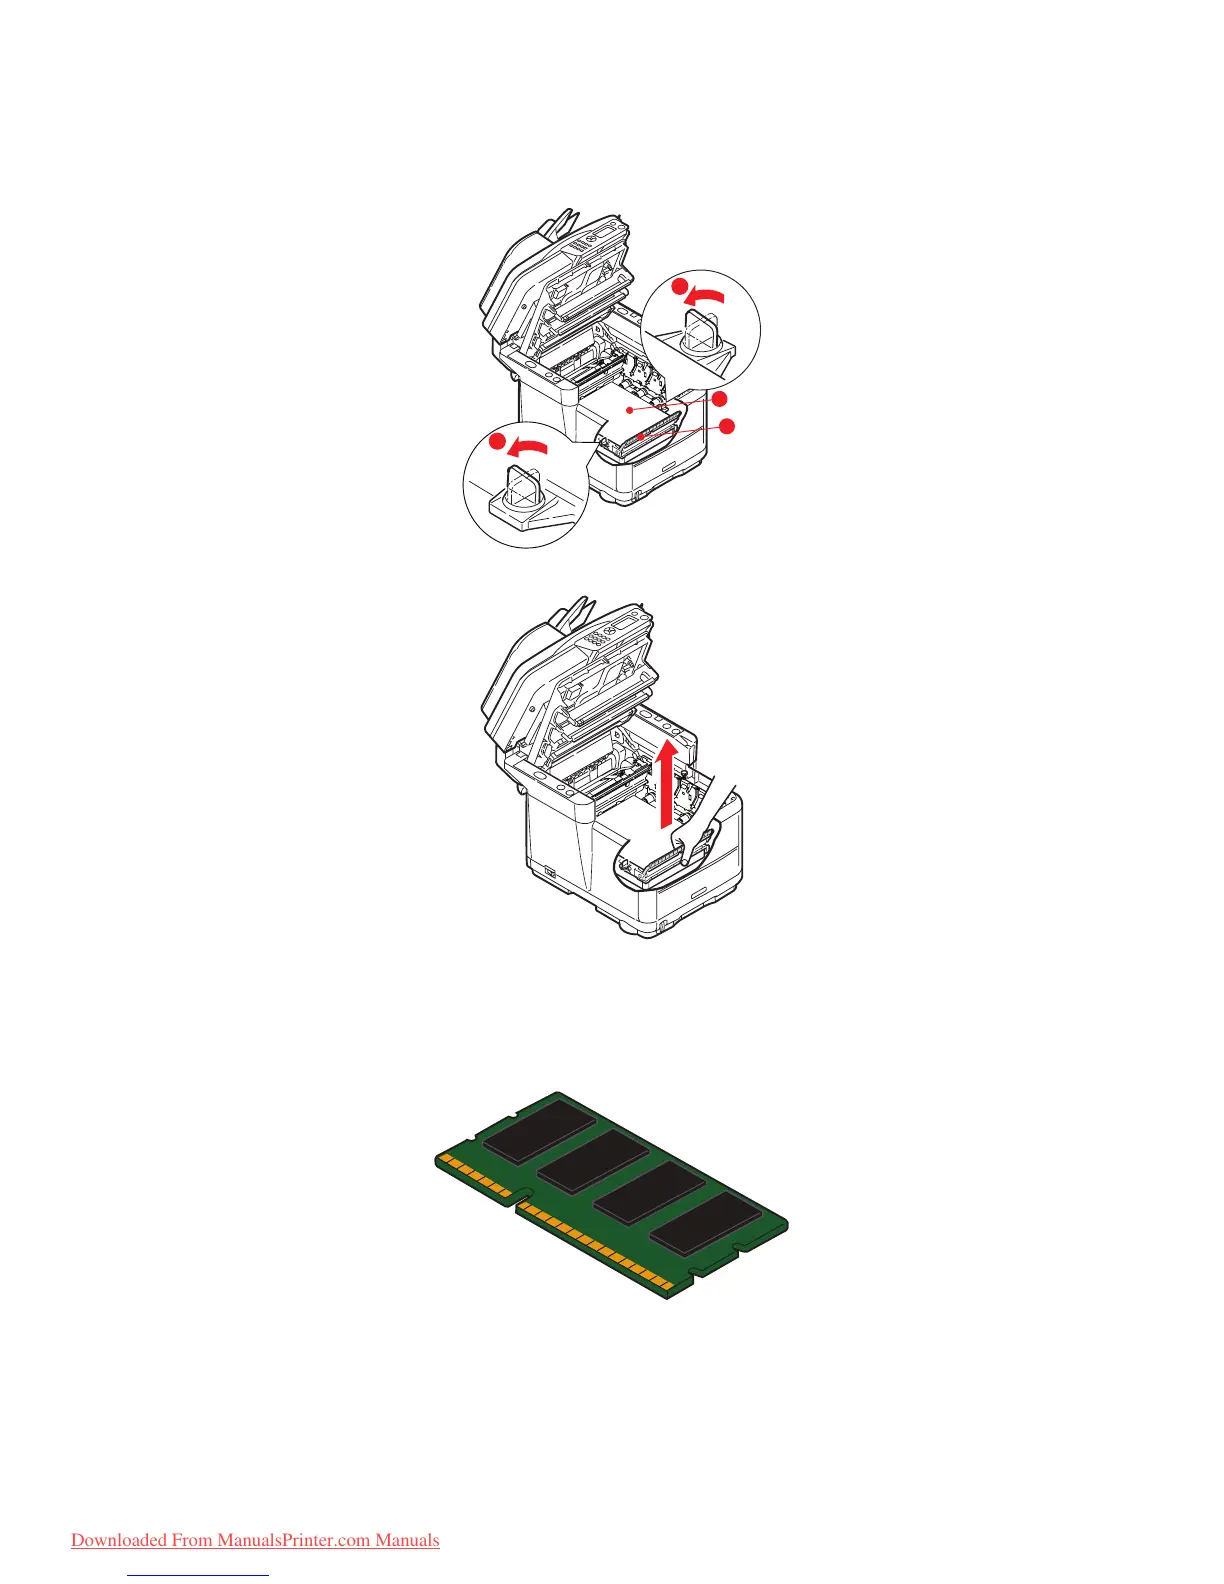
6. Locate the two fasteners (1) at each side of the belt (3) and the lifting bar (2) at the
front end. Turn the two fasteners (1) 90° to the left. This will release the belt from
the printer chassis.
7. Unlock the fasteners and remove the belt as shown.
8. Carefully remove the new memory board from its wrapping. Try to handle the board
only by its short edges, avoiding contact with any metal parts as far as possible. In
particular, avoid touching the edge connector.
Note that the memory board has a small cutout in the edge connector, which is closer
to one end than the other.
a
a
b
c
Downloaded From ManualsPrinter.com Manuals