24Service Guide: Fiery® ES IC-420
Replacing Parts
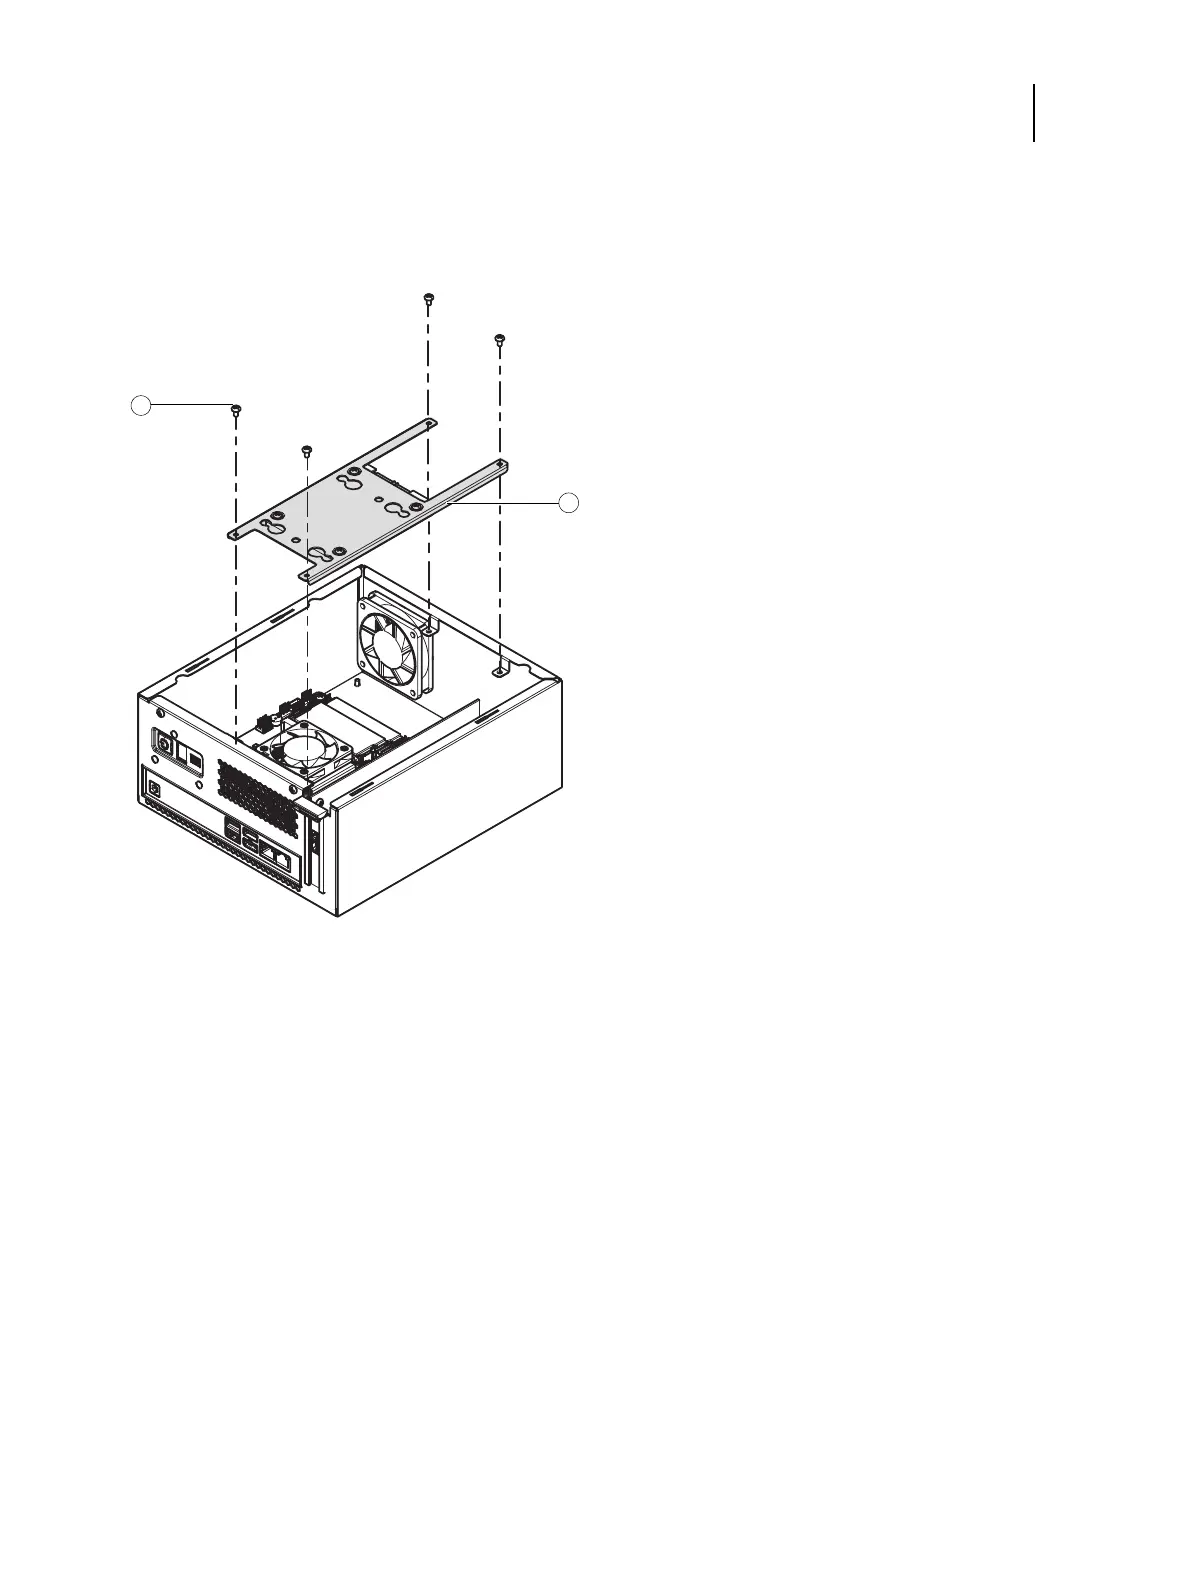
3 Remove the four screws that secure the HDD assembly to the chassis (see Figure 10).
Set aside the screws so that you can replace them later.
Figure 10: Removing the HDD assembly
4 Carefully lift the HDD assembly.
5 Remove the power cable from the HDD.
6 Remove the data cable from the HDD by pulling the connector (not the cable) straight out from the HDD.
Remove the HDD assembly from the chassis.
1 Screw (1 of 4)
2 HDD assembly