23
Startup
Switch-On/-O
. Switch-On/-O
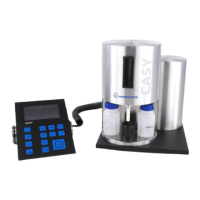
Fitted to the rear panel of the CASY Instrument is a green power switch (see Figure 5), which when
turned to ON, illuminates and indicates that the device is on. After being switched on, the CASY
System automatically performs all the required initialization procedures. Specically, the system
performs a complete self-test during which the hardware, pressure system and all memory mod-
ules (program, calibration, setups) are checked. The following screen appears when the system is
powered up:
CASY TT
Cell Counter + Analyser System
COMPLETE SYSTEM SELFTEST
Hardware : ---> ok
Pressure System: ---> ok
Memory : running
When the initialization procedure is complete, your CASY TT will display an empty size distribution
screen. The previously selected measuring capillary and previously used setup is loaded automati-
cally.
Before switching on your CASY Instrument, ensure that the control panel is connected and proper-
ly bolted to the measuring stand. Removing the plug from the control panel when the measuring
unit is switched to ON may result in damage to the graphic display electronics. OLS OMNI Life
Science GmbH & Co. KG accepts no liability for damage caused by severing a live connection
between the measuring unit and the control panel.
Before switching o the instrument it is recommended to check the background (see Monitoring
background below) to avoid the accumulation of impurities in the liquid system of the CASY In-
strument. After performing this background check, you can switch o the system using the green
power switch on the rear side (see Figure 5) of the unit. To make sure the instrument is completely
o, disconnect the power cable from the power inlet.
If the CASY System is not used for several weeks (>1 month), dry the liquid system as described in
the chapter Maintenance and Care.
 Loading...