Fig. 52
9-2 Detailed Assembly Procedures
3 Installing the Halogen Bulb
(Figs. 49 to 51)
} Use only the designated bulb 12V100WHAL-L (PHILIPS 7724).
If any other bulb is used, performance cannot be guaranteed.
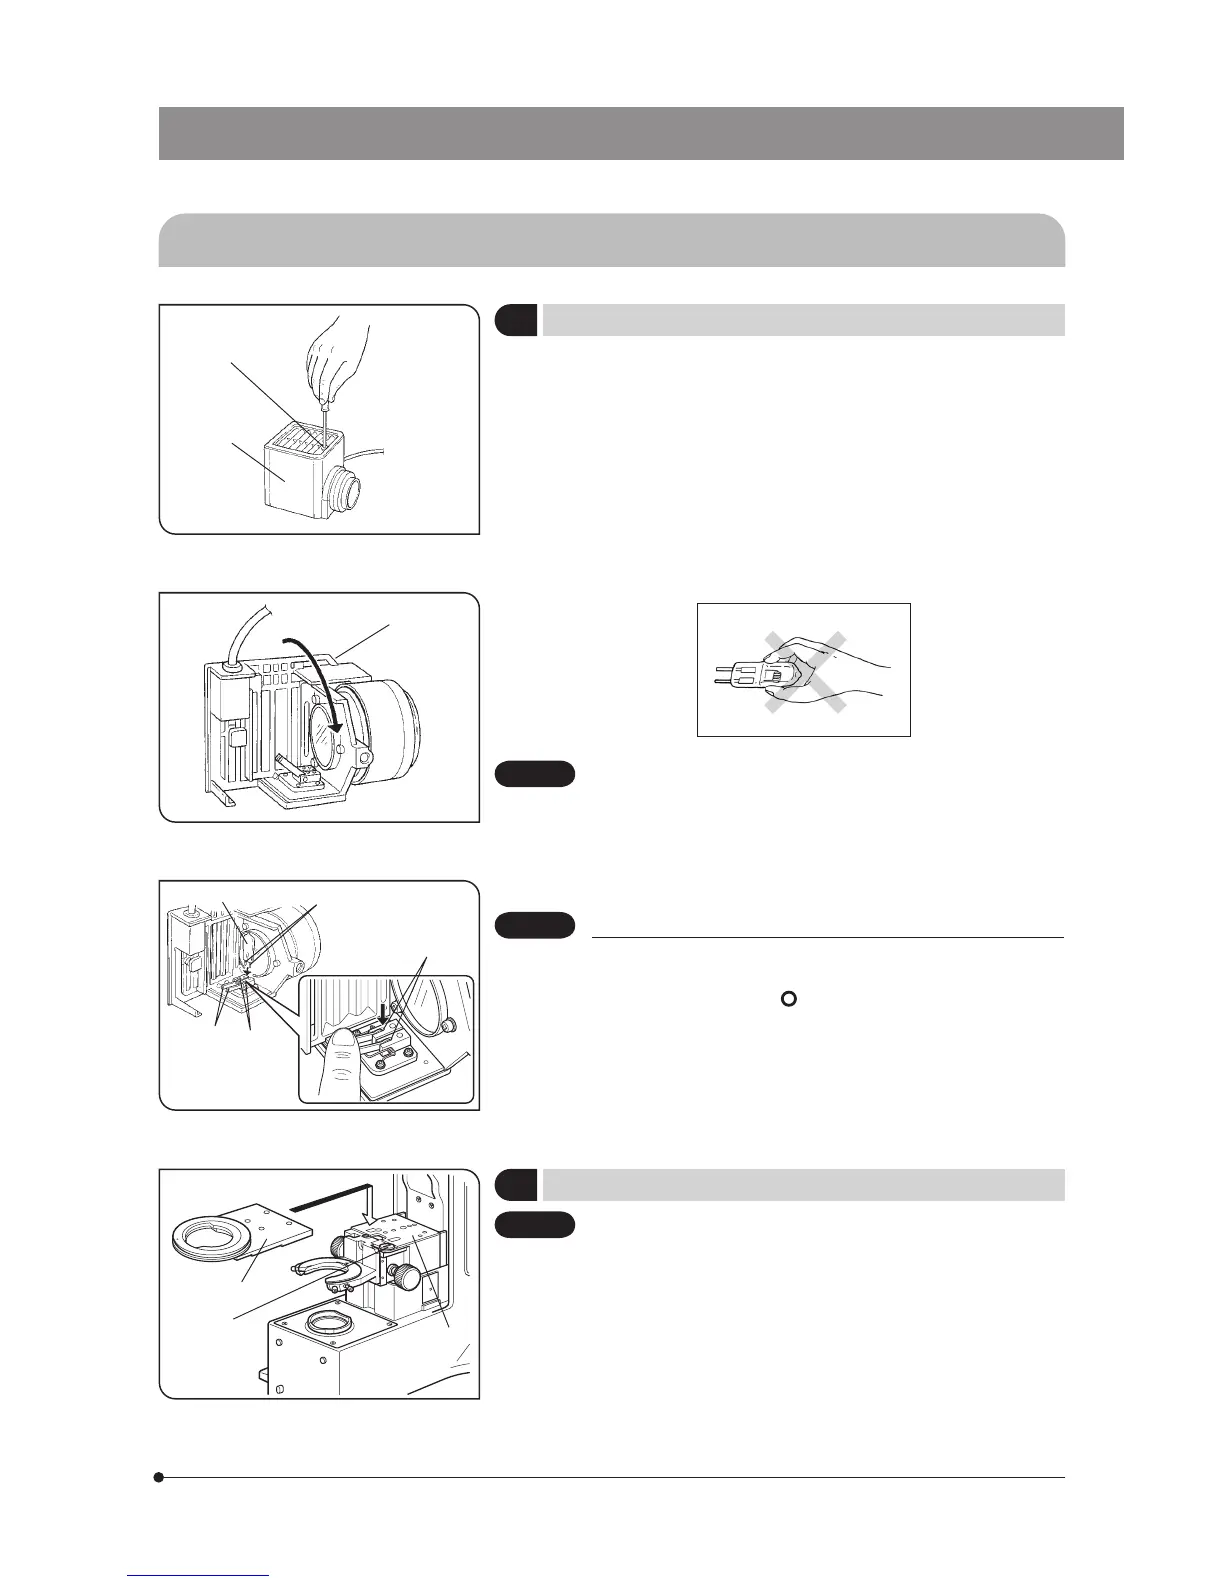
1. Fully loosen the lamp housing clamping screw @ on top of the lamp
housing cover with the provided Allen screwdriver.
2. Lift the lamp housing cover 2 upward to remove it.
3. Turn the lamp socket 3 by 90° in the direction indicated by the arrow.
4. Holding the bulb 5 with gloves or a piece of gauze, depress the bulb
clamping lever | and insert the bulb pins 6 fully into the sections † as
far as they will go.
Gently release the bulb clamping lever to the original position to secure
the bulb.
To prevent reduced bulb life or cracking, do not touch the bulb
with bare hands. If fingerprints are accidentally left on the bulb,
wipe the bulb with a soft cloth.
5. Slide the lamp housing cover onto the housing base from the above.
Tighten the clamping screw @ while pressing downward on the cover.
(Fig. 49)
Caution for Bulb Replacement During Use or Right After Use
The bulb, lamp housing and areas near these will be extremely
hot during and right after use.
Set the main switch to “
” (OFF), disconnect the power cord
from the wall outlet, then allow the old bulb and lamp housing to
cool before replacing the bulb with a new bulb of the designated
type.
CAUTION
CAUTION
Fig. 49
Fig. 50
Fig. 51
1
2
3
6
5
4
7
7
5 Attaching the Stage Adapter
(Fig. 52)
When using a dish plate for observing a dish sample, remove
the stopper screw @ of the stage adapter mount before the
following steps (see page 23 for details).
1. Place the stage adapter 2 on the stage adapter mount 3 by aligning
the pin on the back sides of the stage adapter with the pin hole on the
stage adapter mount.
2. Attach and tighten the four screws provided with the adapter using the
Allen wrench provided with the microscope frame.
CAUTION
3
2
1