Disassembly and Reassembly ProcedureCLV-180
4-10
ISSUE1
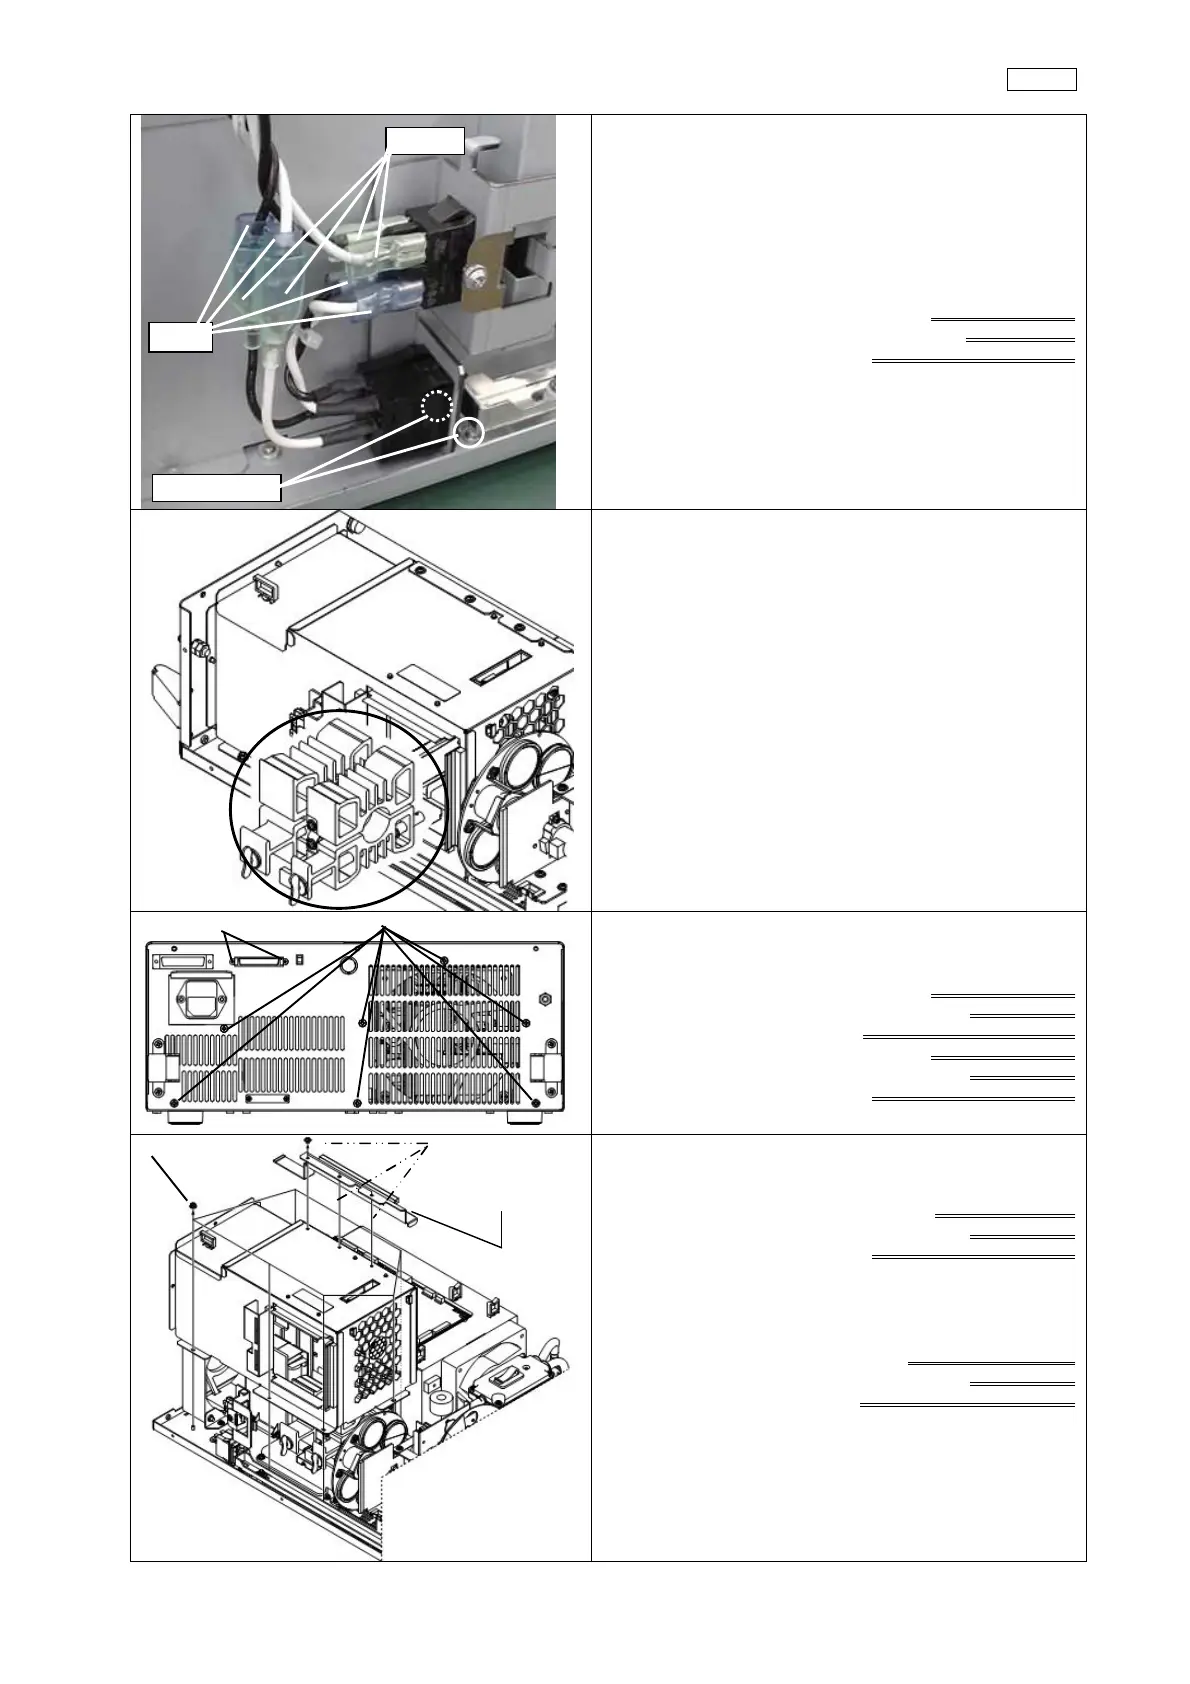
(2) Take off only junction part of FASTEN TERNMINAL
(3) Take off 2 SCREWS (CCUK3x4SZx2) and NSW
BRACKET U
Phillips bit (No.2)
Torque driver
Tightening torque 0.6 Nm
(4) Take off HEAT SINK U
→Go to 3-2-2
CBK2.5x6SA HCBK3x6SA
(5) Take off 9 SCREWS (HCBK3x6SA:7, CBK2.5x6SA:2)
and REAR PANEL U
→Go to 3-2-3
Phillips bit (No.1)
Torque driver
Tightening torque 0.33 Nm
Phillips bit (No.2)
Torque driver
Tightening torque 0.6 Nm
(6) Take off 3 SCREWS (CCUK3X4SZ) and SHIELD
PLATE
Philips bit (No.2)
Torque driver
Tightening torque 0.6 Nm
(7) Take off 6 NUTS (C6N3SZ) and SHIELD CASE 260 U
→Go to 3-2-4
Box bit(Size 5.5 mm)
Torque driver
(Tightening torque:0.6 Nm)
CCUK3x4SZ
Green
Blue
HEAT SINK U
REAR PANEL U
CCUK3X4SZ
SHIELD PLATE
C6N3SZ