Disassembly and Reassembly ProcedureCLV-180
4-11
ISSUE1
CUKSK3x6SZ CUKSK4x6SZ
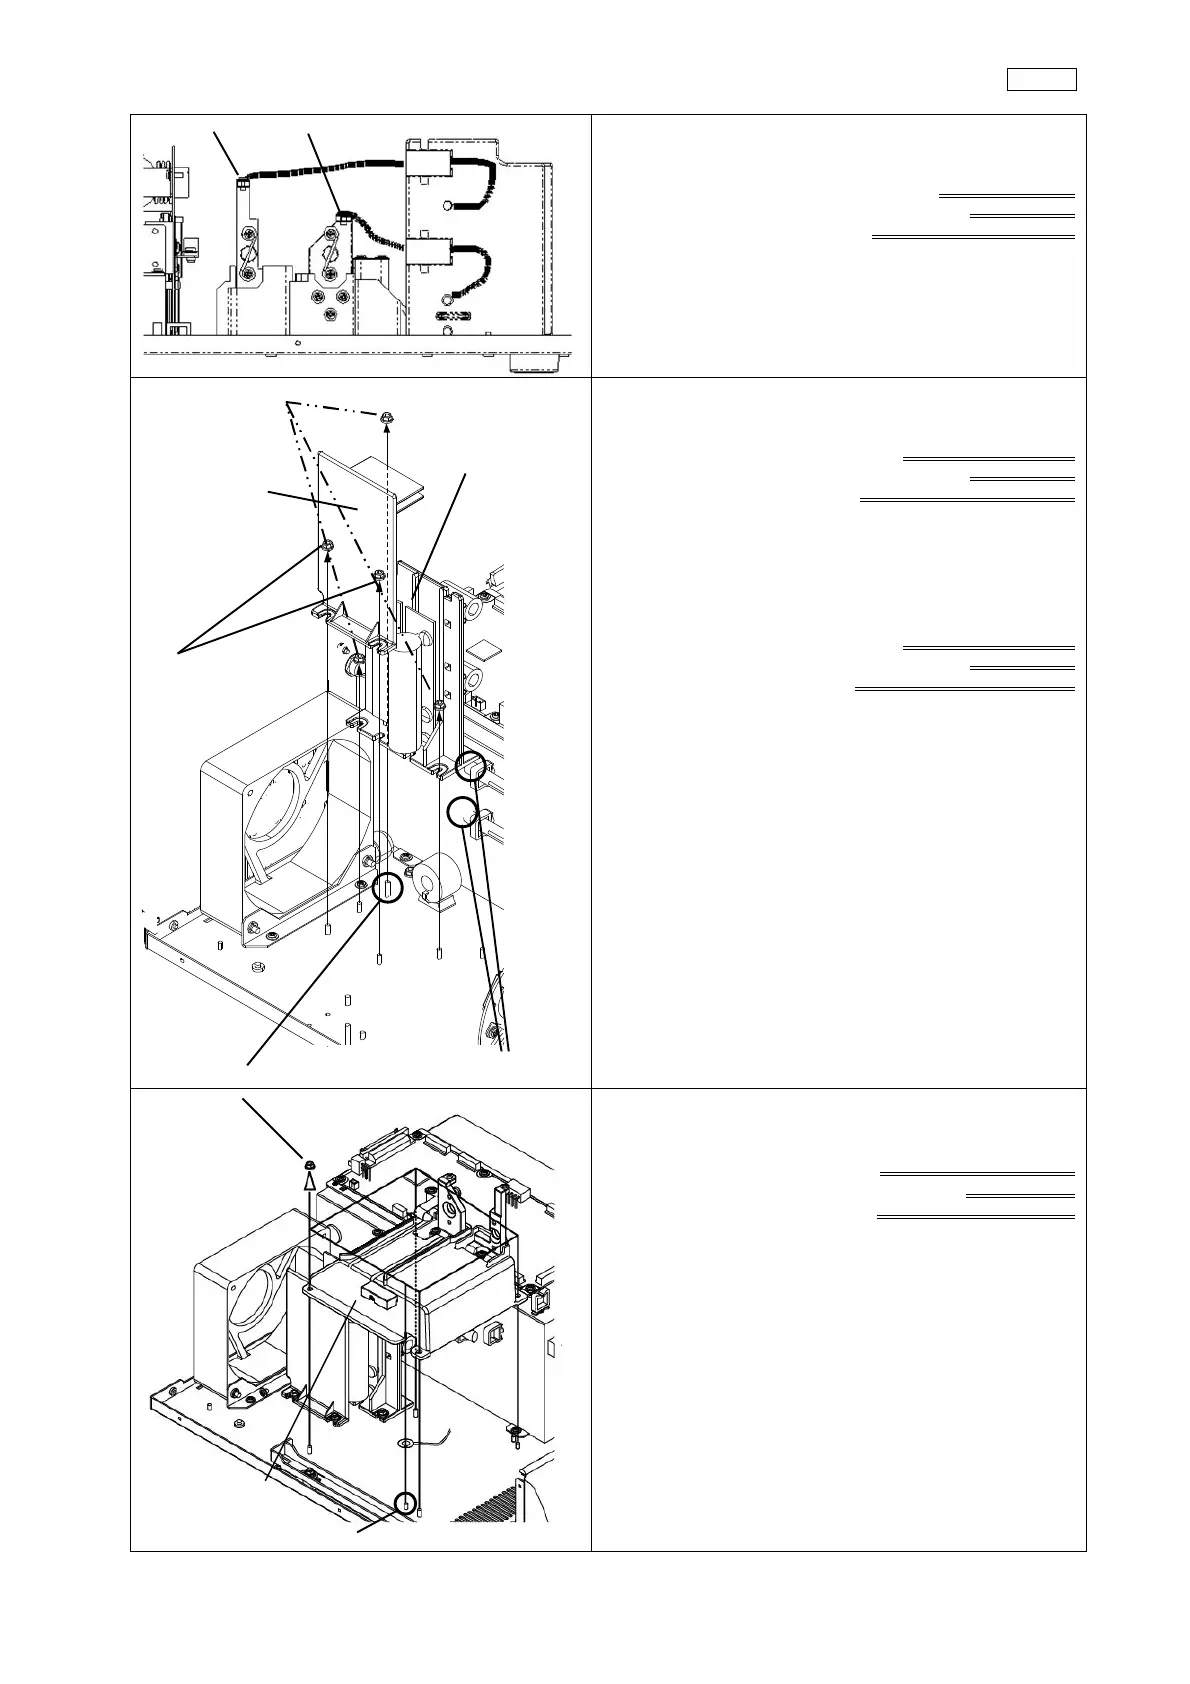
(8) Take off 2 SCREWS (CUKSK3x6SZ, CUK¥SK4x6SZ) ,
and adjust HARNESS which is connected with LAMP
BASE U
Phillips bit (No.2)
Torque driver
Tightening torque 0.6 Nm
Connected with HARNESS Take off HARNESS
(9) Take off 2 NUTS (C6N3SZ) and IGNITER COVER
Box bit (Size 5.5 mm)
Torque driver
(Tightening torque:0.6 Nm)
(10) Take off 3 NUTS (C6N3SZ) and IGNITER U
*At same time, take off HARNESS from POWER
SUPPLY
→Go to 3-2-6
Box bit (Size 5.5 mm)
Torque driver
(Tightening torque:0.6 N m)
C6N3SZ
Connected with HARNESS
(11) Take off 5 NUTS (C6N3SZ) and LAMP BASE U
*One of NUTS is connected with HARNESS
→Go to 3-2-5
BOX bit(size 5.5 mm)
Torque driver
Tightening torque0.6 Nm
(10) C6N3SZ
(9) C6N3SZ
LAMP BASE U
IGNITER
COVER
IGNITER U