Disassembly and Reassembly ProcedureCLV-180
4-12
ISSUE1
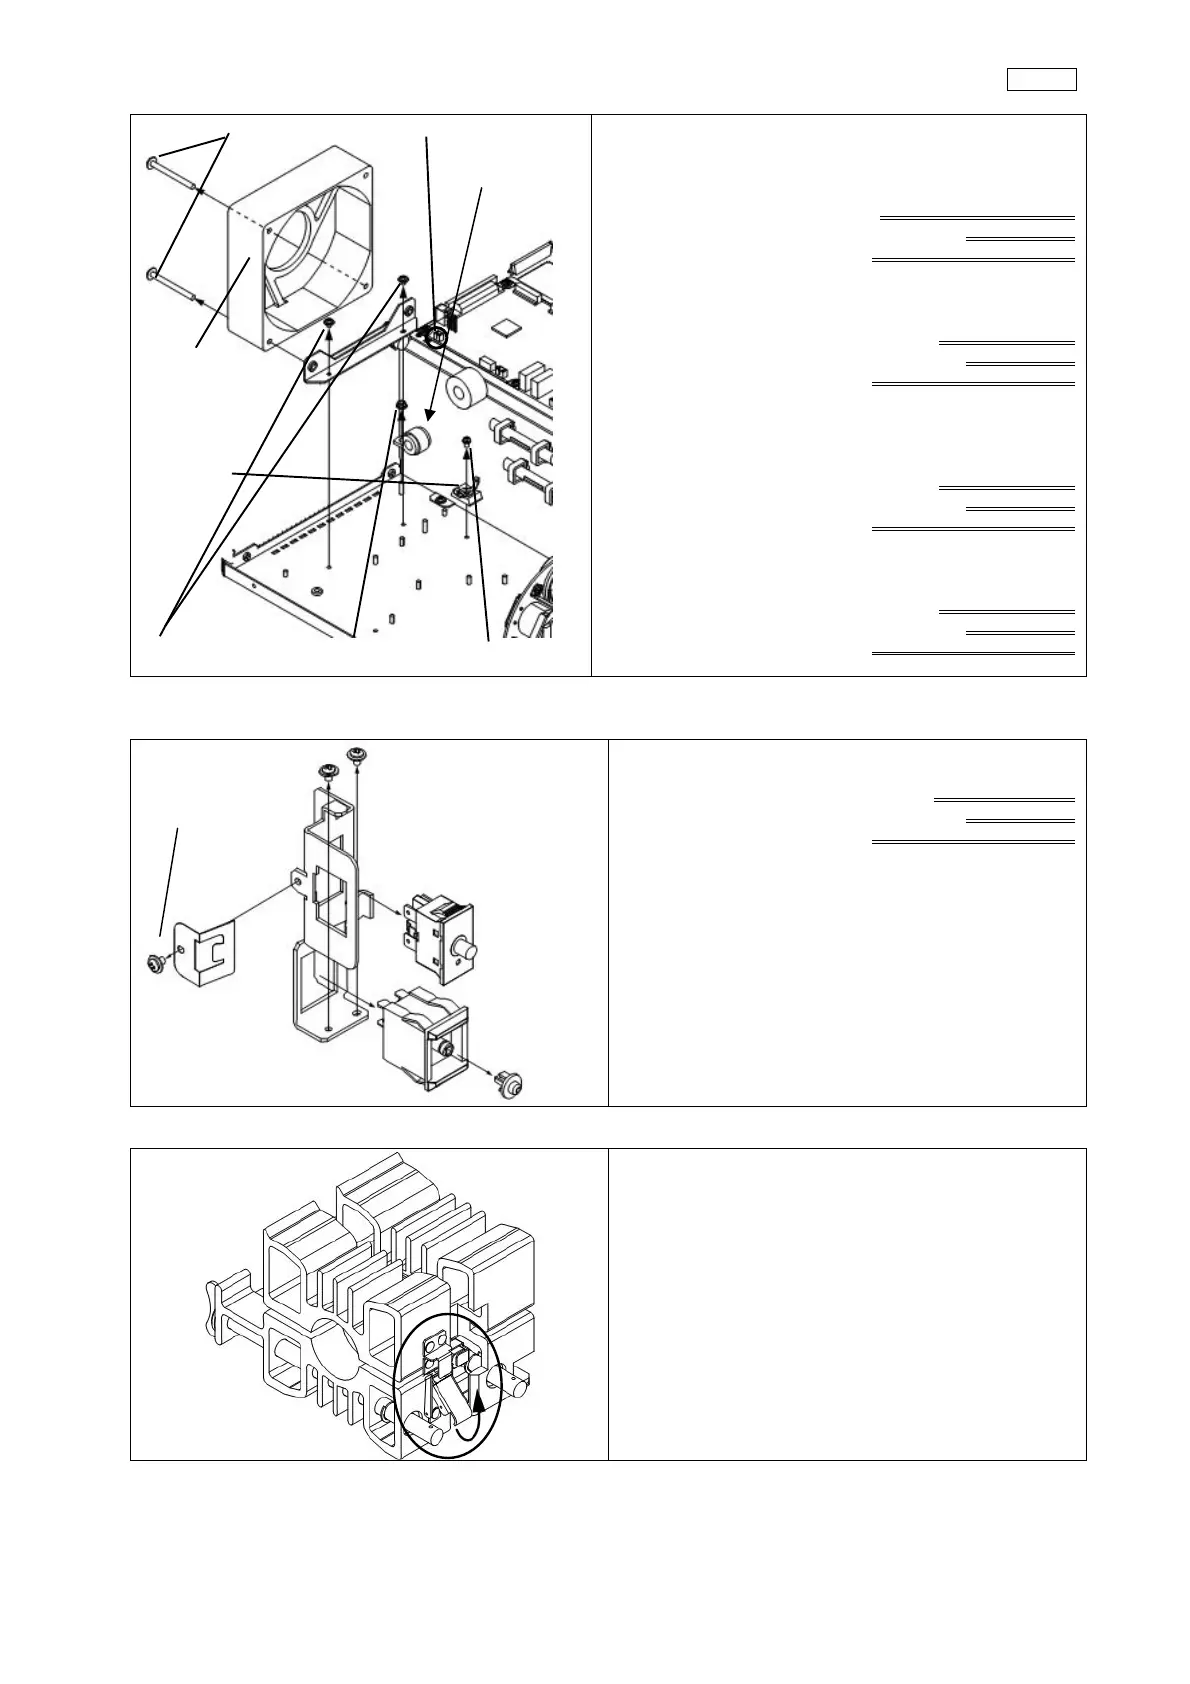
(15)CCUK4x45SZTake off CONNECTOR
(14)CCUK3x4SZ (13)C6N3SZ (16)CUKSK3x6SZ
(12) Take off FAN CABLE from J14 of MAIN BOARD
(13) Take off 1 NUTS (C6N3SZ) and FERRITE CORE
BOX bit(size 5.5 mm)
Torque driver
Tightening torque 0.6 Nm
(14) Take off 2 SCREWS (CCUK3x4SZ) and FAN ECO U
Phillips bit (No.2)
Torque driver
Tightening torque 0.6 Nm
(15) Take off 2 SCREWS (CCUK4x45SZ) and FAN BK
ECO
Phillips bit (No.2)
Torque driver
Tightening torque 1.4 Nm
(16) Take CORE out and take off SCREW (CUKSK3x6SZ)
and CORE STAND
Phillips bit (No.2)
Torque driver
Tightening torque 0.6 Nm
3-2-1 NSW bracket
(1) Take off 1 SCREW (CCUK3x4SZ) and SW PLATE
SPRING
Phillips bit( No.2 )
Torque driver
Tightening torque 0.6 Nm
(2) Take off EXTENDING KNOB from MAIN SWITCH
(3) Take SWITCH (INTERLOCK SW)and MAIN SWITCH
from N SWITCH BK
*Take off by pushing the trap on each upper and
lower side
3-2-2 Heat sink eco U
(1) Unlock HEAT SINK F ECO U
FERRITE CORE
CCUK3x4SZ
INTERLOCK
SWITCH
MAIN SWITCH
EXTENDING
KNOB
CORE
STAND
FAN BK
ECO