Disassembly and Reassembly ProcedureCLV-180
4-28
ISSUE1
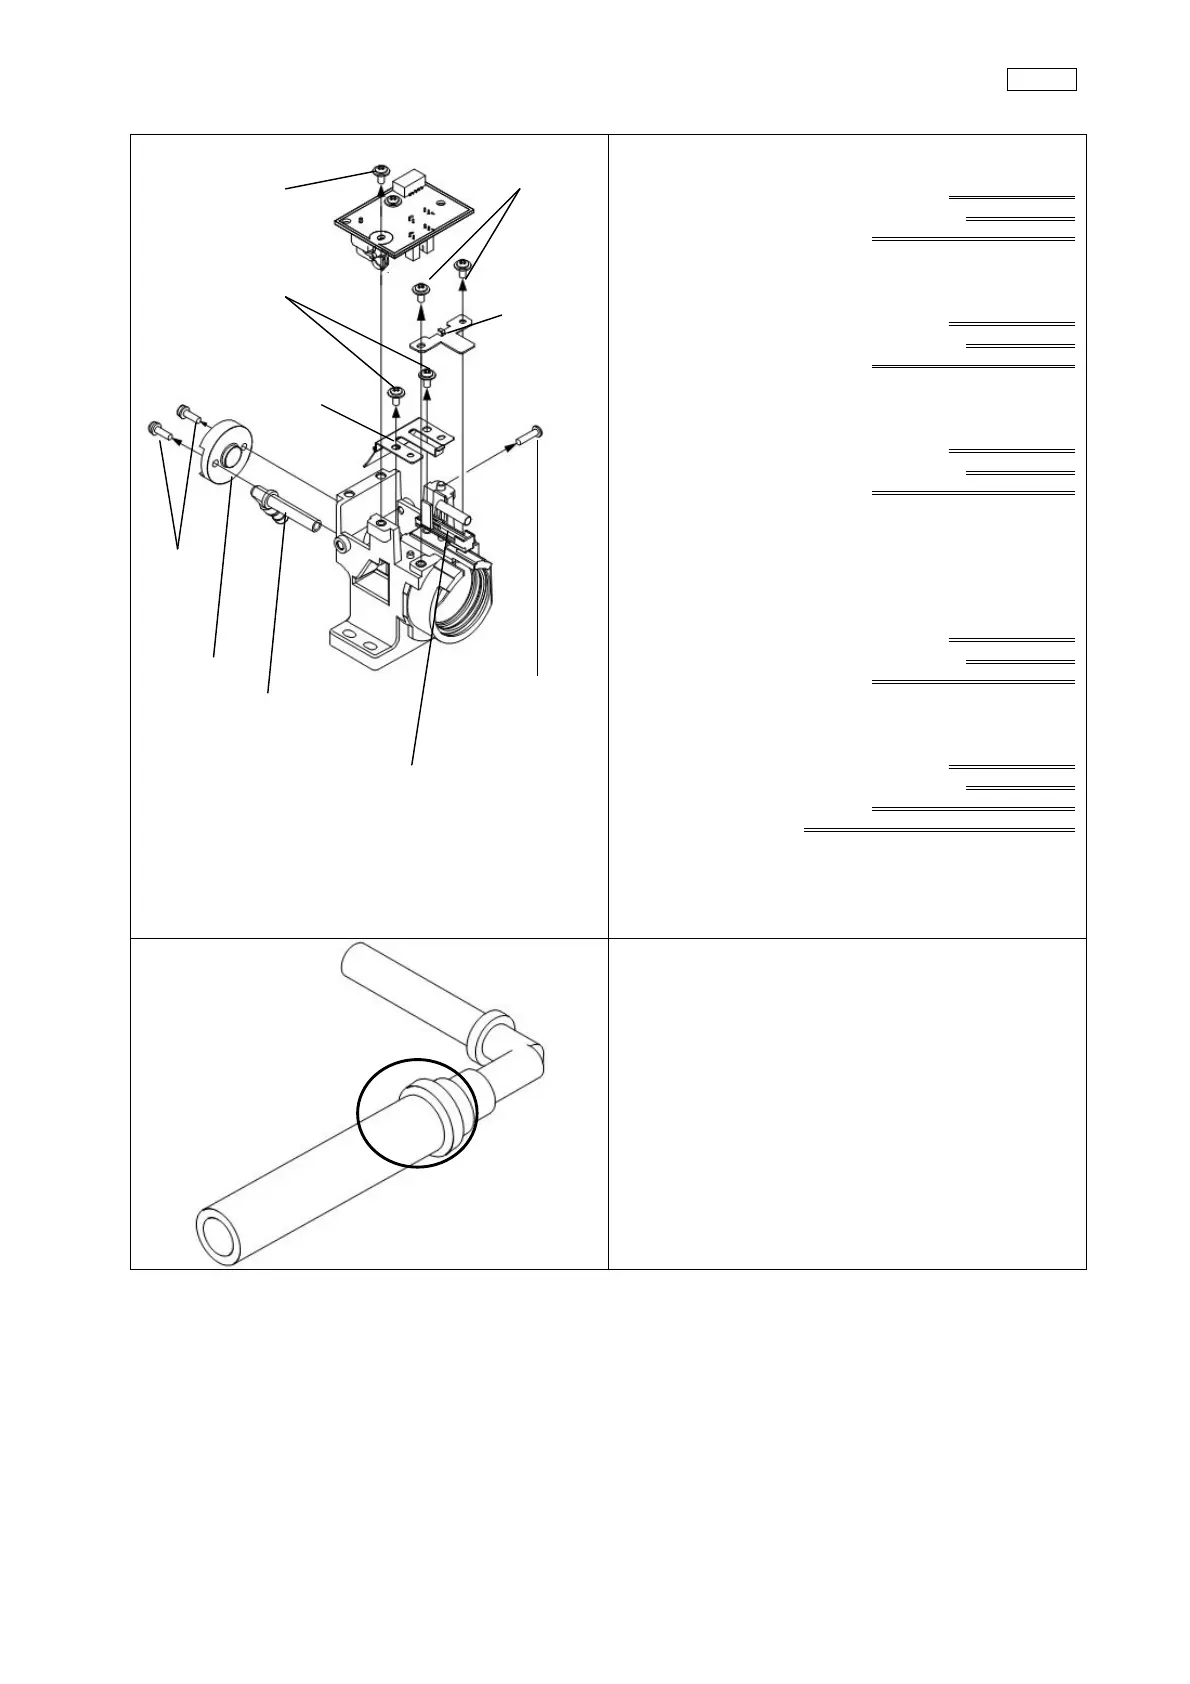
3-4-3 S socket 180U
(1) Take off 1 SCREW (CCUK3x4SZ) and SS BOARD
REPAIR U
Phillips bit (№2)
Torque driver
Tightening torque 0.6 Nm
(2) Take off 2 SCREWS (CCUK3x6SZ) and RETAINING
BRACKET180
Phillips bit (№2)
Torque driver
Tightening torque 0.6 Nm
(3) Take off 2 SCREWS (CCUK3x6SZ) and HINGE 180
Phillips bit (№2)
Torque driver
Tightening torque 0.6 Nm
(4) Take off SLIDE DETECTION SPRING and SLIDE
DETECTION 180
(5) Take off PLASTIC SCREW
Phillips bit (№2)
Torque driver
Tightening torque 0.2 Nm
(6) Take off 2 SCREWS, and then take off HEAT
COVER and ATTACHMENT U
Phillips bit (№2)
Torque driver
Tightening torque 0.6 Nm
HEAT COVER POSITIONING JIG
*When putting on the HEAT COVER、tighten the
SCREW by inserting JIG into HEAT COVER
(7) Cut BINDER and pull TUBE
(1) CCUK3x4SZ
(2) CCUK3x6SZ
(3) CCUK3x6SZ
(5) PLASTIC
SCREW
(6) 2 SCREWS
RETAINING
BRAKET
180
HINGE 180
HEAT COVER
ATTACHMENT U
SLIDEDETECTION
SPRING and SLIDE
DETECTION 180
 Loading...