18
CX21
Fig. 19
Fig. 20
3
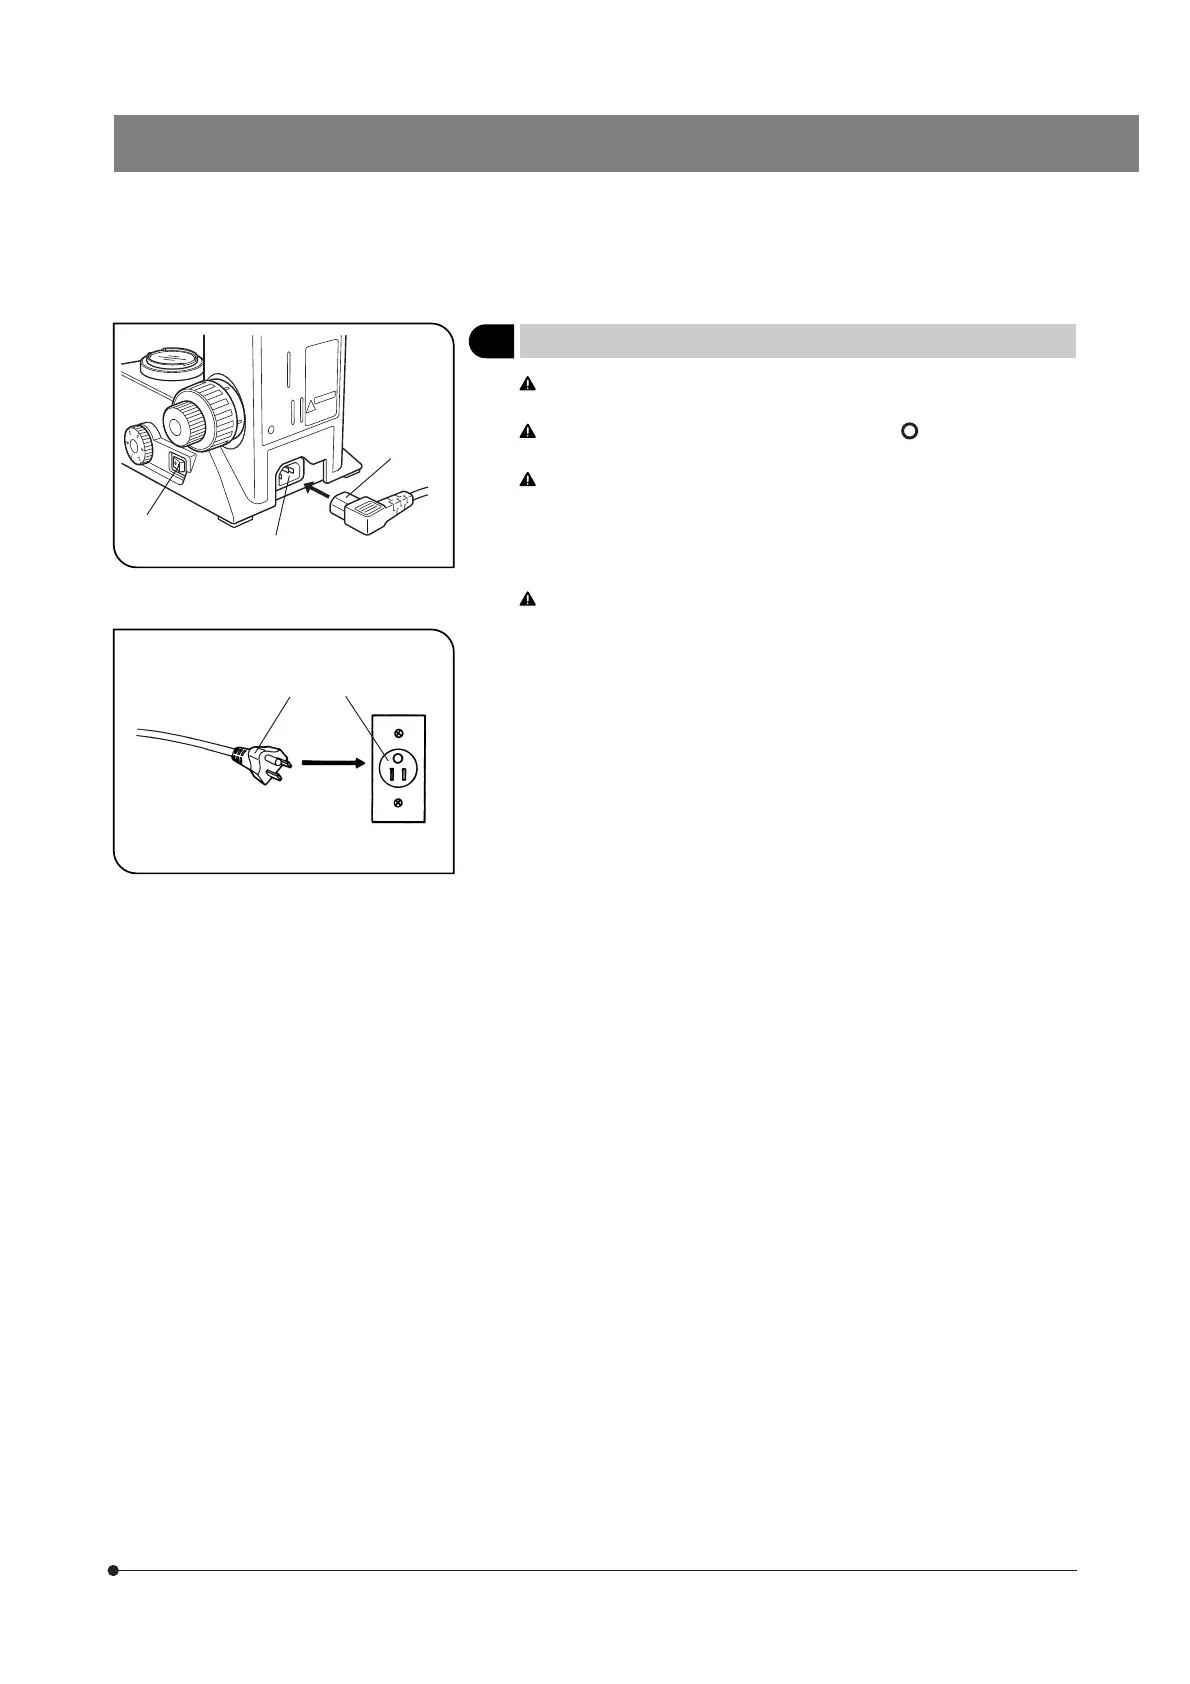
Connecting the Power Cord
(Figs. 19 & 20)
The power cord is vulnerable when bent or twisted. Never subject it
to excessive force.
Make sure that the main switch 1 is set to “ ” (OFF) before con-
necting the power cord.
Always use the power cord provided by Olympus. If no power cord
is provided, please select the proper power cord by referring to the
section “PROPER SELECTION OF THE POWER SUPPLY CORD” at
the end of this instruction manual.
1. Connect the power cord’s connector 2 to connector 3 firmly.
Be sure to supply power from a grounded, 3-conductor power outlet
using the proper power cord. If the power outlet is not grounded
properly, Olympus can no longer warrant the electrical safety perfor-
mance of the equipment.
2. Connect the power cord’s plug | to a wall power outlet 5.
²
@
³
5|