21
Fig. 26
5
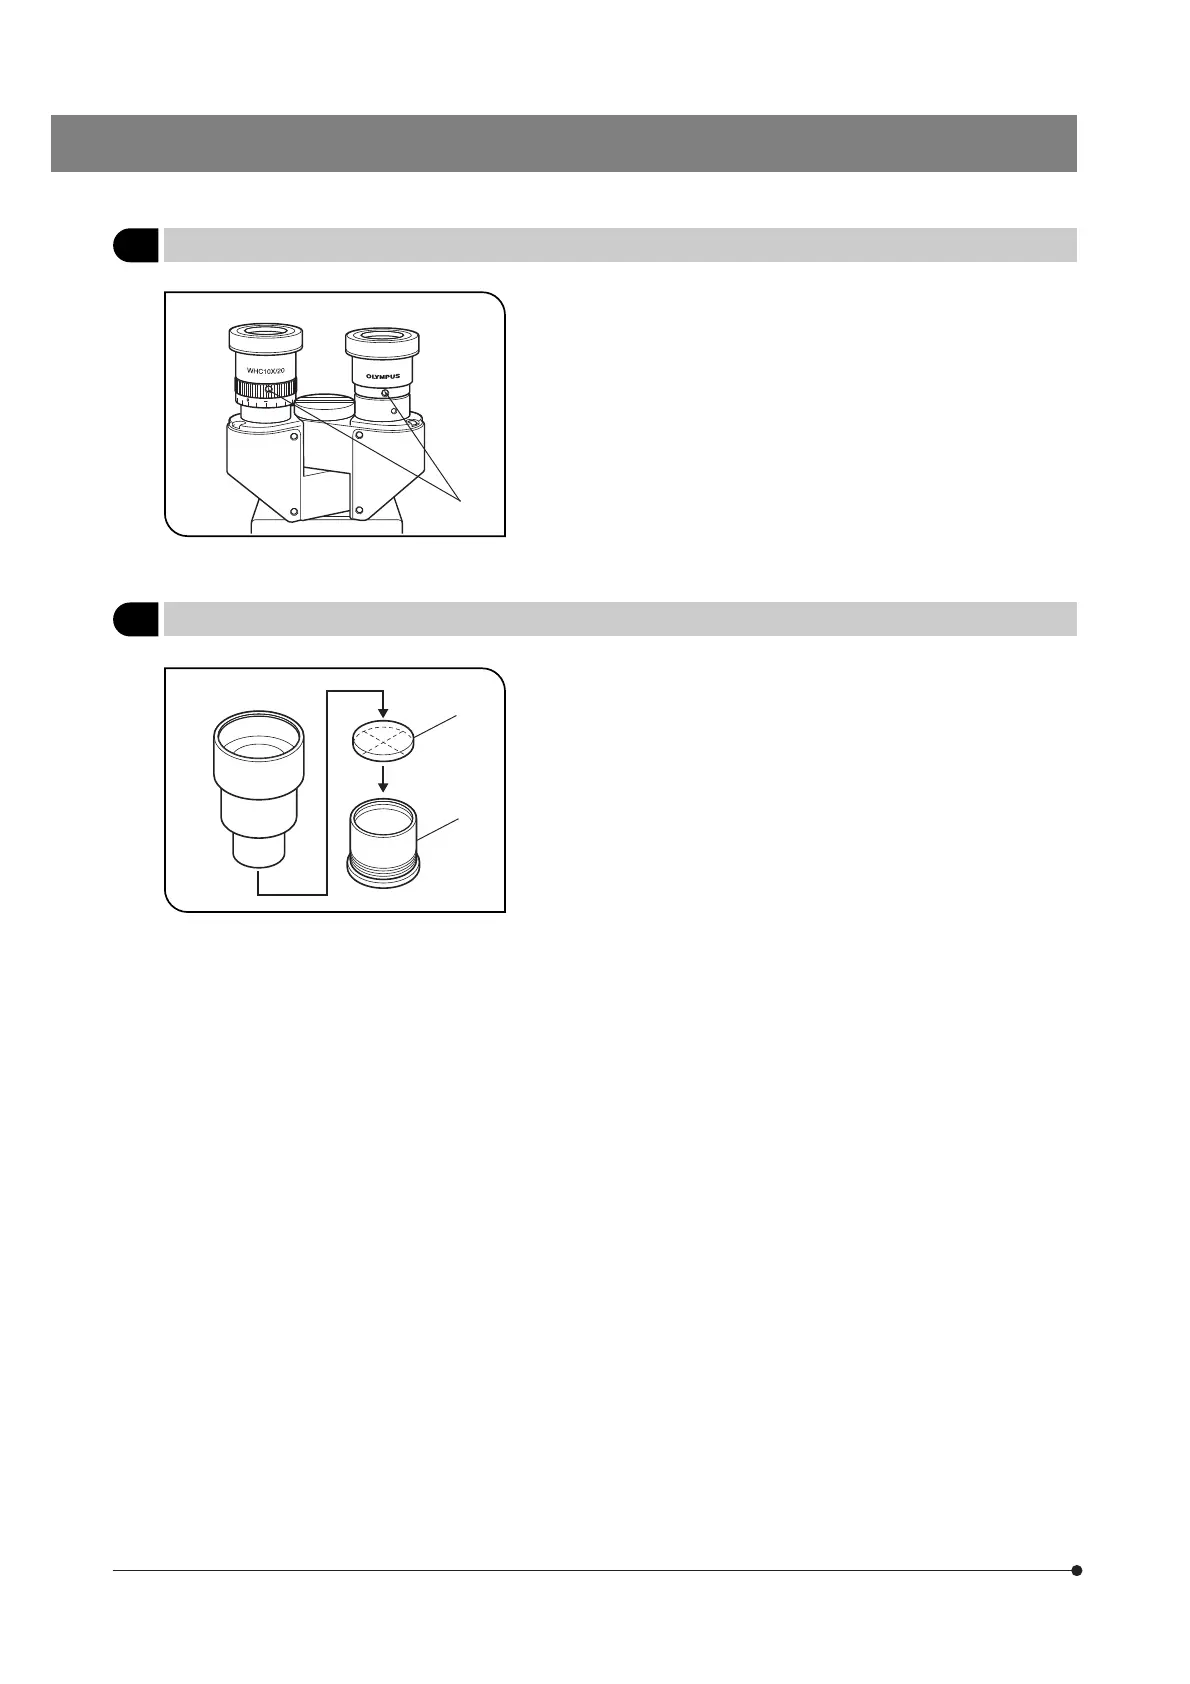
Eyepieces WHC15X/WHC15X-H
(Fig. 26)
}The standard 10X eyepieces are clamped using screws.
1. Using a small flat-blade screwdriver, loosen the clamping screw 1 of a
10X eyepiece and remove it.
2. Insert the WHC15X or WHC15X-H into the eyepiece sleeve and tighten
the clamping screw 1.
@
}The eyepiece micrometer can be inserted in a standard 10X eyepiece
as well as the WHC15X and WHC15X-H.
However, unless the WHC15X-H is used, helicoid adjustment cannot be
performed, so those with poor eyesight will have trouble in bringing the
micrometer into focus.
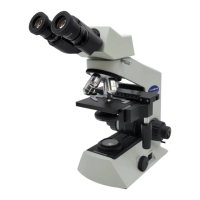
· Get a micrometer with diameter of 19 mm and thickness of 1 mm.
· Remove the micrometer sleeve ² and fit the micrometer @ into the
eyepiece with the indication side facing down as shown in Fig. 27.
Replace the micrometer sleeve to use the micrometer.
6
Using the eyepiece micrometer
(Fig. 27)
Fig. 27
@
²