100
EN
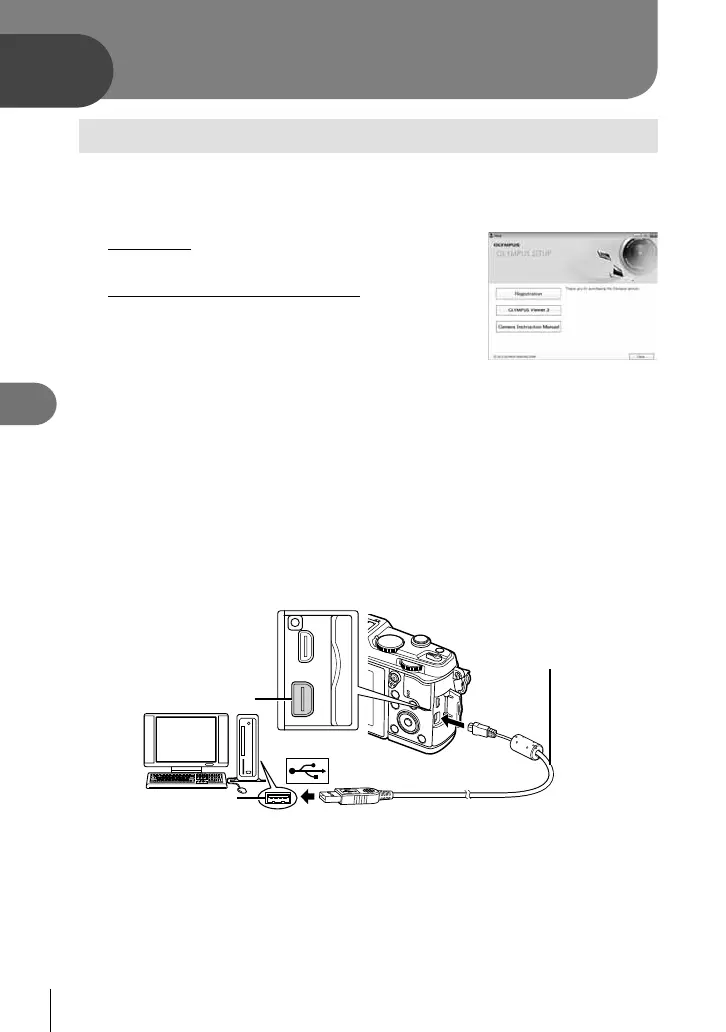
Connecting the camera to a computer
6
6
Connecting the camera to a computer
Installing the PC software
Windows
1
Insert the supplied CD in a CD-ROM drive.
Windows XP
• A “Setup” dialog will be displayed.
Windows Vista/Windows 7/Windows 8
• An Autorun dialog will be displayed. Click “OLYMPUS
Setup” to display the “Setup” dialog.
# Cautions
• If the “Setup” dialog is not displayed, select “My Computer” (Windows XP) or
“Computer” (Windows Vista/Windows 7) from the start menu. Double-click the
CD-ROM (OLYMPUS Setup) icon to open the “OLYMPUS Setup” window and then
double-click “LAUNCHER.EXE”.
• If a “User Account Control” dialog is displayed, click “Yes” or “Continue”.
2
Follow the on-screen instructions on your computer.
# Cautions
• If nothing is displayed on the camera screen even after connecting the camera to the
computer, the battery may be exhausted. Use a full-charged battery.
Multi-connector
Smaller
terminal
USB cable
Look for this mark.
USB port
# Cautions
• When the camera is connected to another device via USB, a message will be
displayed prompting you to choose a connection type. Select [Storage].