Preparation for Use
MOBILE WORKSTATION WM-NP2
39
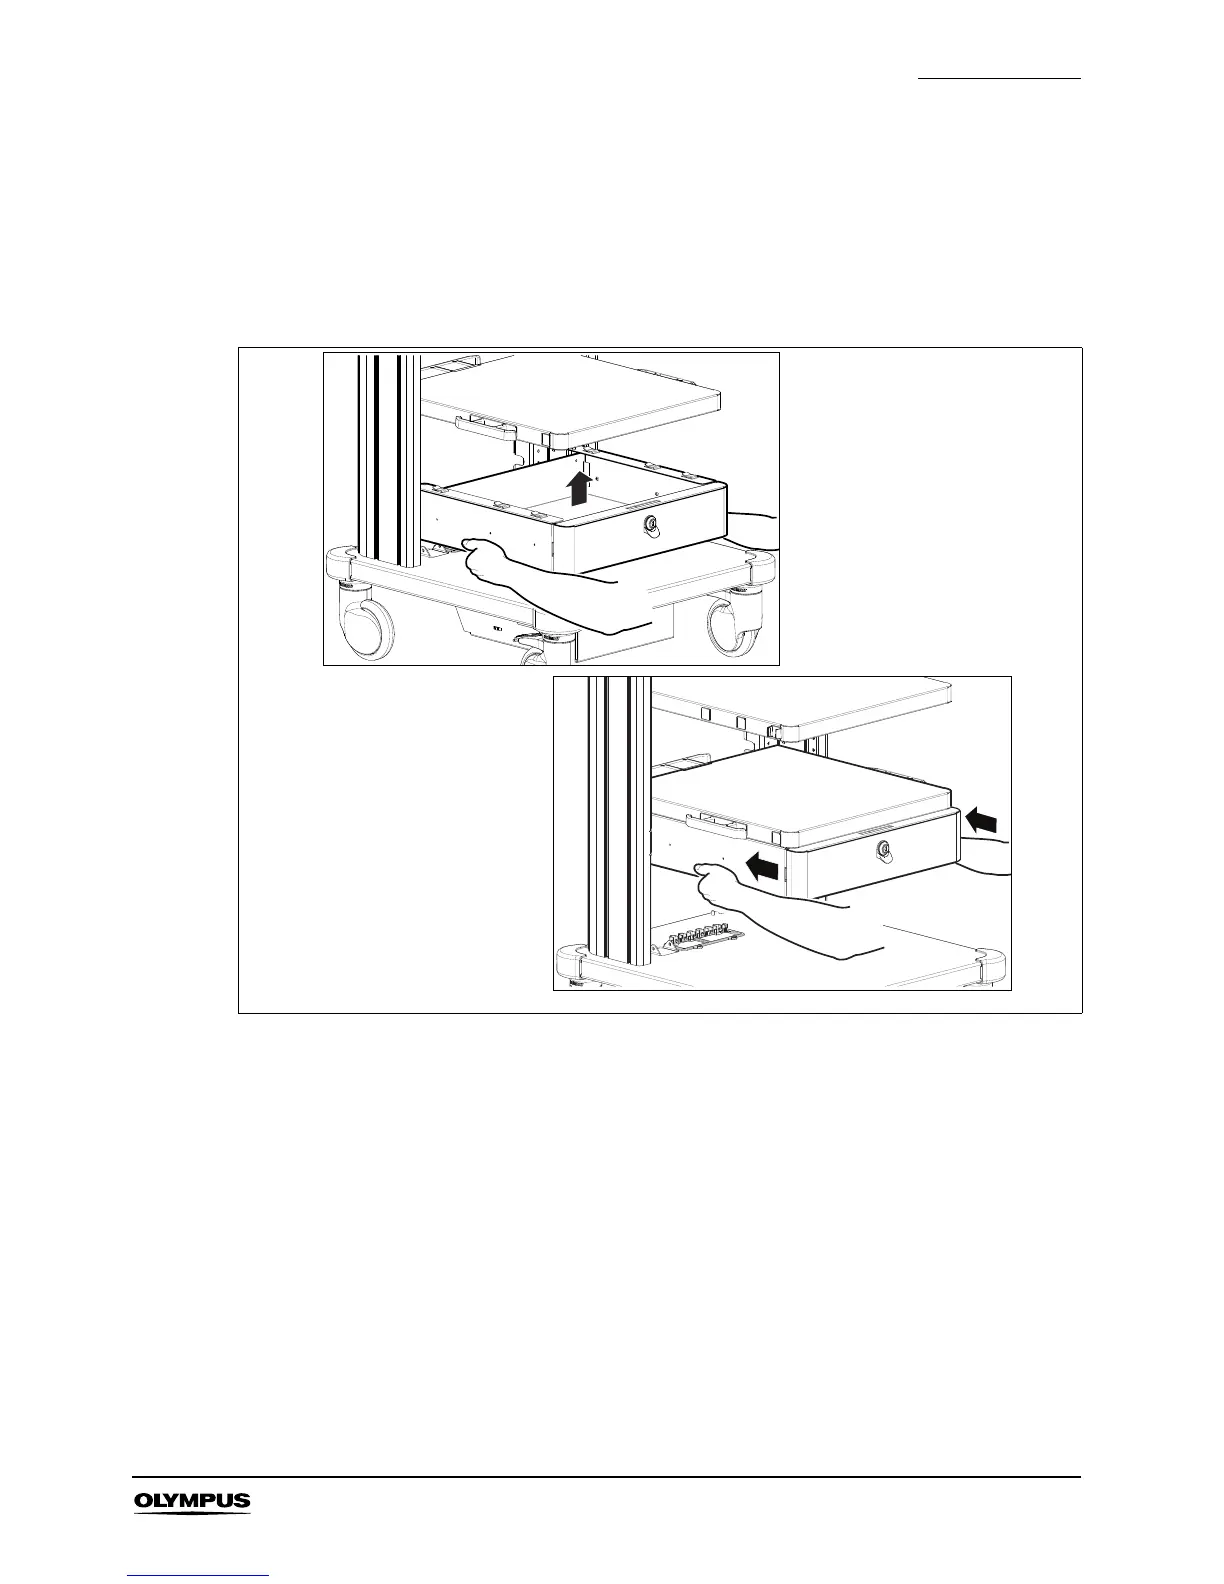
10. Hold the drawer unit with both hands as shown in Figure 4.14a and push it up against the
shelf so that all the six tabs enter their cutouts. At this stage, the drawer unit is correctly
positioned if it protrudes beyond the shelf by about 2cm. Check that there is no gap between
the drawer unit and the shelf, and then slide the drawer unit back into the shelf while
pressing down from above, as shown in Figure 4.14b, until the fixing slots (see Figure 4.13)
are aligned (see Figure 4.12) with the slots in which the T-nuts are inserted. If the drawer unit
is difficult to slide, press it down by gently tapping on it with the palm of your hand.
11. From the rear of the workstation, fit the fixing slots gently over the T-nuts using two M8
screws, M8 crinkle washers and M8 plain washers, as shown in Figure 4.15. If the screw
positions of the fixing slots and the T-nuts are not aligned, insert the supplied Allen key
through the fixing slot and lever the drawer until they are aligned. When all four screws have
been fitted, tighten firmly with the Allen key.
Figure 4.14