O.M.A.C. s.r.l.
Via Giovanni Falcone, 8 42048 Rubiera (RE) - Italy Tel.0522/629371 - 629923 Fax 0522/628980
Rev.4 del 01/2011 O.M.A.C. s.r.l.
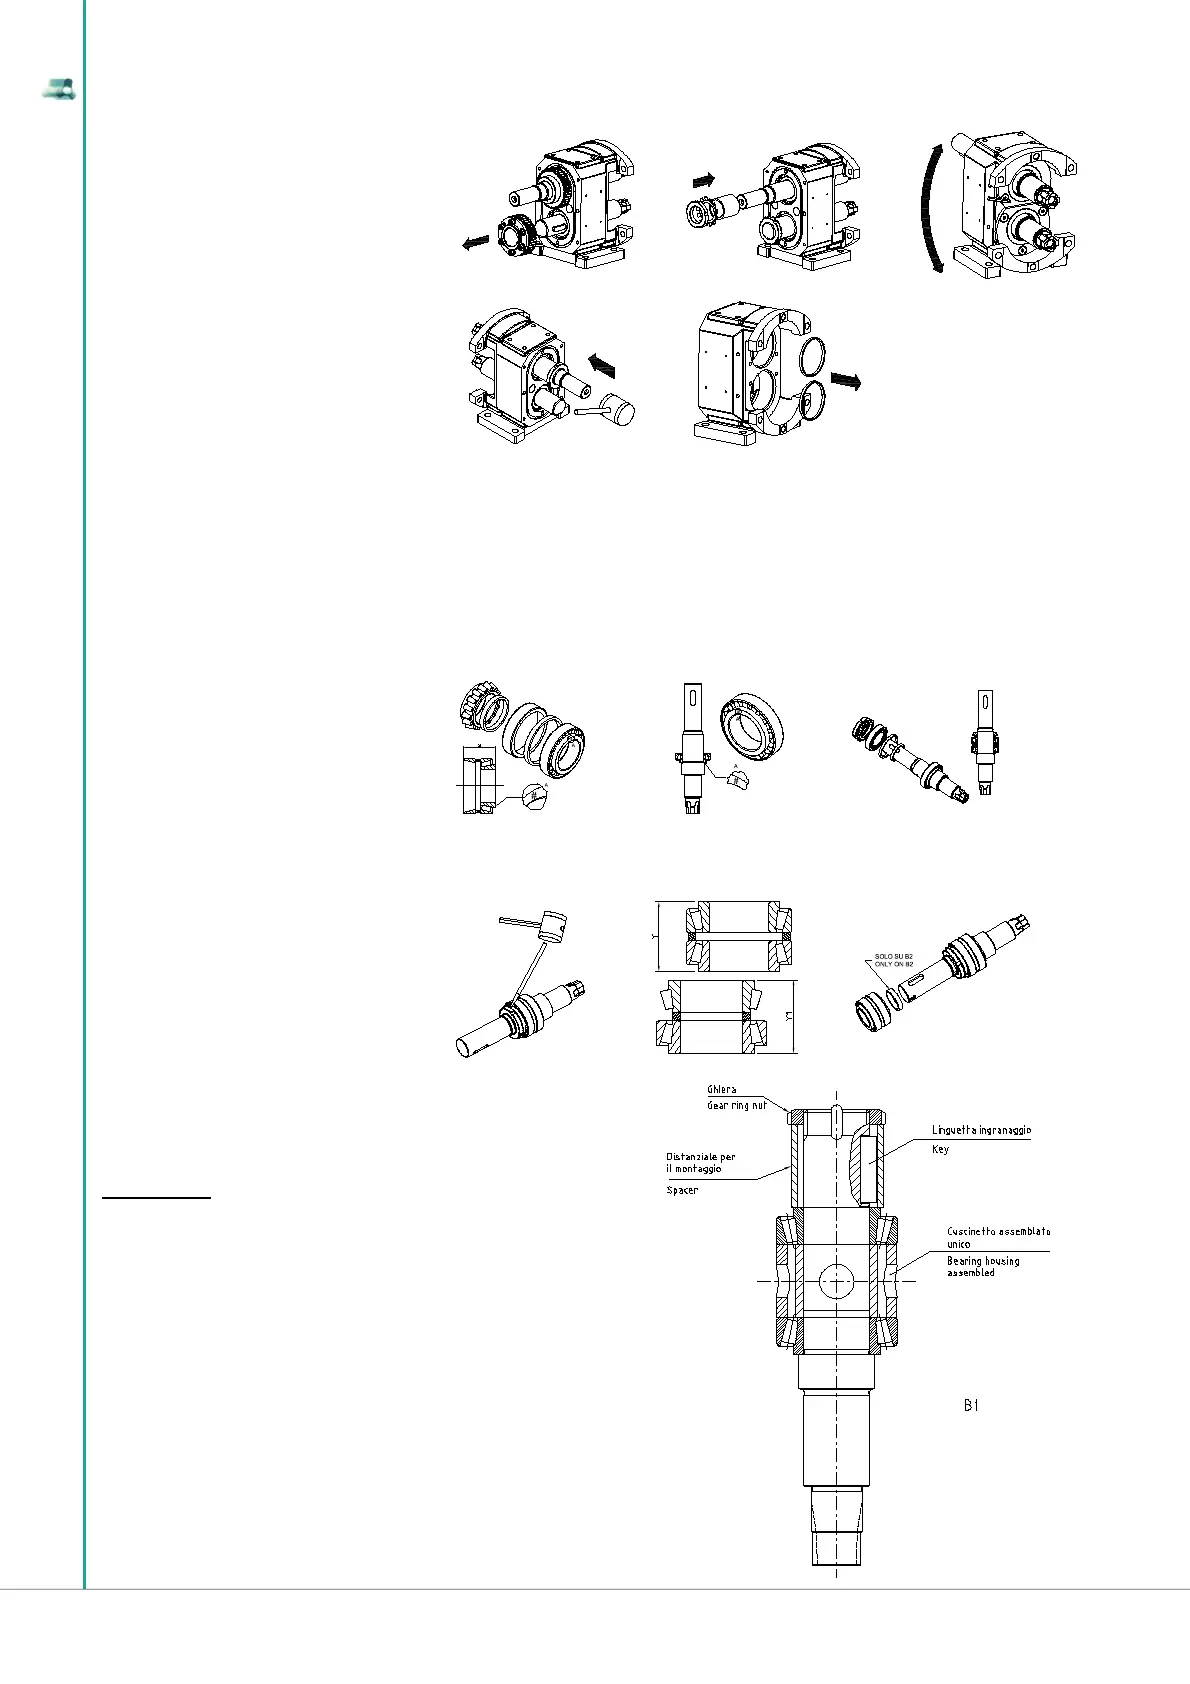
5.8.4 Assembly of the bearings box
19 Ex tract the gears, exerting leverage between
the bea ring housing and the gears side, without
damaging the toothing outline
20 On assembling and disassembling we sug-
gest you should replace the gears with a spacer
in order not to break down the pre-assembled
bearing
21 Remove the bearing retainers
22 Extract the shafts by means of a non metal
hammer
19 20 21
23 Mark the spacers for the axial shaft adjustment, then replace them rightly while re-assembling
22 23
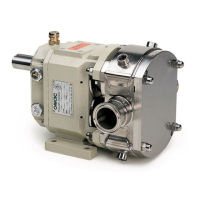
24 *FRONT BEARING ASSEMBLING PHASE1*
If you replace bearings with others that are not supplied by OMAC, you must mark, with the electric pen, the internal ring of a bearing with the # symbol.
Check with depth micrometer gauge the dimension “x” according to the table, take it without the inner spacer and the inner ring with roller set on the
opposite side of #
25 PHASE 2
USE GLOVES. Heat the inner ring # up to ca
150° C and assemble it on the shaft. Wait for the
temperature to drop to room temperature. Value
of the measurement “X” (+/- 0.02)
26 PHASE 3
Assemble the bearing. Insert the inner spacer
the fi rst time just lapped with lapping machine.
Consider the axial clearance between the rollers
and carry out another lapping until you obtain a
preloading on the bearings of about 0,05 mm.
The best assembling is obtained when the bea-
rings, tightened with the ring nut, roll freely and
the outer spacer is slightly blocked but moves
exerting a radial pressure with fi ngers. For ti-
ghtening torques see chap. 1
27 Assemble the pre-assembled front bearing, tighten fi rmly the ring nut and
set the retainer key in the ring nut slot
IMPORTANT: Put all keys of the safety washer up to the ring nut in order to
let the spacer pass for the axial adjustement
28 REAR BEARING ASSEMBLING PHASE1
Measurement of the “Y” dimension without the inner
spacer
30 PHASE 2
Measurement of the “Y1” dimension without the outer spacer , without an outer
ring and with the inner spacer, which must be inserted the fi rst time just lapped,
then the second time with the correct measure in such a way that: Y1 = Y
29 ATTENTION Bearing spacer (pos. n°10 fi g.12.2) has to be placed only
on B2 size.
24 25 26
27 28 29
30 - B1
-0.05
-0.10