Wiring
Connections
(cont'd)
-----
>,~.;::;~:
SECONDARY 7 PIN HARNESS
YELLOW/GREEN: (-) OEM
Alarm
Disarm
Output-
This wire mimics the BLUE
unlock wire and is used for disarming factory installed alarm systems. It is a
250mA negative output.
BROWN: (-)
Horn
Honk
Output-
Connect this to the vehicle's horn switch cir-
cuit. It is a 1A negative output that is directly compatible with most horn circuits.
Add a relay if the vehicle requires higher amperage or positive polarity.
WHITE/RED:
(+/-)
Flashing
Light
Polarity
Selection-
This is the input to the
flashing light relay. Connect the bullet connector on the end
of
this wire to the
mating connector on either the RED (+) or BLACK (-) wire to select the desired-
polarity. The polarity is determined by the vehicle's light circuit.
PINK: (-)
3nd
Channel
Output-
This wire, by default, has a 1 second 250mA
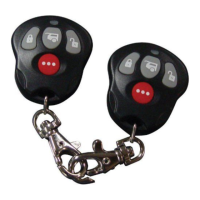
negative output whenever the "•••" transmitter is held for 3 seconds. The timing
is configurable with feature #12. It is typically used to activate accessories like
a remote start unit.
WHITE: (+/-)
Light
Flash
Output-
By default, this wire is connected to the ve-
hicle's parking light circuit. It's polarity is determined by the WHITE/RED wire.
If flashing lights are not desired, this output can be configured to operate as 4th
channel using feature #7.

 Loading...