Using the Graphics Editor SECTION 2 Basic Tutorial
16
1, 2, 3… 1. From the main toolbar, click the button. The Point Editor window
opens.
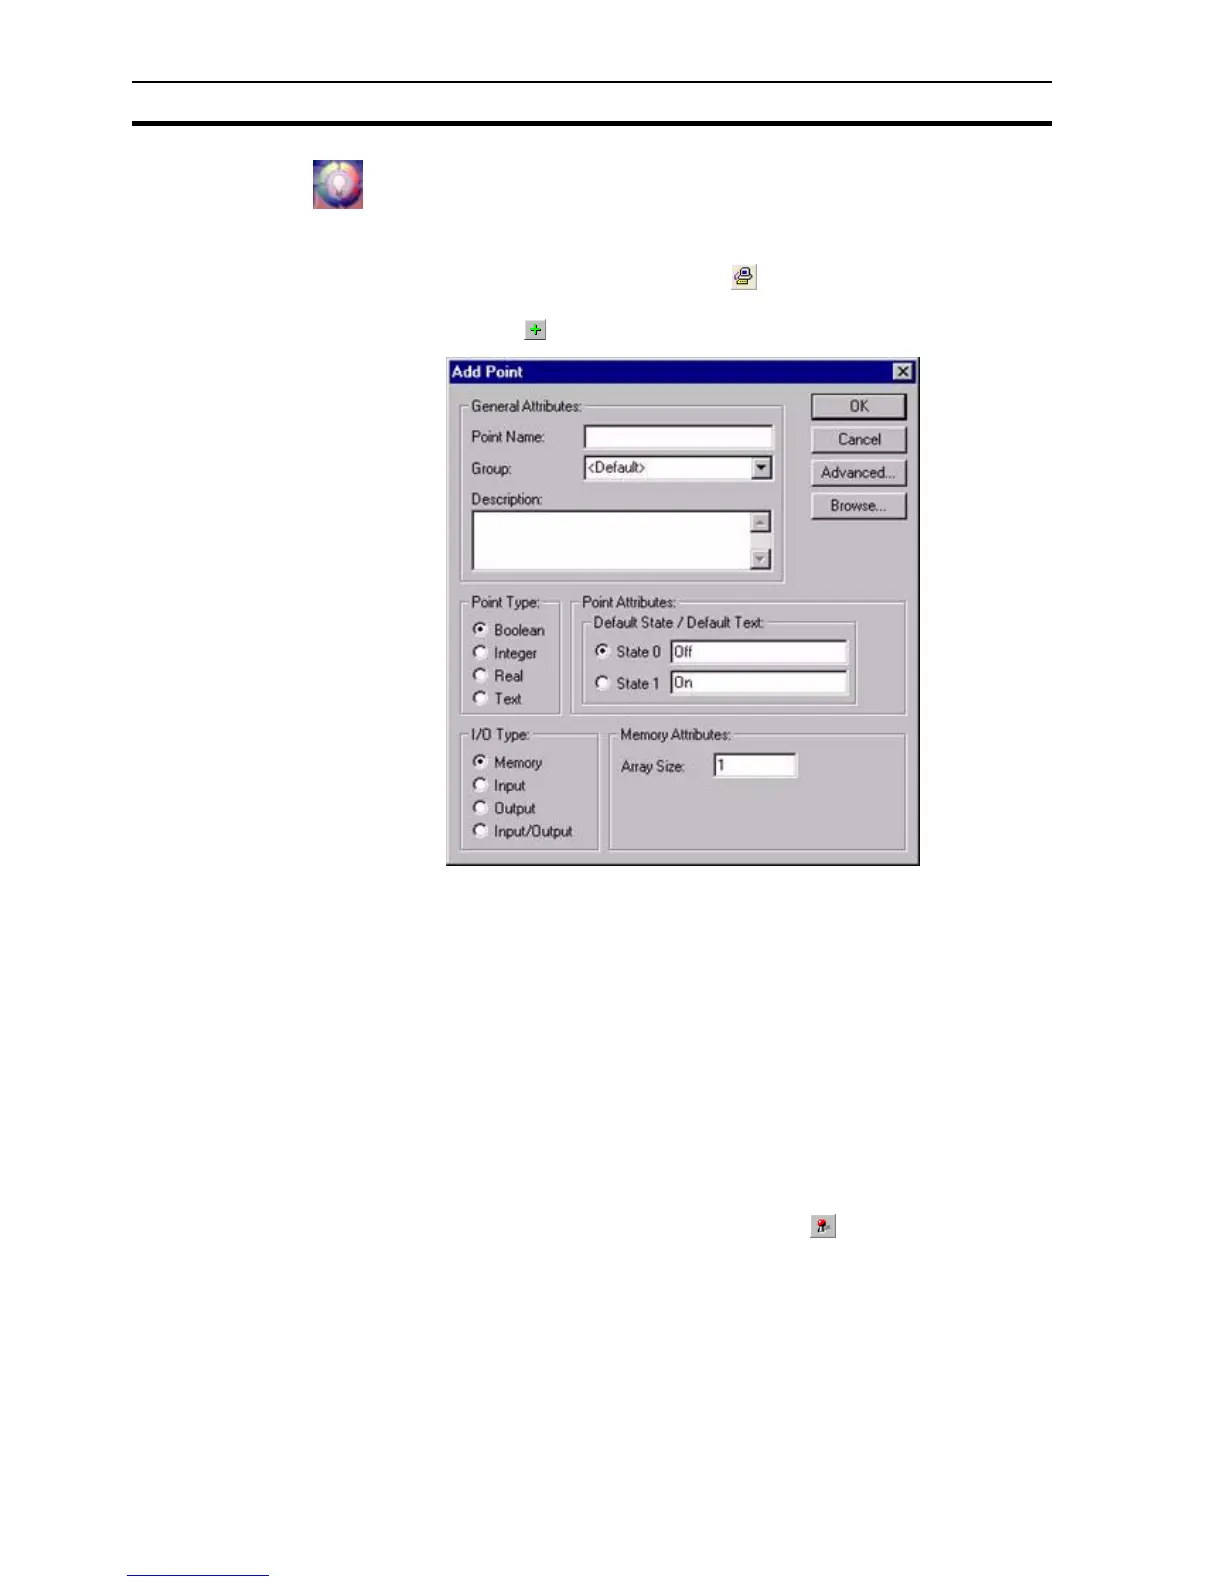
2. Click the button. The Add Point dialog is opens:
3. Now the variable, or 'Point', can be defined to control the traffic signal; in
this instance a simple Boolean point is used.
4. In the Point Name field, type "GO", as the name of the point.
5. Check that the Point Type is "Boolean" and that "Memory" is selected as
the I/O Type.
6. Click the OK button. The point is added to the points database.
2-5-2 Adding the toggle button
As this is a simulation to see the application in action we need a means of
changing the value of our new point "GO". The simplest method is to use a
"Toggle button", a two-state button which changes from one state to the other
each time the button is pressed.
1, 2, 3… 1. From the Graphic Object toolbar, click the button and draw a button
of a suitable size in relation to the traffic signal
For simplicity of this tutorial this 'Point' or variable will be a local memory point.
For a real application of course we would be connecting to a PLC and reading
a digital input. Except for the following point definition the rest of this tutorial is
identical to a real monitoring application.
 Loading...


