Regular Payload Series-Hardware Installation Manual TM5 Series Hardware Version: 3.2 7
Figure 32: Calculation the Torque Load of the Light Module ............................................................................ 43
Figure 33: Electrical Polarity of Fill Light Cable ................................................................................................ 43
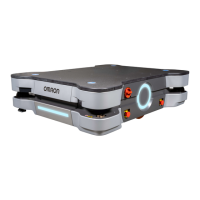
Figure 34: Top View of TM Robot Placed on the AGV/AIV ............................................................................... 44
Figure 35: Working Distance and Field of View of TM Robot’s EIH camera .................................................... 45
Figure 36: Control Box I/O Configuration (1/2) ................................................................................................. 46
Figure 37: Control Box I/O Configuration (2/2) ................................................................................................. 47
Figure 38: Safety Input Connector .................................................................................................................... 48
Figure 39: The Wiring Diagram Example of Switch Type Safety Device. ......................................................... 49
Figure 40: The Wiring Diagram Example of PNP Output Type Safety Device ................................................. 49
Figure 41: The Wiring Diagram Example of PNP Output Type Safety Device ................................................. 50
Figure 42: Safety Output Connector ................................................................................................................. 51
Figure 43: Safety Output Connector Wiring Diagram ....................................................................................... 51
Figure 44: Power Connector ............................................................................................................................. 52
Figure 45: Digital Input ...................................................................................................................................... 53
Figure 46: Set to Sink Input Type ..................................................................................................................... 53
Figure 47: Set to Source Input Type ................................................................................................................. 54
Figure 48: Digital Output ................................................................................................................................... 54
Figure 49: Set to Sink Output Type .................................................................................................................. 55
Figure 50: Set to Source Output Type .............................................................................................................. 56
Figure 51: Analog In .......................................................................................................................................... 56
Figure 52: Analog Out ....................................................................................................................................... 57
Figure 53: System Remote Power ON/OFF ..................................................................................................... 57
Figure 54: EtherCAT ......................................................................................................................................... 58
Figure 55: Connecting Tool End Digital Output ................................................................................................ 60
Figure 56: Connecting Tool End Digital Input ................................................................................................... 61
Figure 57: Connecting Tool End Analog Input .................................................................................................. 61
Figure 58: Front View of the Control Box ......................................................................................................... 62
Figure 59: Interfaces of the TM5-700 / TM5X-700 / TM5-900 / TM5X-900 Series ........................................... 62
Figure 60: Interfaces of the TM5M-700 / TM5MX-700 / TM5M-900 / TM5MX-900 Series ............................... 63
Figure 61: Interfaces of the TM5M-700 SEMI / TM5M-900 SEMISeries .......................................................... 63
Figure 62: Control Box Power Interfaces .......................................................................................................... 64
Figure 63: Robot Interface ................................................................................................................................ 65
Figure 64: The TM5M-700 SEMI / TM5M-900 SEMI ........................................................................................ 66
Figure 65: Detachable I/O Panel ...................................................................................................................... 67
Figure 66: Robot Arm Carton ............................................................................................................................ 69
Figure 67: Control Box Carton .......................................................................................................................... 69