The following instructions detail how to install your Onenity Elite CNC Machine. Please read these
entire instructions carefully. If you have any problems or do not understand these instructions please
contact us at support@onenitycnc.com or 1-888 717 4242 for further assistance.
For step-by-step instructional video’s and how-to’s please visit our Youtube page at:
https://www.youtube.com/onenitycnc. Note: It is highly recommended that you view all of our
assembly videos prior to attempting to assemble your Onenity machine. Our assembly videos can
be found at: youtube.com/onenitycnc
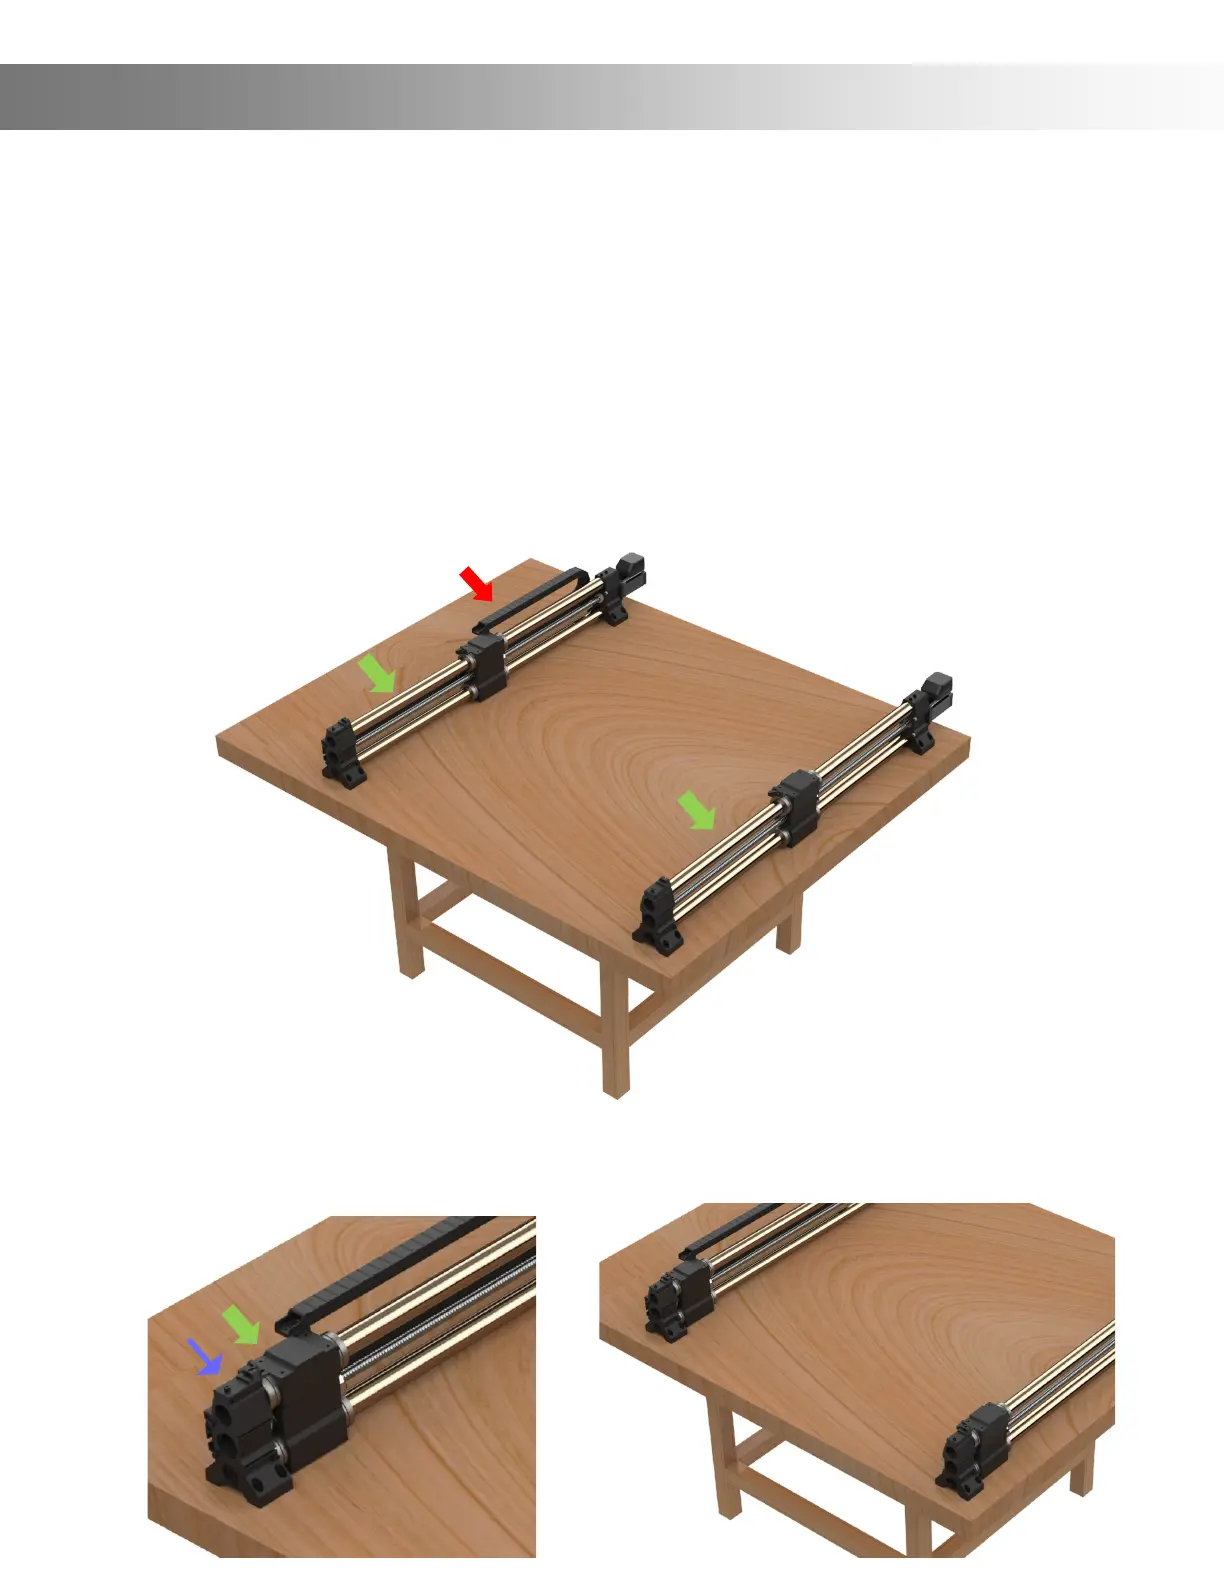
Step 1: Set Y-Rails (Green Arrows) on the bench and place them close to where you would like them to
be installed. See below picture.
Important: The Y-Rail with the Drag Chain must be placed on the left side (Red Arrow)
Note: For illustrative purposes, the drag chains have been removed from certain pictures.
Step 2: Slide the Gantry assembly (Green Arrow) all the way to the front until it’s tight to the
Rail End (Blue Arrow). See below pictures. (Note: you can also turn the ball screw to get the
Gantry Assembly to move to the front). Important: Make sure they are all the way to the front!
Assembly Instructions