Optomed Aurora 15
2.1 Controls and display icons
Battery level, WLAN, patient, fixation target, brightness level and diopter value indicators are shown on the
camera display.
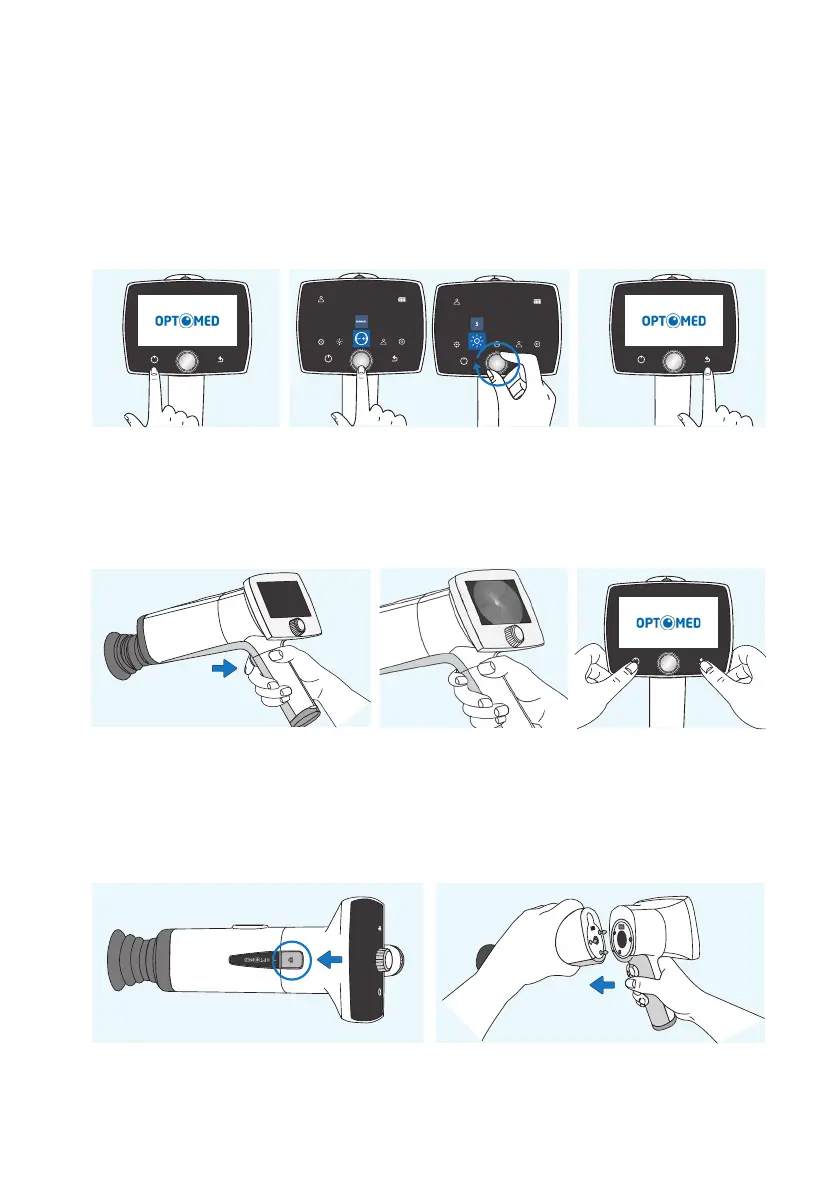
Aurora Camera is powered on and o by pressing the power button. Opening the camera menu is done by
pressing Optoroller, which is also used for navigating in the menu together with back button.
Images are captured by pressing the dual action shutter. If the performance of Aurora Camera is abnormal,
it can be forced to shut down by pressing the power and back buttons simultaneously for seven seconds
or longer.
The battery charging indicator LED is on when the camera is placed on Aurora Charging Station for charging.
There is also an LED indicator in Aurora Charging Station for indicating spare battery charging.
Optics modules are detached by pressing the eject button on the top of the camera.
Device overview |
Power on Back button
Open camera menu and navigate
Shutter button for image capture
Forced shutdown
Press eject button
Detach the module