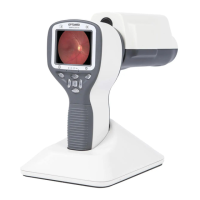
Camera is stabilized by keeping the outer side of the hand against the patient’s forehead. Example of
the correct usage position is shown below:
10. Still image is captured by pressing the shutter button halfway down. If half-press capture is enabled,
still image can be captured by pressing shutter button halfway down. Taken image is displayed on
screen until user clears the image by pressing shutter button, left or right soft key.
Instant review can be enabled/ disabled in the Smartscope FA optics menu.
11. Image can be zoomed in instant preview by pressing middle key. There are four zoom levels (1, 2, 4,
8). Pressing middle key activates next level. Move around the image by using arrow keys. Scroll
between images by using left and right arrow keys.
12. Starting and ending the burst capturing: In order to start the burst capturing keep the shutter
button pressed halfway or all the way down during image capturing. Burst mode is enabled until
user releases shutter button.
13. If multiple patients are examined during one session, new file folder is created for each patient by
pressing middle key for over 3 seconds.
14. Transfer images to a PC after capturing images. Images are transferred via USB connection to the PC
when camera is placed to the cradle or images are automatically transferred wirelessly to the PC if
WLAN connection is active. Smartscope works as any other digital camera.
15. When camera is removed from cradle it verifies image data storage erase. It is recommended that
image data storage is always erased before images are captured of a new patient.