24
4.2 User Remote remote control 7 (and separate instructions)
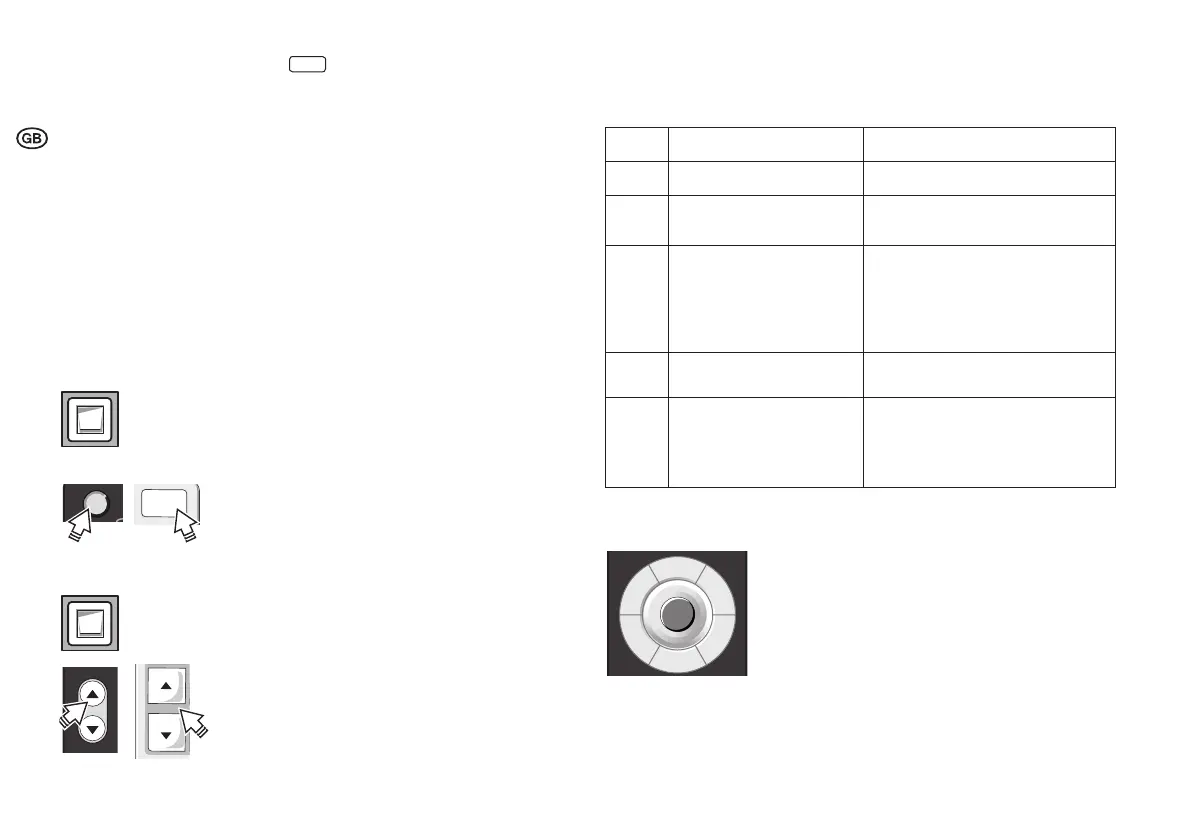
Push-buttons / LED
(21) [ON/OFF] All luminaires on/off
(22) LED signalization (green/red/orange)
(23) [1] Scene push-button 1
(24) [3] Scene push-button 3
(25) [Holiday] Activation of Holiday Mode
(26) [CH-1] Setting brightness on Channel 1 (manual/direct)
(27) [2] Scene push-button 2
(28) [4] Scene push-button 4
(29) [Resume] Resume automatic daylight function
(30) [CH-2] Setting brightness on Channel 2 (manual/direct)
LED signalization (22)
• green - flashes rapidly during signal transfer (IR)
• red - flashes in "Saving" mode
• orange - lights up during "Reset" User Remote
4.3 Switch system on/off
External push-button:
1. Press external push-button (SP) to switch the lighting on
or off.
Master Remote and User Remote:
1. Press [ON/OFF] push-button (SP) to switch CH-1 (DALI 1)
and CH-2 (DALI 2) on and off.
4.4 Dimming the system
External push-button:
1. Press external push-button (LP) to increase or decrease the
brightness of both channels.
Master Remote and User Remote:
1. Hold down push-button [CH-1] or [CH-2] top/bottom to
increase/reduce the brightness of the channels DALI 1 and
DALI 2 independently of each other.
5 Step-by-step system programming using Master Remote
Programming or configuration is carried out using Master Remote or directly at the sensor.
When pressing the Master Remote push-button always point to the relevant sensor.
Step 1 Activating the PROG mode Programming mode 5.1
Step 2 Selection of functioning mode Function modes
5.2
Step 3 Set value default for light regulation Auto setup
5.3
or manual setup
5.4
Step 4
Individual adjustment of the
selected function mode
Delay time
5.5
Test function
5.6
Stand-by-level
5.7
Stand-by-time
5.8
Daylight and motion functions
5.9
Step 5 Light value adjustment for
Channel 2 (CH-2)
Offset
5.10
Step 6 Special functions
100 h burn-in
5.11
Sensor select
5.12
PC modes
5.13
Macro recorder
5.14
5.1 Programming mode (PROG mode)
1. Press push-button [PROG] (LP) to activate programming
mode (LED 1 flashes). CH-1/CH-2 are dimmed down to the
last saved set value (default = 80 %).
2. Step-by-step programming, explained under
5.1 to 5.14
(several functions/settings possible one after the other).
3. Press push-button [PROG] (SP), to save settings and to exit
programming mode.
If the PROG mode is not specifically exited, the settings become effective after 60 secs.
The PROG mode terminates automatically after 60 secs. without push-button actuation.
ON
OFF
ON
OFF
CH-1
CH-1
PROG
M
e
e
t
i
n
g
-
/
C
l
a
s
s
r
o
o
m
S
i
n
g
l
e
O
f
f
i
c
e
S
a
n
i
t
a
r
y
R
o
o
m
O
p
e
n
-
p
l
a
n
O
f
f
i
c
e
C
o
r
r
i
d
o
r
S
t
a
i
r
c
a
s
e