25
5.2 Function modes 8
Switching behavior of the preconfigured function modes: Diagrams 9 to 14 .
• Single Office
9
• Open-plan office
10
• Corridor
11
• Meeting room/classroom
12
• Sanitary room
13
• Staircase
14
5.3 Auto setup
Sets the target value of light regulation to 80% of maximum lighting intensity.
1. Press the push-button [Auto setup] (SP) to start the calibra-
tion. After 3 minutes calibration, the lighting flashes and
automatic light regulation starts.
Note: No settings can be made during "Auto setup". "Prog"
mode is terminated automatically after "Auto setup" has been
carried out.
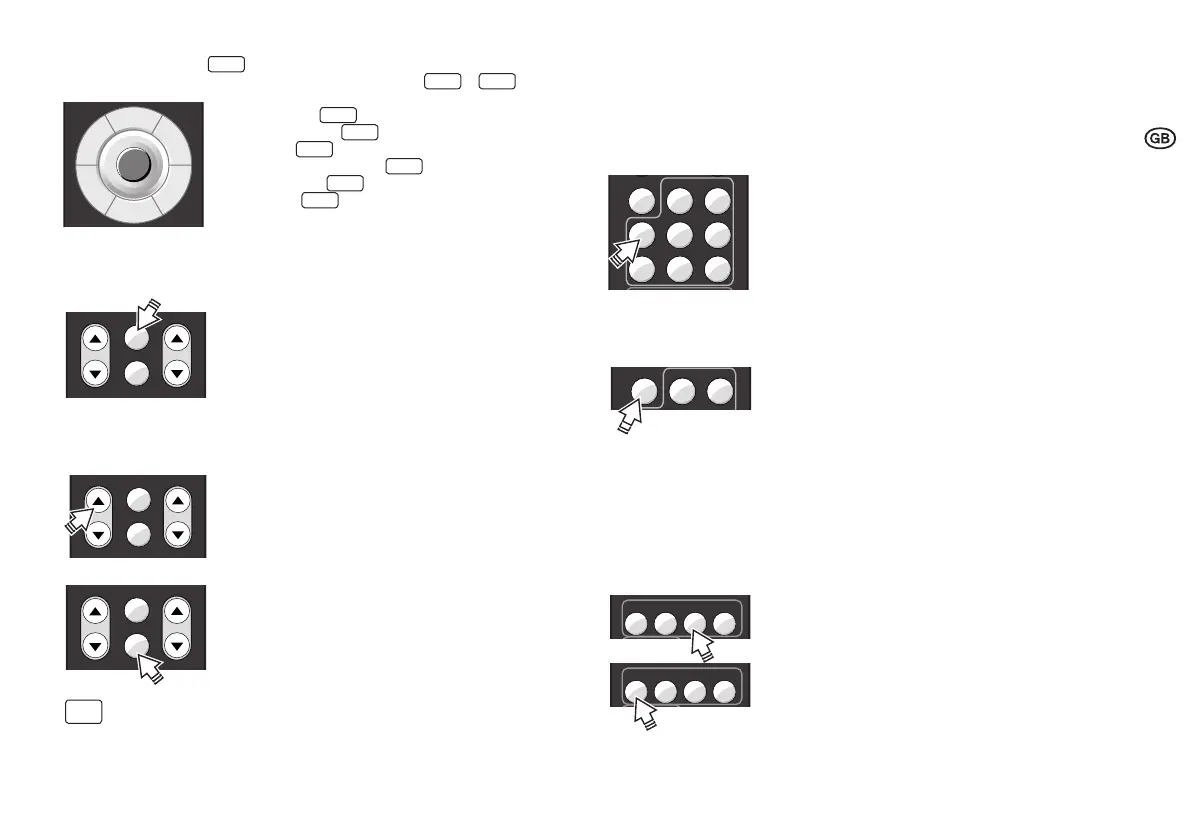
5.4 Manual setup
Saves the set value to any adjustable value.
1. Press the push-button rocker [CH-1] top/bottom to set the
target value for control.
2. Press the push-button [Manual setup] (SP), to save the cur-
rent lighting intensity as the set value (lamps flash).
i
Note:
If the light control system is activated, the control unit increases the saved light value by
one step automatically every 2000 operating hours, thus compensating for the aging of
the light source. If the light source is changed, the set value needs to be saved again to
restart the process.
5.5 Switch off delay (overrun time)
The timer is set until exiting the "ON" condition (change to "STANDBY" or "OFF") according to
the last detection of motion. In the function modes "Corridor", "Staircase" and "Sanitary", the
timer is started by switching on the lighting, even if the motion sensing is deactivated. This
permits time-dependent control also with purely manual operation.
1. Press push-button [Switch off delay 3 min] (SP) to set an over-
run period of 3 minutes for CH-1 and CH-2.
5.6 Test function
The detection range of the sensor can be checked using the test function.
1. Press push-button [test] (SP) to switch on the test function.
2. Press push-button [PROG] (SP) to start the test.
3. Enter the detection area:
- with detection 100% ON,
- without detection after 1 sec. back to 1% ON.
4. If necessary, adjust the detection range by setting the screens
on the sensor and repeat steps 3 and 4 as often as necessary.
5. After completing the test, either wait 60 seconds or press the
push-button [ON/OFF] or [CH-1/CH-2] (SP) to switch off the
test function (return to normal function).
5.7 Stand-by level
Set the brightness (%) in STANDBY or switch the STANDBY function off.
1. For example, press push-button [stand-by level 30%] (SP
or LP) to set STANDBY for CH-1 (CH-2 follows, if necessary,
with OFFSET
5.10).
2. Press push-button [stand-by level OFF] (SP or LP) to switch
STANDBY function off.
PROG
M
e
e
t
i
n
g
-
/
C
l
a
s
s
r
o
o
m
S
i
n
g
l
e
O
f
f
i
c
e
S
a
n
i
t
a
r
y
R
o
o
m
O
p
e
n
-
p
l
a
n
O
f
f
i
c
e
C
o
r
r
i
d
o
r
S
t
a
i
r
c
a
s
e
CH-1 CH-2
Auto
setup
Manual
setup
CH-1 CH-2
Auto
setup
Manual
setup
CH-1 CH-2
Auto
setup
Manual
setup
Switch off delay
test
30
sec
3
min 5
min 10
min
15
min 30
min 60
min
1
sec 1
min
Switch off delay
test
30
sec
1
sec 1
min
Stand-by-level
OFF
10
% 30
% 50
%
Stand-by-level
OFF
10
% 30
% 50
%