28
OTICON AGIL FITTING GUIDE
29
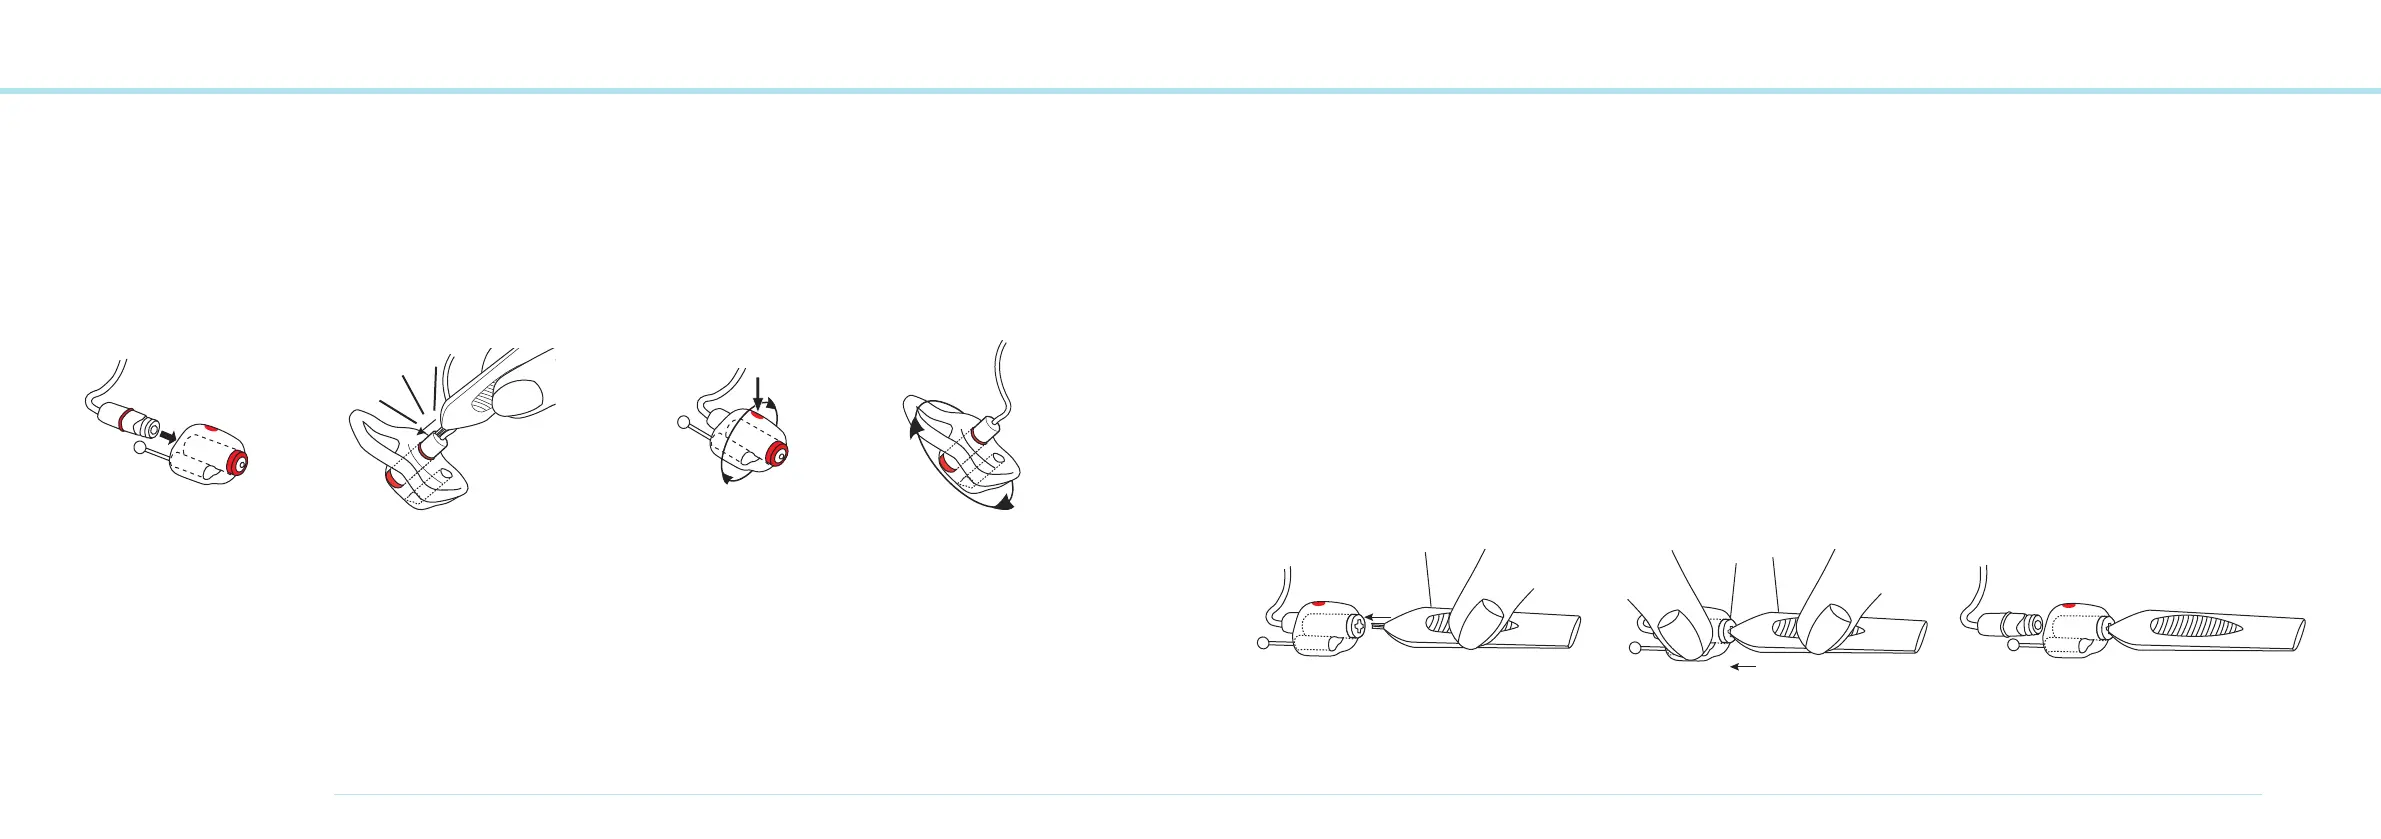
RITE Mold Receiver Insertion Canal Receiver Insertion
1 2 3a
Note: Make sure that the Receiver is not angled when inserted into the Mold. An odd angle will prevent the Receiver from
engaging the Adapter. The click sound indicates that the Receiver is placed correctly, and it should be done with only a little
force. Don’t force the two units together!
3b
Taking off the RITE Mold
The Mold can’t be detached from the Receiver
without the Micro Mold tool
When detaching the Micro Mold follow the instructions
to the right:
1. Remove the WaxStop.
2. Place the Micro Mold in the tool as illustrated making sure
that the cross in the Adapter is matching the tap of the tool.
3. Press the tool into the Mold to release the Receiver unit.
4. Now the Micro Mold can be removed from the Receiver unit.
5. Never remove the existing wax top from the Receiver.
It is part of the locking mechanism.
1 2 3
 Loading...