14
OTICON AGIL FITTING GUIDE
15
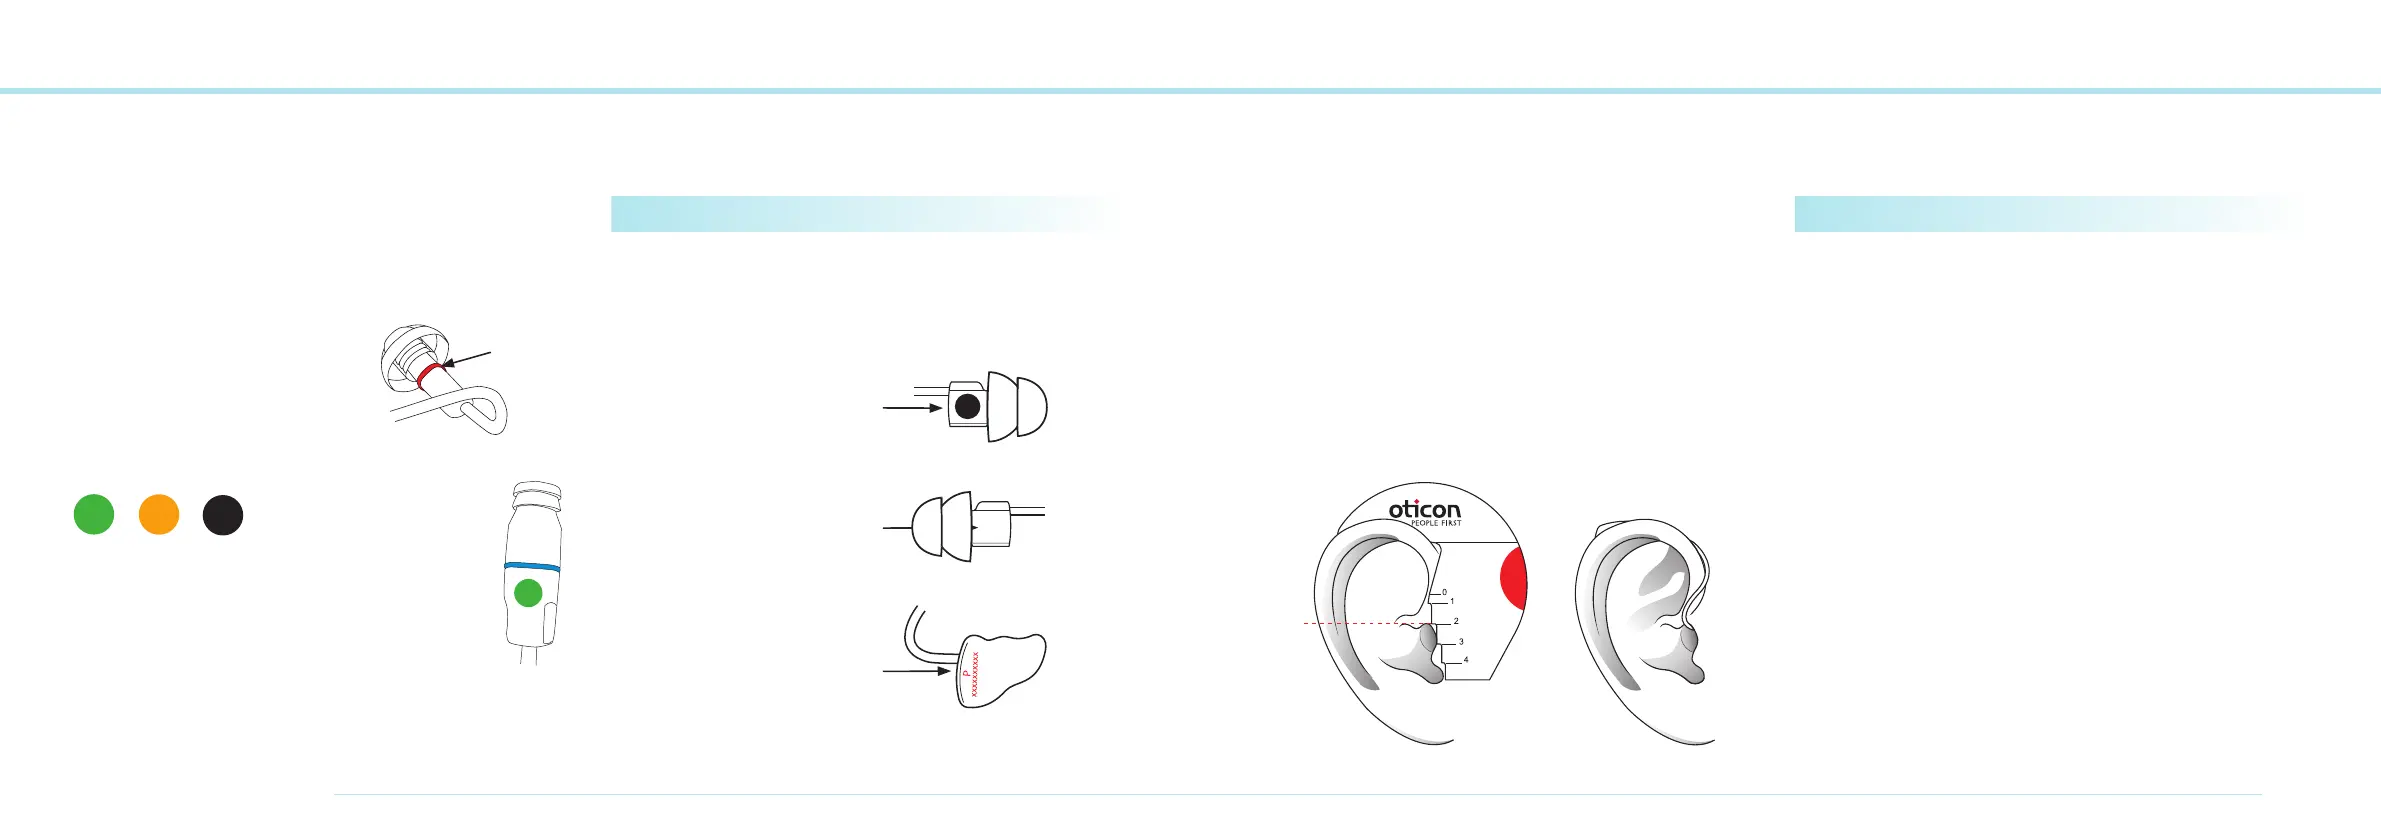
Receiver markings
Power:
Where to find Receiver markings
The Receiver has a small blue/red band to indicate which
ear the device is programmed for.
Receiver type
The Receiver length is marked as
shown 1, 2, 3, 4, or 5.
The power specifications is shown
by a colored circle and S, M or P.
The power specification is selected in Genie
in the Selection Step. When the mini RITE or
Rite is selected, a pull down menu appears so
the fitter can assign the proper Receiver to
the instrument.
Power Receivers are marked with a black circle and a white P.
The L/R markings are on the other side. These markings are
visible when the Adapter is attached.
L (blue)/R (red)
marking
Power marking
Size and L/R marking
Power Custom Mold is marked
P and includes serial number
2R
S
M
P
Measuring the ear for correct
Receiver length
When fitting a NON Power Receiver the correct measurement
corresponds to the top of the ear canal as shown using the
measuring tool. The measurement is the same for all domes
and non power custom earpieces.
The goal is for the Receiver to sit comfortably and be
hidden in the ear canal, and for the wire to be flush with
the skin.
Power Custom Mold
When fitting a Power Receiver with a Power Custom Mold,
(Power Molds) select the next size up as the Receiver fits more
centered in the ear canal.
For example if a # 2 Receiver is measured order a # 3.
For Power Domes measure the same way as for Standard
Receivers.
Power:
P
2
S
 Loading...