6 7
6.4.3 Removing/installing a seat plate (option)
For removal/installation within the scope of adjustments or retrofitting a new seat plate, complete the following
steps:
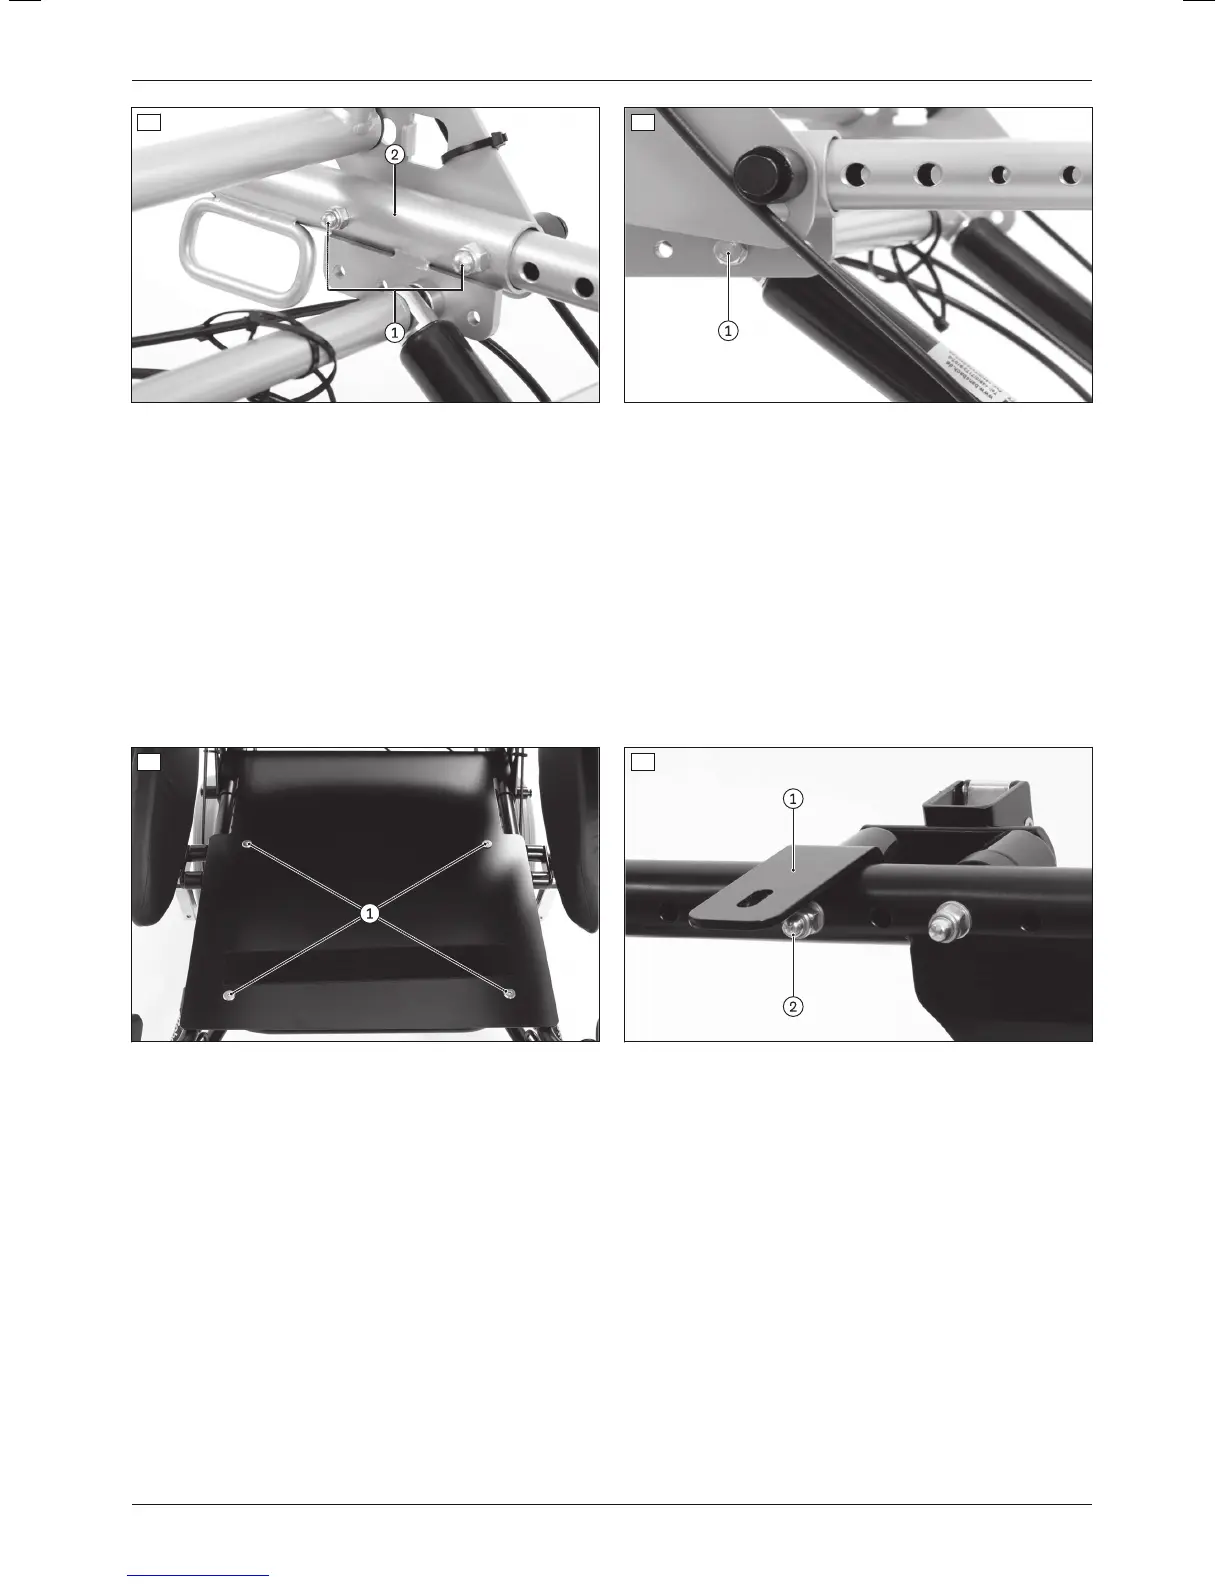
1) Loosen and remove all screw connections between the seat plate and seat plate supports (see fig.8, item1).
2) Remove/replace the seat plate.
3) If necessary: Remove/replace the seat plate supports (see fig.9, item1). Do this by loosening and removing
the screw connections on the seat plate supports (see fig.9, item2).
4) Install the seat plate supports on the seat bars (see fig.9, item1). Do this by inserting the screw connections
into the seat plate supports and firmly tightening them to a torque of 10Nm (see fig.9, item2).
5) Position the seat plate on the seat plate supports.
6) Insert all screw connections between the seat plate and the seat plate supports and firmly tighten them to a
torque of 10Nm (see fig.8, item1).
8 9
6.4.4 Installing other seating systems (option)
In principle, it is possible to install third-party seating systems on the product. In this case, liability rests with the
qualified personnel that completed the installation.
Installation by Ottobock Custom Fabrication is possible with a separate order.
The manufacturer assumes no liability for combinations with seating systems that have not been approved by the
manufacturer.
6.4.5 Installing the back guide for seating shells (option)
The back guide for seating shells is attached to the cross tube of the back frame. The guide plate is attached to the
back of the seating shell using 4 screws (see fig.10, item1) and connected to the back guide:
1) Loosen the clamping screw on the back guide (see fig.10, item2).
2) Insert the clamping plate into the guide plate, narrow side first (see fig.10, item3).
3) Turn the clamping plate 90° so that it engages sideways in the guide plate. (see fig.10, item3).
4) Firmly tighten the clamping screw on the back guide (see fig.10, item2).
14
Settings
Discovery