56
7.5 Chest and Shoulder Pad
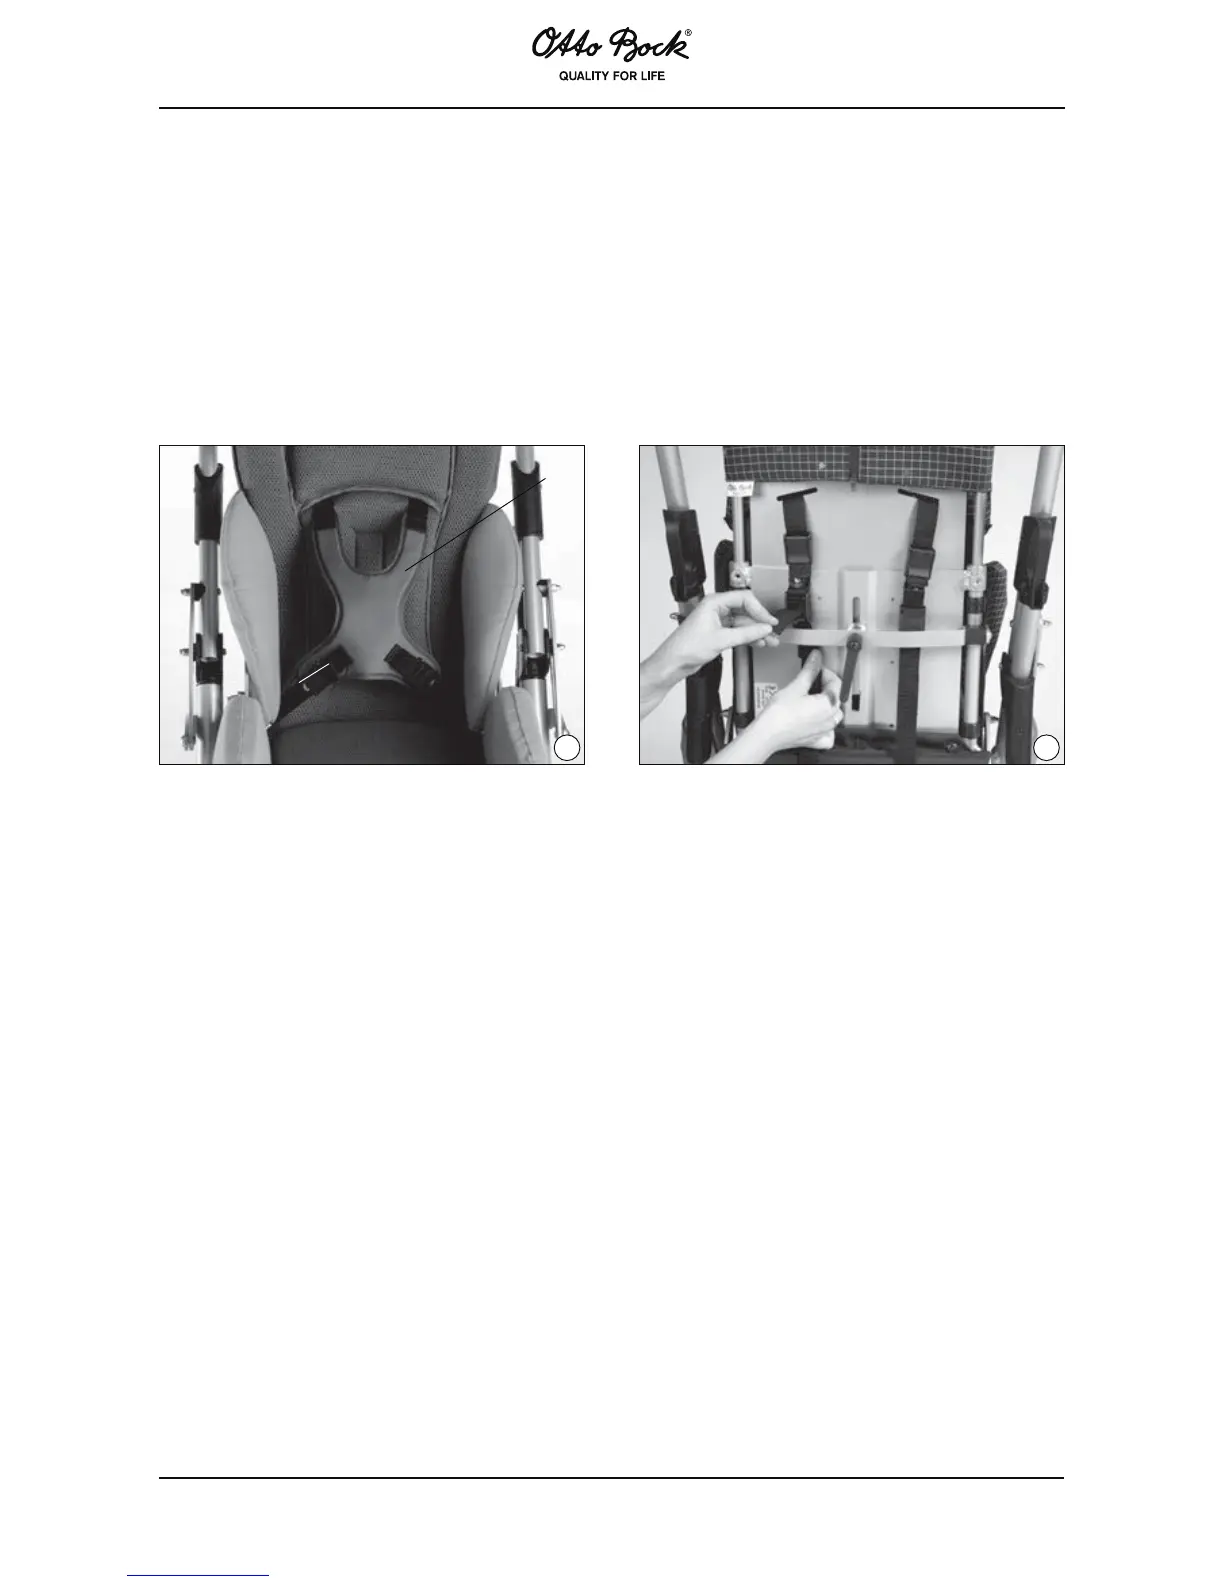
The chest and shoulder pad straps (Fig. 27, item A) are attached to the back plate with cam-
lock buckles and must be attached to the back insert before the back padding is attached to
the back plate. To do this, locate the slotted holes beneath the shoulder strap openings on the
back insert and use the knurled nuts to attach the cam-lock buckles (Fig. 28) to the outside of
the back insert. Make sure that the knurled nuts are on the outside.
Guide the shoulder straps for the chest and shoulder pad to the rear. Thread the lower straps
between seat and back to the rear, through the roll loop (Fig. 23). Thread the straps through the
open cam-lock buckles (Fig. 28) and clamp in position by closing the cam-lock buckles.
27 28
B
A
a) Applying the Chest and Shoulder Pad
Before seating the child in the Kimba Spring, release the four cam-lock buckles (Fig. 28) on the
back plate and slightly pull the chest and shoulder pad to the front. Then open the cam-lock
buckles at the lower end of the pad (Fig. 27, item B), pull out the straps, and position them on
the sides of the seat. Place the child in the Kimba Spring seat and pull the chest and shoulder
pad over the child’s head onto his or her chest. Next, thread the straps into the lower cam-lock
buckles of the pad (Fig. 27, item B) all the way to the stop (rivet) and close the buckles.
Then tighten the lower straps from behind (making sure that the chest and shoulder pad is posi-
tioned symmetrically on the pelvis) and close the buckles on the lower straps. Finally, tighten the
upper straps on the backside of the seat and close the buckles on the upper straps.
To ensure the correct fit, make sure that the straps are not touching the child and that the rein-
forced edge of the pad is not in contact with the strap guide slot.
The pad will provide the best upper-body support when the strap guide slot is approx. 2-3 cm
(0.8-1.18 in) above the child’s shoulder. If necessary, readjust the back insert accordingly.