Things to consider if you are planning to “do-it-yourself.”
Whether you are replacing an existing garage door operator or installing an operator in your garage for
the first time, there are some pre-installation issues which need to be addressed.They are as follows:
The Overhead Door Corporation recommends that you read and fully understand all infor-
mation and instructions contained herein before choosing a “Do-It-Yourself ” installation.
A
ny questions should be directed to the Overhead Door Corporation or an authorized Overhead
Door Dealer.
6
To avoid damage to your door and/or
operator, make sure you disable any door locks
prior to installing your operator
.
2
PRE-INSTALLATION CHECK LIST
FOR HELP—1-800-929.3667 OR OVERHEADDOOR.COM
1
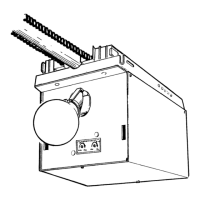
Check your ceiling where the power
head of your new unit will be mounted. Plan
ho
w you will be mounting the power head. It is pos-
sible that ceiling joists may not be in the exact posi-
tion needed with respect to the garage door opera-
tor. In any case, it may be necessary to add an addi-
tional bracket and
fasteners (not included with your
new door operator kit).
2
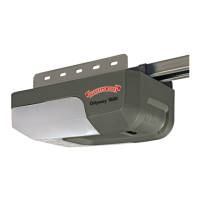
Check the wall directly above the garage
door
. The door operator’s header bracket must
be securely fastened to this wall. Insure that the
structure will provide a strong mounting location.
3
Check to see if the mounting location
for the Safe-T-Beam
®
System (STB) is clear
from obstruction and has a wood sur-
face a
vailable for attaching the STB brackets
. The
brackets may also be attached to concrete if neces-
sary but extra tools and special fasteners (not sup-
plied) will be required.
NOTE: 1-1/2" “STB”
bracket adapters are available through your local
O
verhead Door Dealer.
4
Is your garage door made of
light-weight steel, aluminum, fiberglass or
glass panels
? Additional support bracing must be
added to these type doors. If this is the case, please
contact the door distributor or manufacturer so
that they can furnish you with a “bracing kit.”
7
Insure that your door is properly balanced
and moving freely. SEE WARNING BELOW.
If your door sticks, binds, or is out of
balance, have it adjusted by a professional. Door
springs, cables, pulleys, brackets and associated
hardware are under extreme tension and
can cause serious injury or death.
WARNING
(
The issue numbers below refer to the circled numbers in the illustrations on page 3.
)
8
(NOT SHOWN) If your garage does not have
a separate entry door, you might want to consider
an emergency r
elease kit
(
GER-2
)
for installation on
your garage door. See page 30.
DO NOT USE EXTENSION CORD! Extension
cords can cause dangerous overheating con-
ditions.
DO NOT USE PORTABLE GENERATOR! This
product is designed to operate on standard
house current. Do not use alternate power
supplies.
WARNING
5
You need a 110-120 Volt power supply
available
. If you plan to plug the unit into a
standard electrical outlet, is one available? The outlet
should be no more than about 3 feet from the power
head once it is mounted. (The cord is 4 ft. in length.) SEE
WARNING BELOW.
 Loading...