10400589-001 ©2008-14 Overland Storage, Inc. 73
SnapServer / GuardianOS 7.6 Administrator’s Guide 4 - Network Settings
5. If you selected Simple as the bind type, complete the two new options (
Bind DN
and
Bind
Password
).
6. Click
OK
to update the settings immediately.
If NIS is enabled, you are warned that existing quotas or ID mappings for NIS users will
be applied automatically to LDAP users and groups that have the same UID or GID.
7. Click
Enable LDAP
to complete the process.
Configuring NIS
NOTE: Unless UID/GID assignments are properly handled, NIS users and groups may fail to display
properly. For guidelines on integrating compatible SnapServer UIDs, see User and Group ID
Assignments in Chapter 7.
NIS uniquely identifies users by UID, not user name, and although it is possible to have
duplicate user names, Overland Storage does not support that configuration. To configure NIS
on your SnapServer:
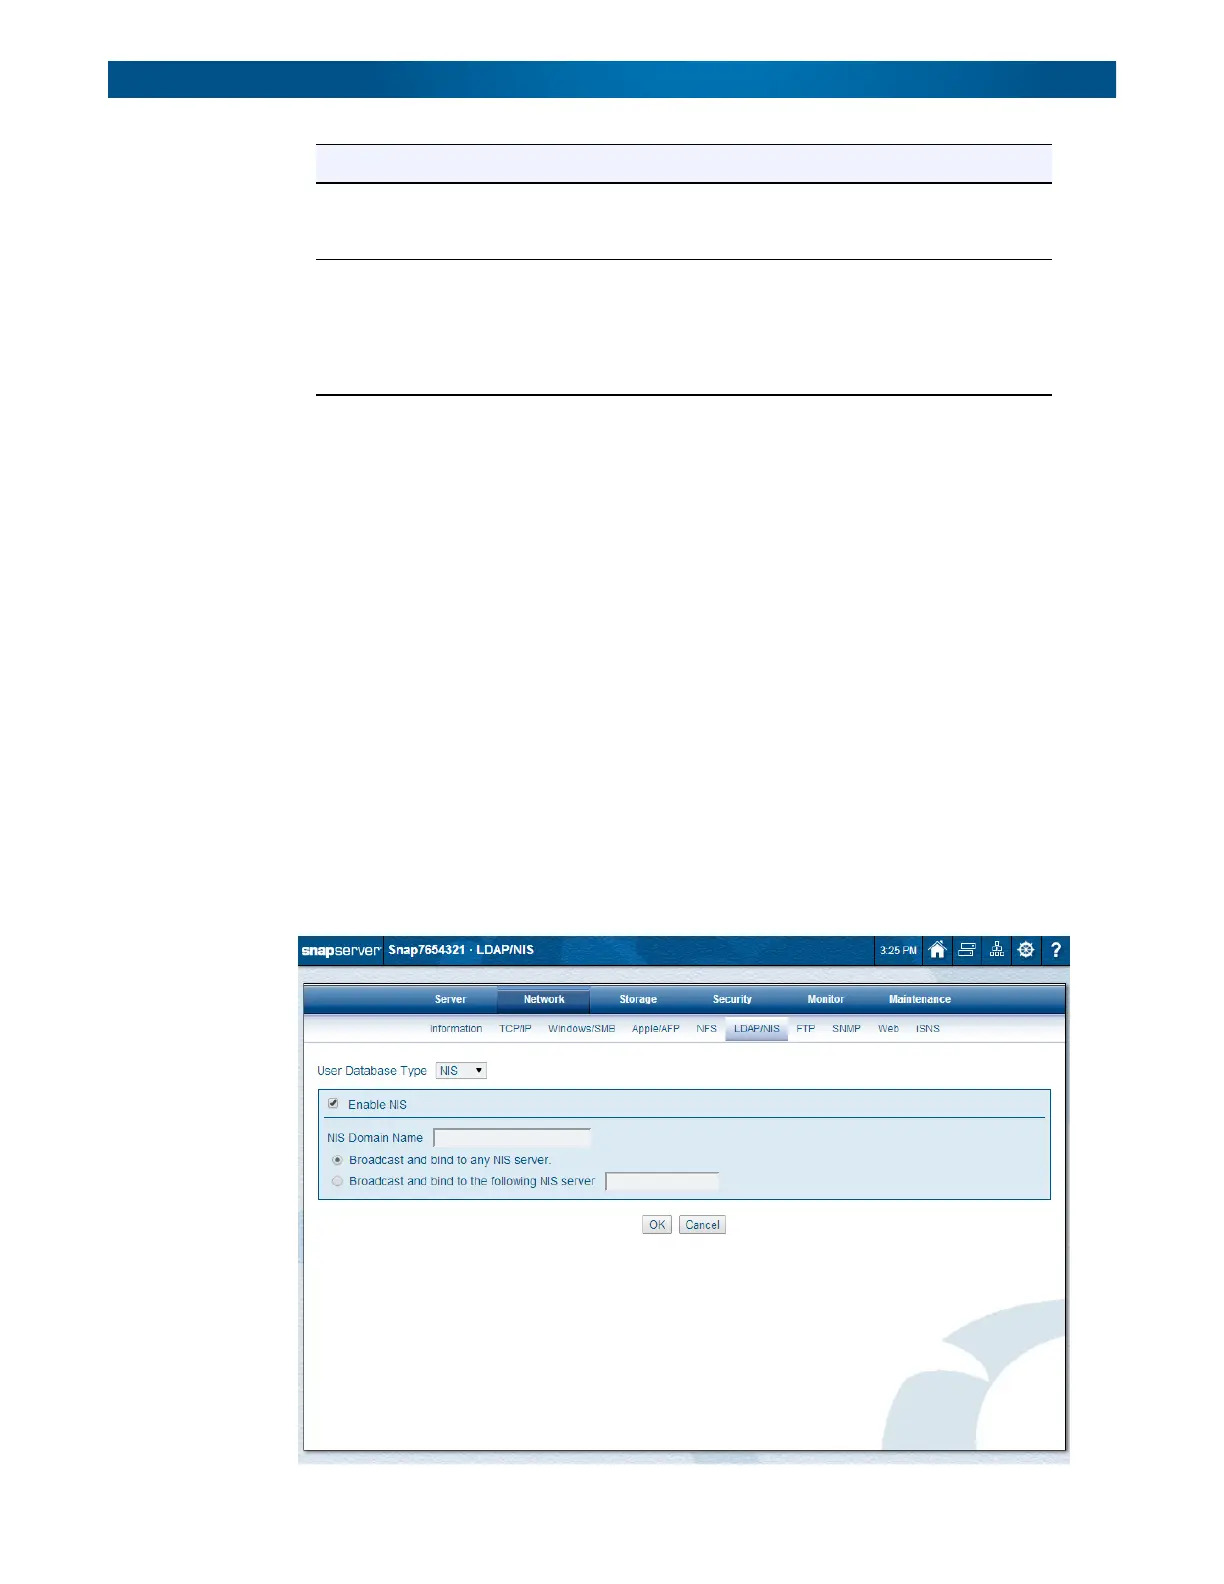
1. Go to
Network > LDAP/NIS
.
2. Verify
NIS
is displayed in the
User Database Type
drop-down list.
LDAP Base DN Click Search to locate the Base DN on the LDAP server, or enter the
Base DN in LDAP syntax such as:
cn=accounts,dc=mydir,dc=mydomain,dc=com.
LDAP Bind Type From the drop-down list, select the LDAP bind type:
• Anonymous
•Simple
If Simple is selected, two new fields are shown: Bind DN and Bind
Password.
Options Description
 Loading...