S3L-24P Layer 3 Lite Managed Switch Hardware Installation Guide
6
Hardware installation
Installation guidelines
This section will discuss the hardware installation guidelines that administrators must follow in order to
properly and safely install this switch into the appropriate environment.
Please read through the Safety Instructions chapter before starting any installation discussed in this
chapter.
Installation into a rack
This switch can be mounted in a standard 19"(1U) rack using the provided mounting brackets. The following
section will explain how to install the rack-mount brackets onto the switch and then mount the switch into a
standard 1U rack-mount unit.
The following parts will be used to install the switch into a rack-mount unit:
• One pair of either frontal or rear rack-mount brackets.
• Eight Phillips-head frontal or rear rack-mount bracket screws.
Additional equipment needed to install the switch into a rack-mount unit:
• One Phillips-head screwdriver. This screwdriver will be used for the rack-mount bracket screws
• One additional screwdriver. This screwdriver will be used for the rack-mount unit screws and its type
and size depends on the rack-mount unit screws being used.
• Four rack-mount unit screws. These screws will be used to attach the switch onto to the rack-mount
unit and are not included in the switch’s packaging as rack-mount units differ at each installation site.
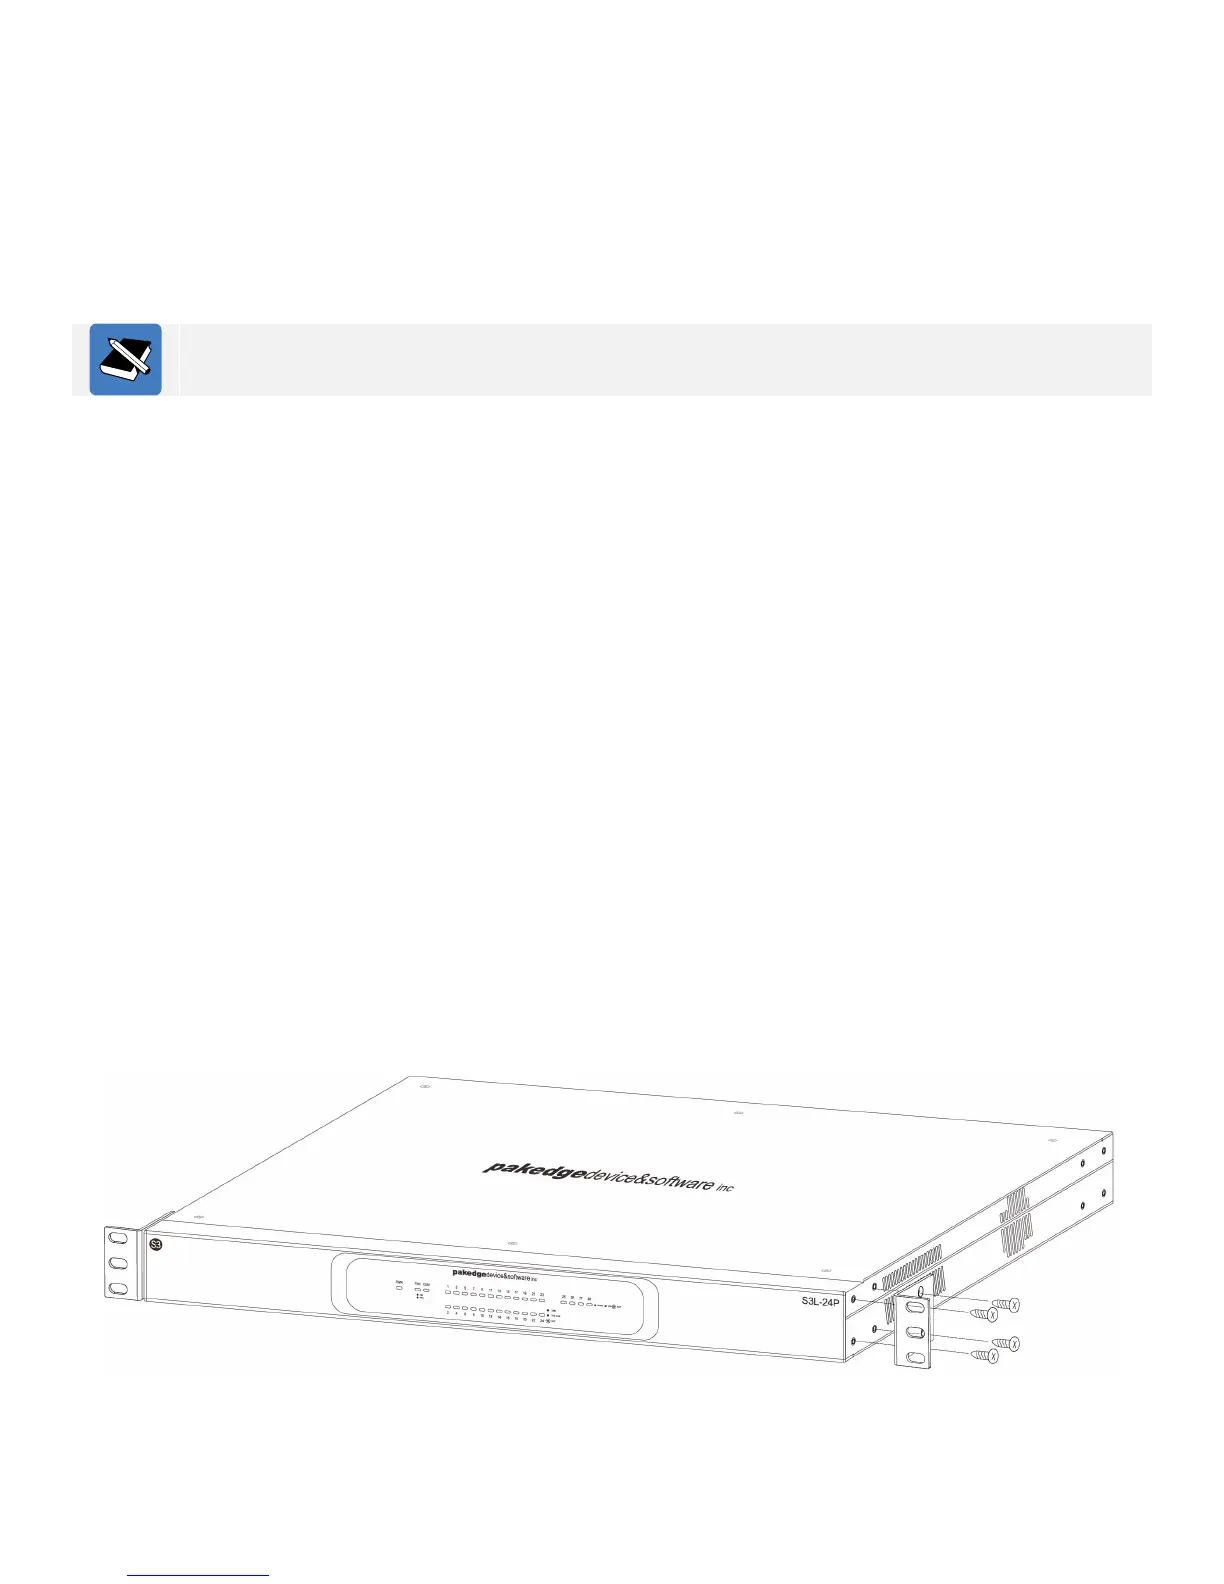
The figure below illustrates how to install the frontal rack-mount brackets onto the switch.
1. Place the switch on a flat horizontal surface.
2. Position the frontal rack-mount bracket over the screw holes on the side of the switch. The ears of
the bracket must be facing forward and outwards.
3. Use the frontal rack-mount screws and the Phillips-head screwdriver to fasten the bracket onto the
side of the switch.
4. Repeat steps 1 to 3 for the other frontal rack-mount bracket on the other side of the switch.
Figure 6: Front rack-mount bracket installation
 Loading...