PTV 35/44/55/66 Installation Manual
Rev. 1.1 55
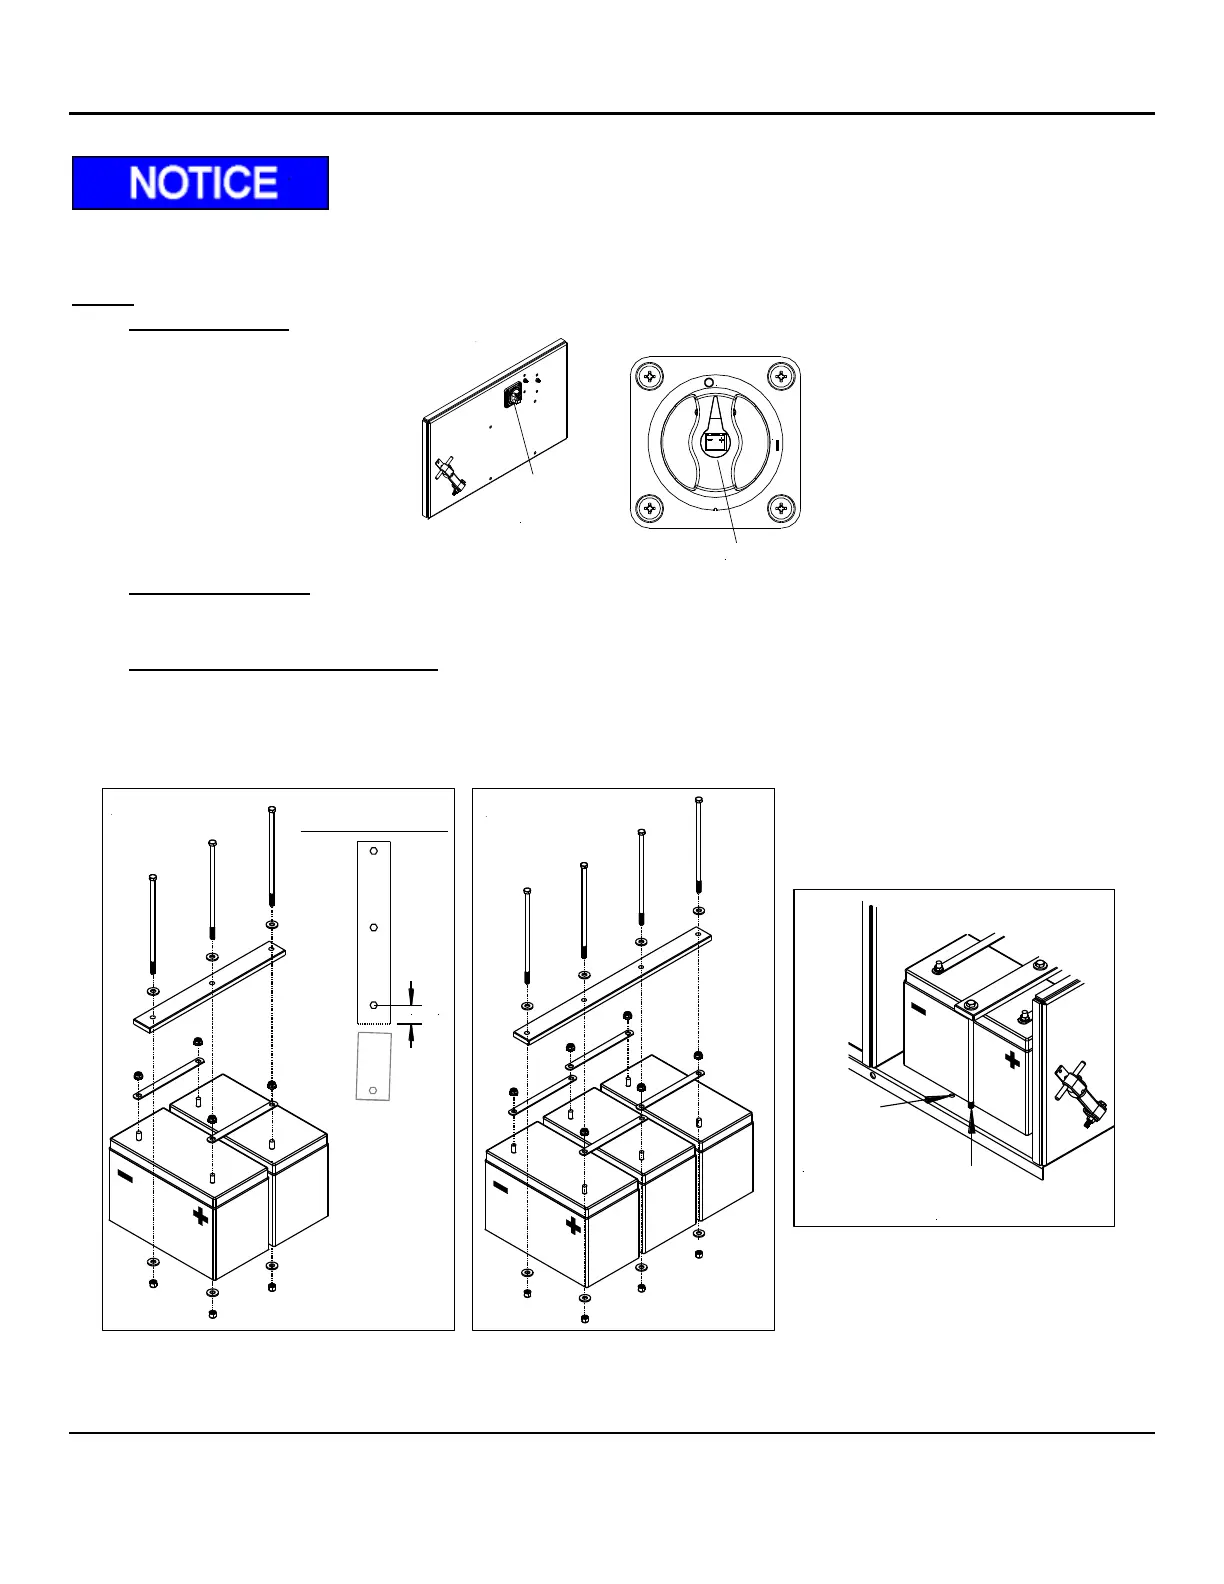
13.1 Auxiliary Batteries Installation
Three (3) batteries are always recommended for PTV55 & PTV66, for high cycle and max load
applications and for city deliveries with short duration between stops.
Steps:
1. ON/OFF Switch: Ensure the switch is set to OFF before installing any power and ground wires.
2. Battery Installation: Remove the hydraulic enclosure cover by removing the bolt under the handle. Install
batteries in hydraulic enclosure with positive terminals to the right side as shown. Secure the batteries to
the box with the battery strap kit.
3. Battery Strap Kit and Buss Bars: Secure the batteries to the enclosure with the battery strap kit provided.
The nylon strap is made for a 3-battery setup. When installing only 2-batteries, the nylon strap will
require trimming as shown.
Connect the three (3) batteries in parallel by installing two buss bars on the negative terminals and two
buss bars on the positive terminals. Use two (2) buss bars when connecting two batteries.