EasyManua.ls Logo

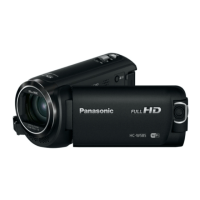
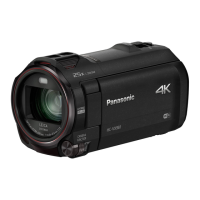
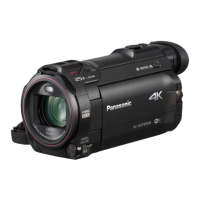
Panasonic HC-W580 User Manual

Panasonic HC-W580
281 pages
To Next Page IconTo Next Page
Page #1 background imageLoading...
Page #1 background image
Basic Owners Manual
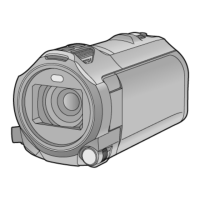
High Definition Video Camera
Model No.
HC-W580
HC-V380
SQT1139
until
2016/2/4
Please read these instructions carefully before using this product, and save this manual for future
use.
More detailed operating instructions are available in “Owner’s Manual
(PDF format)”. To read it, download it from the website.
https://eww.pavc.panasonic.co.jp/hdw/oi/W580/
Click the desired language.
If you have any questions, visit :
U.S.A. : http://shop.panasonic.com/support
Canada : www.panasonic.ca/english/support
Register online at http://shop.panasonic.com/support (U.S. customers only)
HC-W580&V380PP-SQT1139_mst.book 1 ペー 015年12月15日 火曜日 午前11時57分

Table of Contents

Other manuals for Panasonic HC-W580

Questions and Answers:

Panasonic HC-W580 Specifications

General IconGeneral
Sensor TypeBSI MOS Sensor
Optical Zoom50x
Recording MediaSD/SDHC/SDXC Memory Card
LCD Screen Size3.0 inch
Built-in Wi-FiYes
Intelligent Zoom90x
F ValueF1.8 (WIDE) / F4.2 (TELE)
Recording FormatAVCHD, MP4
SpeakerDynamic type
NFCNo
LCD Screen Resolution460, 800 dots
Touch ScreenYes
Built-in FlashNo
Sensor Size1/5.8 inch
Image StabilizationHYBRID O.I.S. +
Dimensions60 mm x 62 mm x 129 mm
Focal Length2.06 mm - 103 mm
Focal Length (35mm equivalent)28.0 – 1740 mm
LCD Monitor3.0-inch LCD (460K dots)
Video Recording Mode1920x1080
Audio Recording FormatDolby Digital (2ch)
Microphone2ch Stereo
HDMIYes (Micro HDMI)
USBUSB 2.0
Video Resolution1920 x 1080
Battery TypeLithium-ion
Digital Zoom150x/3000x (i.Zoom)

Summary

Safety Precautions

WARNING

Important safety warnings for reducing fire, electric shock, or product damage.

CAUTION

Safety cautions for reducing fire, electric shock, or product damage.

Certification and Compliance

Declaration of Conformity

Details of the manufacturer's compliance with regulations and standards.

IMPORTANT SAFETY INSTRUCTIONS

General Operating Instructions

Key instructions for safe and proper use of the apparatus.

AC adaptor

Concerning the battery

Information and precautions regarding the use and charging of the battery pack.

Cautions for use

Electromagnetic Interference Precautions

Guidance on avoiding interference from other electronic devices.

Cleaning Instructions

Proper methods for cleaning the unit to maintain its finish.

Extended Storage Precautions

Recommendations for storing the unit when not in use for extended periods.

About the recording format for recording motion pictures

AVCHD Format Details

Information on AVCHD format suitability and saving methods.

MP4 Format Details

Information on MP4 format suitability for PC editing.

iFrame Format Details

Information on iFrame format suitability for Mac editing.

Cards that you can use with this unit

SD Card Compatibility

Details on supported SD, SDHC, and SDXC memory cards.

Downloading the Owner’s Manual (PDF format)

Accessories

Power supply

Inserting/removing the battery

Step-by-step instructions for installing and removing the battery pack.

Charging the battery

Charging and recording time

Charging/Recording time

Information on charging and recording times based on battery and format.

Battery capacity indication

Explanation of the battery level indicator on the LCD monitor.

Recording to a card

Cards that you can use with this unit

Details on compatible SD card types and capacities.

About the Speed Class ratings for recording motion pictures

Guidance on SD Speed Class ratings required for motion picture recording.

Inserting/removing an SD card

Turning the unit on/off

Turning the unit on and off with the power button

Instructions for powering the unit on and off using the power button.

Turning the unit on and off with the LCD monitor

Convenient operation of turning the unit on/off by opening/closing the LCD monitor.

Selecting a mode

Switching this unit between Recording Mode and Playback Mode

How to switch between recording and playback modes using the button.

Switching this unit between Motion Picture Recording Mode and Still Picture Recording Mode

How to switch between motion and still picture recording modes via touch screen icon.

How to use the touch screen

About the Touch Menu

Setting date and time

Setting your home region for the first time

Recording motion pictures

Recording still pictures

Recording with the Sub Camera (Twin Camera) [W580]

Using the zoom

Zoom ratio during the Still Picture Recording Mode

Details on zoom capabilities and ratios for still picture recording.

Motion picture/Still picture playback

Watching Video/Pictures on your TV

Using the menu screen

Language selection

How to change the display language for the unit's screens.

Formatting

Procedure for formatting media, with a warning about data loss.

What you can do with the Wi-Fi® function

[Link to Cell]

Install the “Image App”

Instructions for installing the Panasonic Image App on your smartphone.

Preparations before using [Link to Cell]

Setting up a direct connection between this unit and a smartphone

Steps to establish a direct Wi-Fi connection with a smartphone.

Setting up a Wi-Fi connection via a wireless access point

Steps to connect the unit to a wireless access point.

Using [Link to Cell] with a direct connection

About [Link to Cell]

Screen display during remote operations

Illustrations of the recording and playback screens on the smartphone.

Wireless Twin/Multi-Camera function

Wireless Twin Camera function

Functionality for displaying one smartphone's image in a Sub Window.

Wireless Multi-Camera function

Functionality for displaying multiple smartphones' images in Sub Windows.

Troubleshooting

It is not a malfunction in following cases

Common sounds or visual phenomena that are not malfunctions.

Power Issues

Troubleshooting steps for power-related problems like unit not turning on.

Recording Issues

Image Quality Changes

Troubleshooting for color/brightness changes or horizontal bars in the image.

About copyright

Carefully observe copyright laws

Guidance on using recorded content for personal entertainment only.

Licenses and Trademarks

Information on software licenses and registered trademarks.

Specifications

AC adaptor

Optional accessories

About the Remote Pan Tilt Cradle

Description and usage of the optional Remote Pan Tilt Cradle accessory.

Limited Warranty (ONLY FOR U.S.A.)

Mail-In Service--Online Repair Request

Procedure for submitting a repair request online and shipping instructions.

Limited Warranty Limits And Exclusions

Conditions and exclusions not covered by the limited warranty.

Warranty (For Canadian Customers)

LIMITATIONS AND EXCLUSIONS

Warranty limitations and exclusions for Canadian customers.

Read this first

About the recording format for recording motion pictures

Explanation of AVCHD, MP4, and iFrame recording formats.

Indemnity about recorded content

Disclaimer regarding responsibility for recorded or edited content loss.

About Condensation

Information on condensation on lens/LCD and how to prevent/resolve it.

Cards that you can use with this unit

For the purposes of this owner’s manual

Wi-Fi® function

[Link to Cell] Functionality

Details on using Link to Cell for remote operations and SNS uploads.

[Baby Monitor] Functionality

Details on using Baby Monitor for remote baby monitoring.

[Home Cam] Functionality

Details on using Home Cam for remote confirmation of recording screen.

[DLNA Play] Functionality

Details on playing back scenes on DLNA-compatible devices via Wi-Fi.

[Copy] Functionality

Details on copying scenes and pictures to a PC via Wi-Fi.

[Live Cast] Functionality

Details on broadcasting motion pictures live via LUMIX CLUB and USTREAM.

[History] Functionality

Information on accessing Wi-Fi connection history for easy setup.

Wireless Twin/Multi-Camera function

Using a Smartphone as a Wireless Sub Camera

How to use a smartphone as a Sub Camera for Twin/Multi-Camera functions.

What you can do with a PC

HD Writer LE 3.1 Software

Overview of functions and data types supported by HD Writer LE 3.1.

Names and Functions of Main Parts

Turning the unit on/off

Turning the unit on and off with the power button

Instructions for powering the unit on and off using the power button.

Turning the unit on and off with the LCD monitor

Convenient operation of turning the unit on/off by opening/closing the LCD monitor.

Selecting a mode

Switching this unit between Recording Mode and Playback Mode

How to switch between recording and playback modes using the button.

Switching this unit between Motion Picture Recording Mode and Still Picture Recording Mode

How to switch between motion and still picture recording modes via touch screen icon.

Power supply

Inserting/removing the battery

Step-by-step instructions for installing and removing the battery pack.

Charging the battery

Charging and recording time

Charging/Recording time

Information on charging and recording times based on battery and format.

Battery capacity indication

Explanation of the battery level indicator on the LCD monitor.

Recording to a card

Cards that you can use with this unit

Details on compatible SD card types and capacities.

About the Speed Class ratings for recording motion pictures

Guidance on SD Speed Class ratings required for motion picture recording.

Inserting/removing an SD card

Turning the unit on/off

Turning the unit on and off with the power button

Instructions for powering the unit on and off using the power button.

Turning the unit on and off with the LCD monitor

Convenient operation of turning the unit on/off by opening/closing the LCD monitor.

Selecting a mode

Switching this unit between Recording Mode and Playback Mode

How to switch between recording and playback modes using the button.

Switching this unit between Motion Picture Recording Mode and Still Picture Recording Mode

How to switch between motion and still picture recording modes via touch screen icon.

How to use the touch screen

About the Touch Menu

Setting date and time

Before recording

Basic camera positioning

Guidelines for holding the unit steady and positioning for optimal recording.

Basic motion picture recording

Tips for steady motion picture recording and effective zoom usage.

Recording Yourself

Instructions for rotating the LCD monitor to record yourself.

Recording motion pictures

Recording still pictures

Recording still pictures in Motion Picture Recording Mode

Motion picture/Still picture playback

Change the thumbnail display

Speaker volume adjustment

Using the menu screen

Language selection

How to change the display language for the unit's screens.

Formatting

Procedure for formatting media, with a warning about data loss.

Using the Setup Menu

[SET WORLD TIME] Setup

Setting the world time by selecting home and travel destinations.

[ZOOM MODE] Settings

[REC FORMAT] Settings

[REC MODE] Settings

[FACE FRAMING] Settings

Prioritized face framing

How prioritized face framing works and is displayed.

[LEVEL GAUGE] Settings

To correct the tilt

Instructions on how to use the electronic level to correct unit tilt.

[AGS] Settings

[AUTO SLOW SHTR] Settings

[Digital Cinema Color] Settings

[SHOOTING GUIDE] Settings

[Wind Noise Canceler] Settings

[MIC SETUP] Settings

[MIC LEVEL] Settings

[PICTURE ADJUST] Settings

[PICTURE SIZE] Settings

Picture size and Maximum zoom ratio in Still Picture Recording Mode

How picture size affects zoom ratio and aspect ratio in still pictures.

[SHTR SOUND] Settings

Playback Operations

Skip Playback

How to skip to the start of a scene during playback.

Slow-motion Playback

How to perform slow-motion playback when paused.

Frame-by-frame Playback

How to play back frame by frame when paused.

Direct Playback

How to play back by touching or sliding the playback bar.

Creating still picture from motion picture

Highlight & Time Frame Index

Repeat Playback

Resuming the previous playback

Zooming in on a still picture during playback (Playback zoom)

Various playback functions

Playing back motion pictures/still pictures by date

How to play back scenes and still pictures recorded on the same day.

Highlight Playback

Creating and playing back highlight clips with effects and music.

Highlight Playback

Manual Edit

To select a scene

How to select a scene for manual editing.

To select part of a scene

How to select a specific part of a scene for editing.

To set the music

How to add music to the edited scene.

To save a manually-edited scene

How to save the edited scene as a new file.

Setting up the custom effect

Playing back with the settings changed

Scene setting

How to set scenes or dates for playback.

Checking the favorite scenes

To clear the favorite scenes from the thumbnail display

Playing back the favorite scenes

Priority settings

Playback time setting

Setting up the title

Entering text

Instructions for entering text for titles using the on-screen keyboard.

Saving the Highlight Playback

Manual Edit

To select a scene

To select part of a scene

How to select a specific part of a scene for editing.

To set the music

To save a manually-edited scene

Baby Calendar

When registering for the first time

Steps for registering a baby's birthday and name for the first time.

Baby Calendar

Check the Baby Calendar

How to check the baby's age in months and navigate through it.

To return to the normal thumbnail display

How to switch back to the standard thumbnail view.

Changing the playback settings and playing back the slide show

To change/add a baby’s registered details

How to modify or add registered baby details.

To delete a baby’s registered details

How to delete registered baby information.

Changing the playback settings and playing back the slide show

Playing back still pictures recorded in Stop Motion Animation Assist Mode as a slide show

To play back other recording groups

How to play back other recording groups using the date select icon.

Deleting scenes/still pictures

To delete the scene or still picture being played back

How to delete a scene or still picture during playback.

To delete scenes or still pictures from the thumbnail display

How to delete scenes or still pictures from the thumbnail view.

Deleting part of a scene (AVCHD/Backup for Twin Camera)

To complete editing

Steps to finalize scene deletion.

Dividing a scene (AVCHD/Backup for Twin Camera)

To delete all the divided points

Procedure to cancel all divided points.

Dividing a scene to partially delete (MP4/iFrame)

To complete editing

Steps to finalize scene division and deletion.

Protecting scenes/still pictures

Convert to MP4

To stop converting to MP4 halfway

How to cancel the MP4 conversion process.

To exit the MP4 conversion

How to stop the MP4 conversion process.

Watching Video/Pictures on your TV

Connect this unit to a TV.

Instructions for connecting the unit to a TV using HDMI or composite cables.

Playback using VIERA Link

What is the VIERA Link (HDAVI Control™)?

Explanation of VIERA Link functionality for Panasonic TVs.

Connect this unit to a Panasonic TV compatible with VIERA Link with an HDMI mini cable.

Steps for connecting the unit to a VIERA Link compatible TV.

Copying/playing back with a USB HDD

Preparing for copying/playing back

Prerequisites and checks before copying or playing back via USB HDD.

Points to check before copying

Important considerations before starting data copying to a USB HDD.

Formatting

Procedure for formatting the USB HDD, with warnings about data loss.

Simple copy

Copy selected files

When you stop copying halfway

Instructions on how to cancel the file copying process midway.

Playing back the USB HDD

To terminate the connection between this unit and the USB HDD

How to safely disconnect the unit from the USB HDD.

Dubbing with a Blu-ray disc recorder, video device, etc.

Check before dubbing

Ensuring compatibility of equipment used for dubbing.

Dubbing in high-definition picture quality

To dub using equipment with an SD card slot

Method for dubbing using an SD card.

To dub using equipment with a USB terminal

Method for dubbing using a USB cable connection.

Dubbing in standard picture quality

Using the Eye-Fi™ card

Using Eye-Fi direct mode

Transferring files directly from Eye-Fi card to smartphone.

Selecting files to transfer

How to select specific files for transfer.

Wi-Fi® function

Use this unit as a wireless LAN device

Precautions when using the unit as a wireless LAN device.

Do not connect to the wireless network you are not authorized to use

Warning against connecting to unauthorized wireless networks.

Before use

Prerequisites for using Wi-Fi functions, including access points.

[Link to Cell]

Caution

Important notice regarding privacy and portrait rights when using Link to Cell.

Preparations before using [Link to Cell]

Setting up a direct Wi-Fi connection between this unit and a smartphone

Steps to establish a direct Wi-Fi connection with a smartphone.

Setting up a Wi-Fi connection via a wireless access point

Steps to connect the unit to a wireless access point.

Using [Link to Cell] with a direct connection

When [Direct Connection Password] is set to [ON]

Using [Link to Cell] with a wireless access point connection

About [Link to Cell]

Screen display during remote operations

Illustrations of the recording and playback screens on the smartphone.

Functions available for remote operations

In Recording Mode

List of functions available for remote operation in recording mode.

In Playback Mode

List of functions available for remote operation in playback mode.

[Baby Monitor]

Caution

Important notices for responsible use of the Baby Monitor feature.

Preparations before using [Baby Monitor]

Install the smartphone application “Image App” on your smartphone.

Instructions for installing the Panasonic Image App on your smartphone.

Set up a Wi-Fi connection between this unit and the wireless access point.

Steps to connect the unit to a wireless access point.

When the Wi-Fi connection is complete, follow the procedure in “Using [Baby Monitor]”.

Steps after Wi-Fi connection is established for using Baby Monitor.

Using [Baby Monitor]

Changing [Baby Monitor] settings

How to adjust settings like notification and sound detection.

[Home Cam]

Caution

Important notices regarding the function's intended use.

Preparations before using [Home Cam]

Install the smartphone application “Image App” on your smartphone.

Instructions for installing the Panasonic Image App on your smartphone.

Set up a Wi-Fi connection between this unit and the wireless access point.

Steps to connect the unit to a wireless access point.

When the Wi-Fi connection is complete, follow the procedure in “Using [Home Cam]”.

Steps after Wi-Fi connection is established for using Home Cam.

Using [Home Cam]

Changing the home monitor settings of this unit

How to modify settings for the home monitoring function.

When configuring the home monitor settings using QR code

When using the home monitor function for the second time or later

Scanning a QR code to set up a connection

When connecting a smartphone to this unit as a Wireless Sub Camera for the first time (To use the Wireless Twin Camera function)

Selecting this unit’s SSID on the smartphone to set up a connection

When [Direct Connection Password] is set to [OFF]

Steps for connecting when direct connection password is set to OFF.

When [Direct Connection Password] is set to [ON]

Steps for connecting when direct connection password is set to ON.

Recording with a Wireless Sub Camera (Wireless Twin/Multi-Camera)

Connection status icons for a Wireless Sub Camera

Icons indicating Wi-Fi connection status and signal strength.

Displaying or hiding the Sub Window

How to show or hide the Sub Window during operation.

When the Wi-Fi signal weakens

Displaying or hiding the Sub Window

Changing the Wireless Twin Camera settings

Changing the display position of the Sub Window

How to adjust the position of the Sub Window display.

Changing the color of the Sub Window frame

How to change the color of the Sub Window frame.

Changing the Wireless Multi-Camera settings

Changing the display position of the Sub Window

How to adjust the position of the Sub Window display.

Changing the color of the Sub Window frame

How to change the color of the Sub Window frame.

Switching the image in the Sub Window

Swapping the images between the Sub Windows

[Live Cast]

Caution

Important notices regarding privacy and portrait rights when using Live Cast.

Preparations before using [Live Cast]

Acquire a USTREAM ID/Password/APP.

Steps to get a USTREAM account and application.

Acquire a “LUMIX CLUB” Login ID/Password.

Steps to acquire a LUMIX CLUB account.

Set up a Wi-Fi connection between this unit and the wireless access point.

Steps to connect the unit to a wireless access point.

Broadcasting live

To send e-mails

How to send e-mails with broadcast information.

To start the live broadcast

Steps to initiate the live broadcast.

To stop the live broadcast

Steps to stop the live broadcast.

To exit the Live Cast Mode:

How to exit the Live Cast mode.

Configuring the live broadcast settings

To configure the e-mail delivery settings

To set the image quality

Install the “Image App”

About the “Image App”

Information about the Panasonic Image App.

Setting Up a Wi-Fi Connection

Wi-Fi connection methods

Overview of connecting via wireless access point or direct smartphone connection.

Connecting to a wireless access point

Steps to connect to a wireless access point.

Setting up a connection manually

Manual steps to connect to a wireless access point.

Connecting from the history

If the Wi-Fi connection cannot be established (Wireless Twin/Multi-Camera)

Cannot connect this unit to the smartphone.

Troubleshooting for connection failures between unit and smartphone.

The Sub Window image is interrupted.

Troubleshooting for interrupted Sub Window images due to weak Wi-Fi signal.

Messages

CHECK CARD.

Error message for incompatible or unstable SD cards.

THIS BATTERY CANNOT BE USED.

Error message for incompatible batteries or battery issues.

THIS EXTERNAL DRIVE CANNOT BE USED./PLEASE CHECK THE EXTERNAL DRIVE.

Error message for unrecognized external drives like USB HDDs.

Troubleshooting

It is not a malfunction in following cases

Common sounds or visual phenomena that are not malfunctions.

Power Issues

Troubleshooting steps for power-related problems like unit not turning on.

Recording

The unit arbitrarily stops recording.

Troubleshooting for unexpected recording stops.

Auto Focus function does not work.

Troubleshooting for Auto Focus failures.

Color balance of images is strange when recording in a place such as a gymnasium.

Troubleshooting for color balance issues in complex lighting.

Playback

Scenes/still pictures cannot be played back.

Troubleshooting for inability to play back scenes or still pictures.

Scenes cannot be deleted.

Troubleshooting for inability to delete scenes or still pictures.

With other products

Even when this unit is correctly connected to a TV, images or sounds are not output.

Troubleshooting for no image/sound output when connected to TV.

VIERA Link does not work.

Troubleshooting steps for VIERA Link connectivity issues.

With a PC

When connected by the USB cable, this unit is not detected by the PC.

Troubleshooting for PC not detecting the unit via USB cable.

Cannot see the PDF operating instructions for HD Writer LE 3.1.

Troubleshooting for issues viewing HD Writer LE 3.1 PDF instructions.

About the Wi-Fi function

Cannot connect to wireless access point or smartphone.

Troubleshooting for Wi-Fi connection issues.

Cannot operate from smartphone using [Link to Cell].

Troubleshooting for Link to Cell remote operation problems.

Cannot use [DLNA Play].

Troubleshooting for DLNA Play connectivity issues.

Others

If the SD card is inserted in this unit, it is not recognized.

Troubleshooting for SD card recognition issues.

Cautions for use

Electromagnetic Interference Precautions

Guidance on avoiding interference from other electronic devices.

Cleaning Instructions

Proper methods for cleaning the unit to maintain its finish.

About the battery

Be sure to detach the battery after use.

Importance of detaching the battery to prevent over-discharge.

About status indicator during charging

About the SD card

When disposing of or giving away the SD card, note that:

Important notes regarding SD card disposal and data deletion.

About personal information

Disclaimer

Statement on liability for alteration or loss of personal information.

When requesting a repair, transferring to another party, or disposing.

Steps to protect personal information before repairs or disposal.

About copyright

Carefully observe copyright laws

Guidance on using recorded content for personal entertainment only.

Licenses and Trademarks

Information on software licenses and registered trademarks.

Recording modes/approximate recordable time

Approximate number of recordable pictures

Optional accessories

About the Remote Pan Tilt Cradle

Description and usage of the optional Remote Pan Tilt Cradle accessory.

Connecting the Remote Pan Tilt Cradle to this unit

Instructions for connecting the Remote Pan Tilt Cradle to the camera.

Using the Remote Pan Tilt Cradle

Mode Selection

Selection of modes like Party Scene, Moving Object, Manual, Preset Positions.

Setting up [Preset Positions]

Registering and moving to specific positions using the cradle.

Using Cyclic Mode

Rearranging the Cyclic Mode sequence

Deleting positions registered to the position buttons

Remote Pan Tilt Cradle settings

[Panning Angle] Settings

Setting the left/right pan range for the cradle.

[Tilt Angle] Settings

Setting the up/down tilt range for the cradle.

[Tilt Speed] Settings

Setting the up/down operation speed of the cradle.

[Firmware Upgrade]

Instructions for updating the cradle's firmware.

Related product manuals