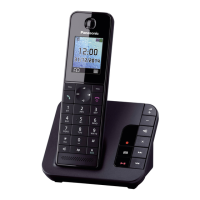
Do you have a question about the Panasonic KX-TGH262B and is the answer not in the manual?
Information for experienced technicians, safety precautions, and lead-free solder handling.
Details DECT 6.0, Bluetooth standards, bit rate, modulation, and RF power.
General description of the system and detailed functions of the BBIC.
Details the handset's power supply and reset signal mechanisms.
Instructions to access Base Unit engineering mode and adjust parameters.
Instructions to access Handset engineering mode and adjust parameters.
Diagram to diagnose and resolve common product issues based on symptom.
Step-by-step guide to verify power supply and clock signals for the Base Unit.
Procedure to check battery voltage and reset signals for the Handset.
Troubleshooting steps for problems with playing back recorded messages on the Base Unit.
Steps to verify battery charging status for Base Unit, Handset, and Charger.
Method to identify defective RF parts by testing handset-base unit registration.
Flowchart outlining the steps for checking RF link, frequency, transmission, and range.
Tables detailing procedures for confirming RF link and crystal frequency.
Tables detailing procedures for verifying RF transmission power and range.
Checks the base unit for bell ring and Caller ID data.
Procedure to access Bluetooth settings and pair a headset.
Verifies Bluetooth voice transmission, reception, and phonebook transfer.
Steps to remove the base unit's outer cabinet and internal covers.
Procedure for removing the main and operational PC boards from the base unit.
Instructions for opening the handset casing and removing its covers.
Steps for removing handset components like charge terminals and the main PC board.
Steps for preparing the LCD, including tape removal and alignment.
Instructions for correctly connecting the handset LCD connector to the main PCB.
Lists essential equipment for measurements, including DMM, oscilloscope, and frequency counter.
Prepares JIG setup and details base unit cable connections.
Lists commands for reading/writing EEPROM and setting operational modes.
Shows the bottom view of the Base Unit PC board with test points marked.
Illustrates the handset PC board with locations for measurement equipment.
Procedure for downloading programming and adjusted data to BBIC and EEPROM.
Steps for adjusting the base unit's crystal frequency and system clock.
Procedure for downloading programming and adjusted data to handset ICs.
Steps for adjusting the handset's crystal frequency and system clock.
Emphasizes nozzle selection and temperature control to prevent damage.
Step-by-step guide for removing an LLP IC using a hot air tool.
Steps for placing and soldering an LLP IC onto the PC board.
Lists necessary materials like solder, iron, and flux for flat IC replacement.
Method for cutting pins and removing the flat package IC from the board.
Steps for temporarily fixing and soldering the initial pins of a flat IC.
Technique for removing excess solder along pins after resoldering.
Lists ICs, transistors, diodes, resistors, and capacitors on the base unit main PC board.
| Color | black |
|---|---|
| Speakerphone | yes |
| Expandable | yes |
| Volume Control | yes |
| Intercom | yes |
| Record Time | 18 minutes |
| New Message Indicator | yes |
| Caller ID | yes |
| Call Waiting | yes |
| Answering System | yes |
| Flash Function | yes |
| Conference Call | yes |
| Caller ID Memory | 50 gigabytes |
| Handsets | yes |
| Expansion Base Stations | 1 |
| Expansion Handsets | 2, 6 |
| Backlit Keypad | yes |
| Keypad Location | handset |
| Bluetooth | yes |
| Remote Access | yes |
| Frequency | dect 6.0 digital |
| Depth | 4.2 inches |
|---|---|
| Height | 3.6 inches |
| Width | 3 inches |
| Net Weight | 0.269 ounces |