108
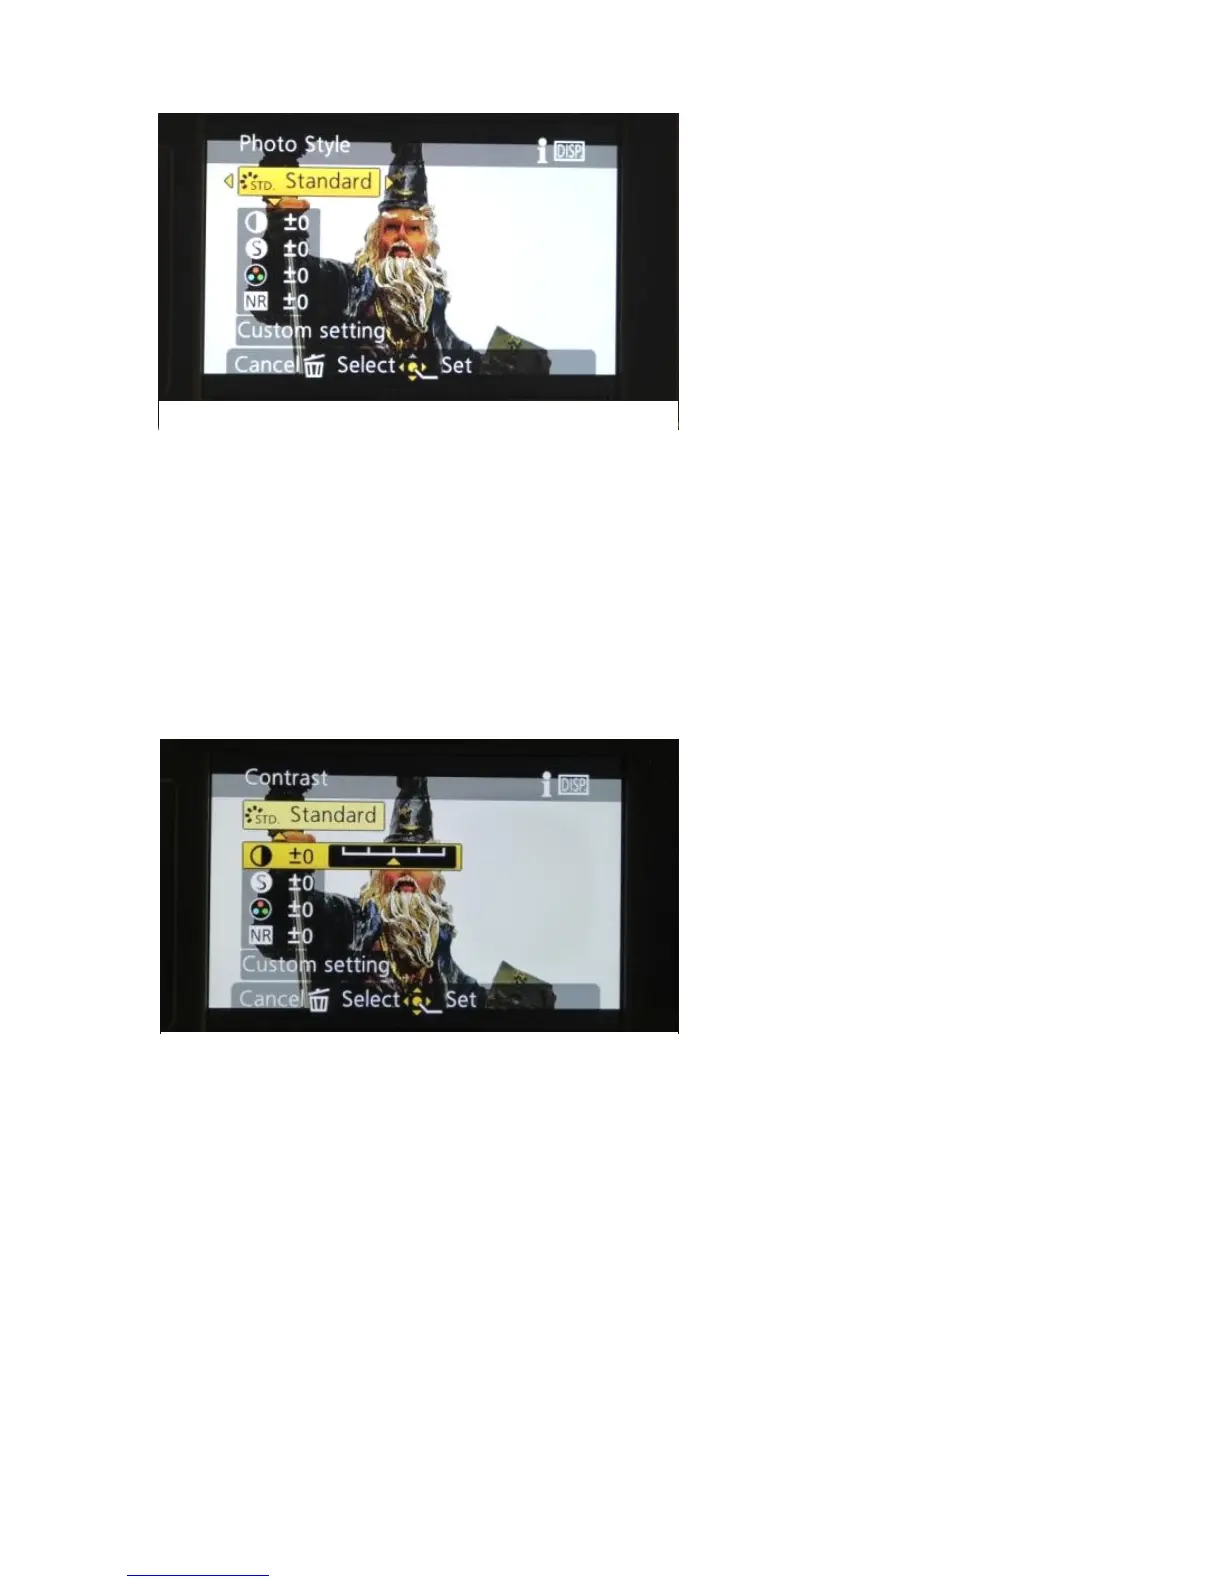
By selecting the photo style
option in the menu and
pressing the navigation key
to the right ► you will see
the first of the photo style
choices – Standard. Keep
pressing the navigation key
and you will cycle through
the other 6 options.
In the illustration above you can see the 4 parameters to which you may
make the adjustment. From the top: Contrast, Sharpness, Saturation and
Noise reduction.
If you use the navigation down key ▼ you will enter the adjustment for
the selected parameter as shown below.
The back control dial or the
left and right navigation
buttons can be used to
adjust the value.
The centre value is the
default setting. Go to the left
to reduce the control’s effect
or to the right to increase it.
These 4 parameters affect the image the same way in all of the 6 photo
styles except in the case of the Monochrome style where the Saturation
slider can be used to give a sepia effect if you set it below 0 or a blue tint
if you set it above 0. A very useful feature if you like to capture these
toned images.
After many, many, tests of using these photo styles I have adopted the
Standard photo style as my “shoot anything” photo style with the
following adjustment to the parameters.
Sharpness +1 and Noise reduction -2.
 Loading...