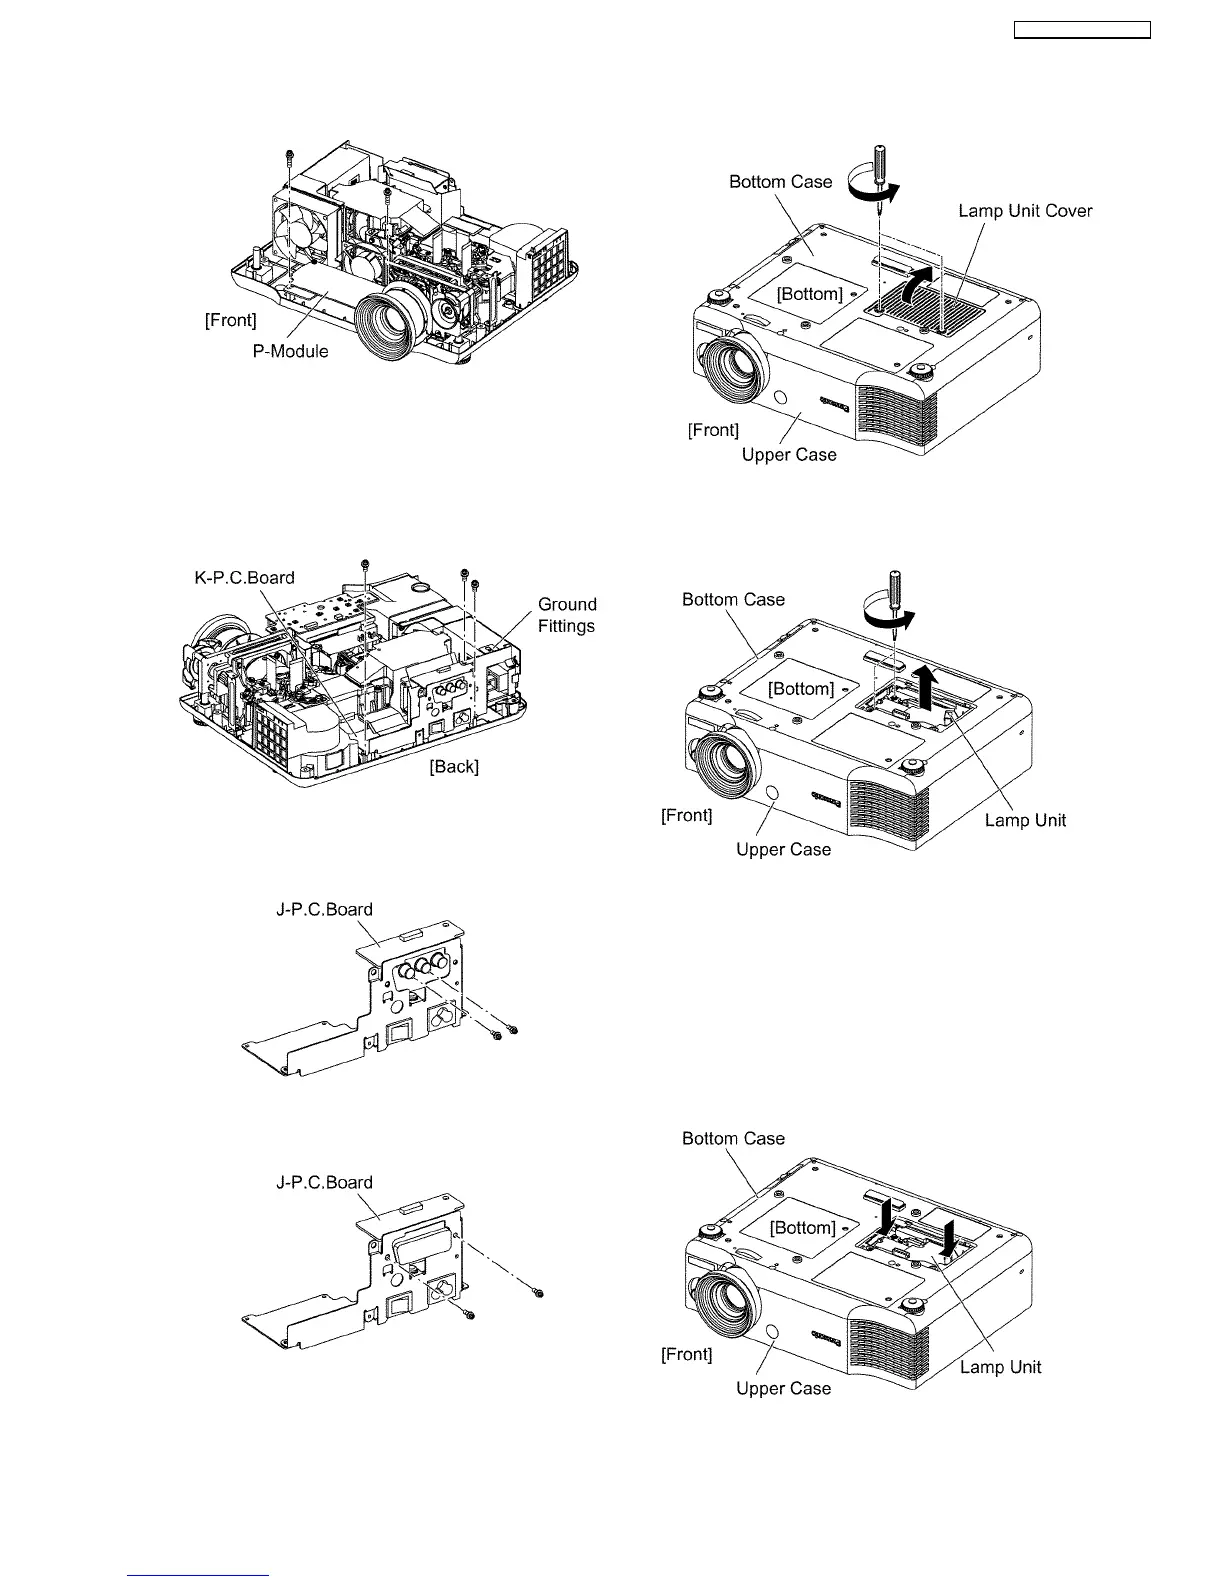
6.8. Removal of K-P.C.Board
1. Remove the A-P.C.Board block according to the steps 1
through 3 in the section 6.3. "Removal of A-P.C.Board".
2. Unscrew the 1 screw and remove the ground fittings.
3. Unscrew the 2 screws and remove the K-P.C.Board block.
4. Unscrew the 2 screws and remove the J-P.C.Board.
[For PT-AE900U]
[For PT-AE900E]
6.9. Removal of Lamp Unit
1. Turn the projector upside down.
2. Loosen the 2 screws until they idle and remove the lamp
unit cover.
3. Loosen the 2 screws fixing the lamp unit until they idle and
remove the lamp unit.
Note:
·
When installing the lamp unit (or a new one) in the
main unit, place it in a specified position and press
the connector side and the opposite side of the lamp
unit (arrow positions shown in the figure below), and
confirm the lamp unit is inserted securely.
Then, tighten the 2 screws fixing the lamp unit, and
attach the lamp unit cover.
17
PT-AE900U / PT-AE900E
 Loading...