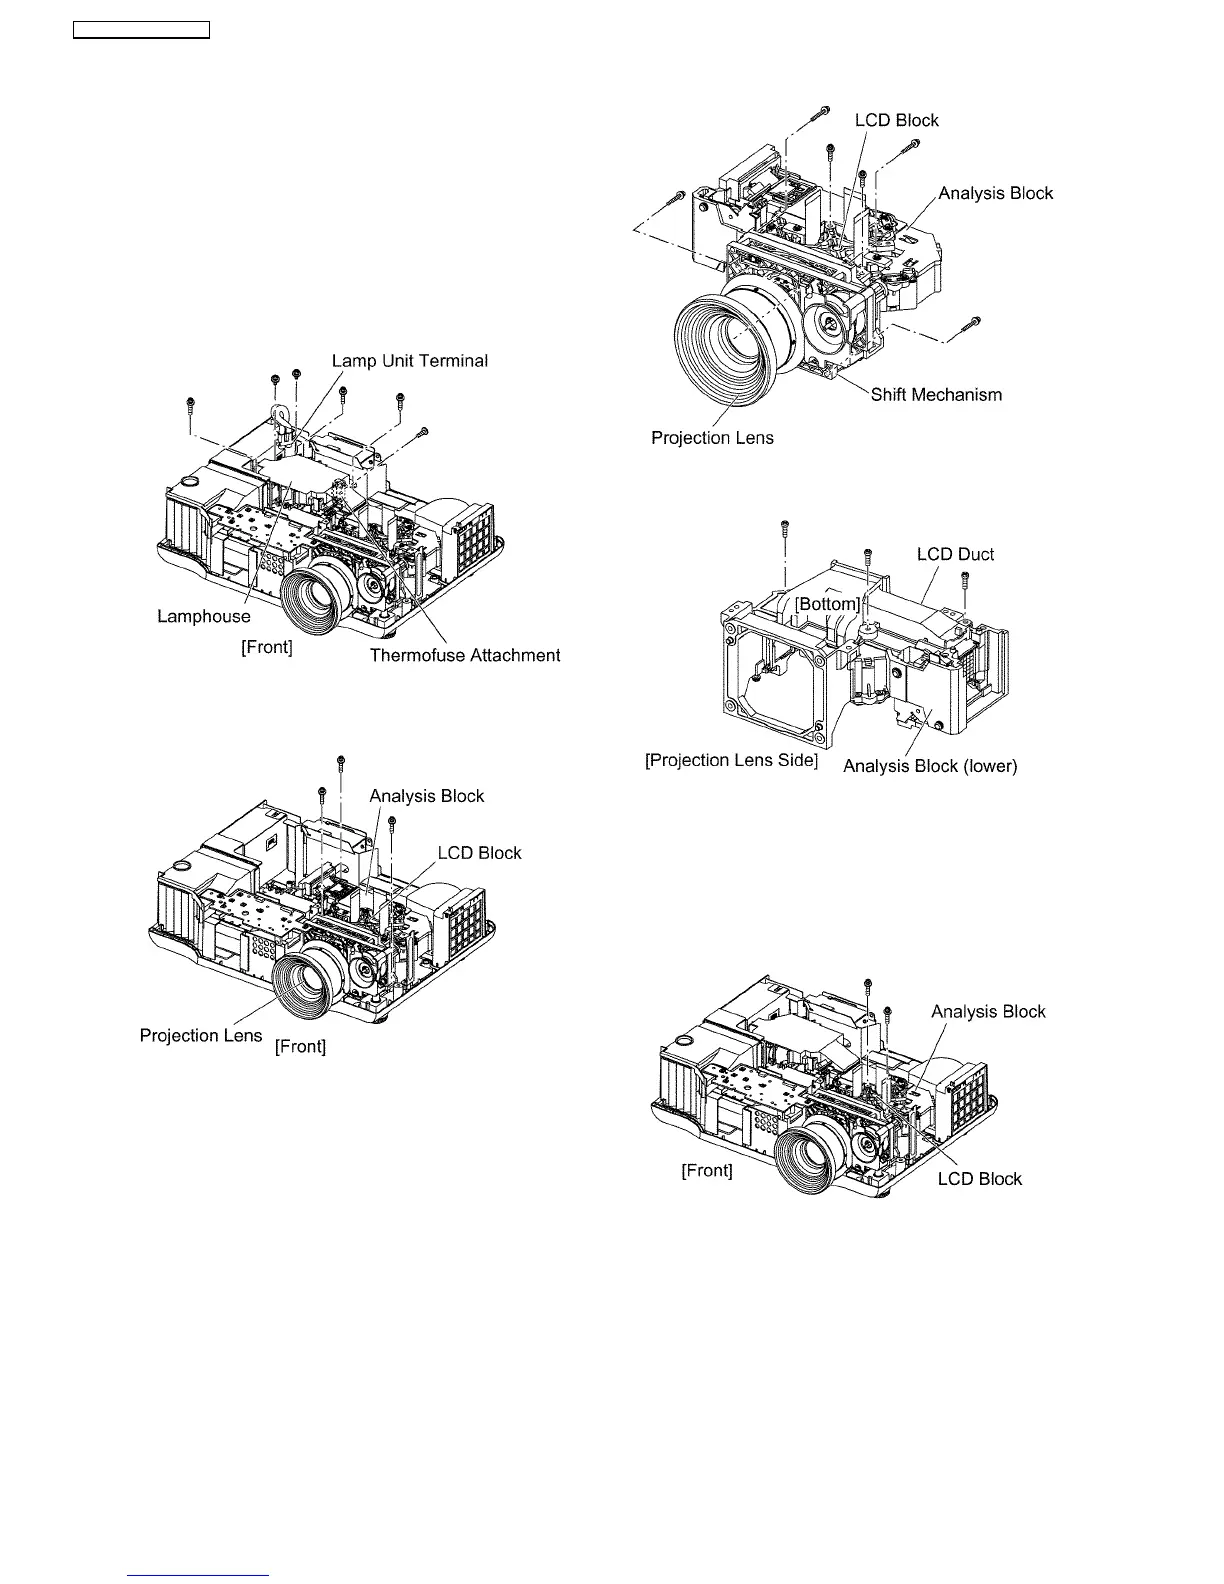
6.10. Removal of Analysis Block
1. Remove the lamp unit according to the section 6.9.
"Removal of Lamp Unit".
2. Remove the A-P.C.Board block according to the steps 1
through 3 in the section 6.3. "Removal of A-P.C.Board".
3. Unscrew the 2 screws and remove the lamp unit terminal.
4. Unscrew the 1 screw and remove the thermofuse
attachment.
5. Unscrew the 3 screws and remove the lamphouse.
6. Unscrew the 3 screws and remove the block of Analysis
Block, LCD Block and Projection Lens Block.
7. Unscrew the 2 screws and remove the LCD block.
8. Unscrew the 4 screws and remove the projection lens block
(with shift mechanism).
9. Unscrew the 3 screws and remove the LCD duct.
6.11. Removal of LCD Block
1. Remove the A-P.C.Board block according to the steps 1
through 3 in the section 6.3. "Removal of A-P.C.Board".
2. Unscrew the 2 screws and remove the LCD block.
6.12. Removal of Projection Lens
1. Remove the projection lens block according to the steps 1
through 8 in the section 6.10. "Removal of Analysis Block ".
2. Unscrew the 4 screws and separate the projection lens and
the shift mechanism.
18
PT-AE900U / PT-AE900E
 Loading...