EasyManua.ls Logo

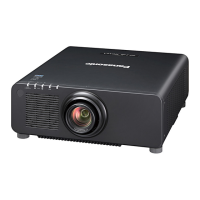
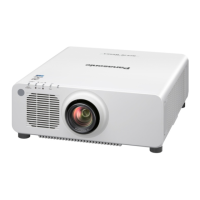
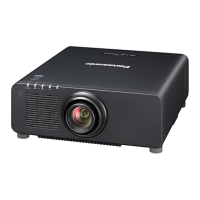
Panasonic PT-RZ690

Panasonic PT-RZ690
240 pages
To Next Page IconTo Next Page
Loading...
Thank you for purchasing this Panasonic product.
This manual is common to all the models regardless of sufxes of the Model No.
z
for Taiwan
B: Black model, the standard zoom lens supplied
z
for India
BD: Black model, the standard zoom lens supplied LBD: Black model, the lens sold separately
z
for Korea
B: Black model, the standard zoom lens supplied W: White model, the standard zoom lens supplied
z
for other countries or regions
B: Black model, the standard zoom lens supplied LB: Black model, the lens sold separately
W: White model, the standard zoom lens supplied LW: White model, the lens sold separately
Before operating this product, please read the instructions carefully and save this manual
for future use.
Before using this product, be sure to read “Read this rst!” (
x
pages 5 to 17).
DPQP1335ZA/X1
DLP™ Projector
Commercial Use
Operating Instructions
Functional Manual
ENGLISH
Model No.
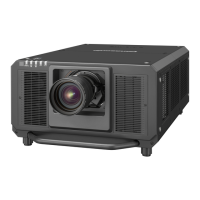
PT-RZ990
PT-RZ890
PT-RZ790
PT-RZ690

Table of Contents

Questions and Answers:

Panasonic PT-RZ690 Specifications

General IconGeneral
BrandPanasonic
ModelPT-RZ690
CategoryProjector
LanguageEnglish

Summary

Chapter 1 Preparation

Precautions for use

Important safety guidelines and precautions for using the projector, including installation and transportation.

Cautions when transporting

Specific instructions for safely transporting the projector, including lens handling.

Cautions when installing

Guidelines for proper installation, including avoiding specific locations and ensuring secure mounting.

Security

Measures to protect the projector and personal information from unauthorized access or interference.

DIGITAL LINK

Information on the DIGITAL LINK technology and its support for transmitting video, audio, and control signals.

Art-Net

Details on the Art-Net protocol for Ethernet communication, used for controlling stage lighting systems.

Application software supported by the projector

Overview of supported software for projector control, logo transfer, and system management.

Cautions on use

General precautions for optimal picture quality, handling the projection lens, and operation guidelines.

Accessories

List of standard accessories included with the projector.

Optional accessories

Information on optional accessories available for extending projector functionality.

About your projector

Overview of the projector's components, including the remote control and projector body.

Remote control

Detailed explanation of the remote control's buttons and functions for operating the projector.

Projector body

Identification and description of the various parts and terminals located on the projector body.

Preparing the remote control

Instructions for inserting batteries, using multiple remote controls, and connecting the remote control via cable.

Connecting the remote control to the projector with a cable

Procedure for connecting the remote control to the projector using a wired connection.

Chapter 2 Getting Started

Setting up

Guidance on setting up the projector, including usable outlets and installation modes.

Installation mode

Details on different projector installation orientations like front/rear and floor/ceiling.

Parts for installation (optional)

Information on optional parts required for installation, such as ceiling mount brackets.

Projected image and throw distance

Guidance on setting up the projector based on projected image size and throw distance.

Adjusting adjustable feet

Instructions for adjusting the projector's angle and leveling using the adjustable feet.

Removingattaching the projection lens

Step-by-step procedure for safely removing and attaching the projector's projection lens.

Removing the projection lens

Detailed steps for detaching the projection lens from the projector.

Attaching the projection lens

Detailed steps for securely attaching the projection lens to the projector.

Connecting

General guidelines and examples for connecting external devices to the projector.

Before connecting

Important precautions to take before connecting any external device to the projector.

Connecting example: AV equipment

Illustrative examples of connecting AV equipment like DVD players via HDMI or DVI-D.

Connecting example: Computers

Illustrative examples of connecting computers to the projector using various input terminals.

Connecting example using DIGITAL LINK

Example setup for connecting devices via DIGITAL LINK using twisted-pair cables.

Connecting example when using the contrast synchronization functionshutter synchronization function

Guide for connecting multiple projectors for synchronized contrast or shutter functions.

Chapter 3 Basic Operations

Switching onoff the projector

Instructions for connecting the power cord and turning the projector on and off.

Connecting the power cord

Procedure for securely attaching the power cord to the projector.

How to attach the power cord

Detailed steps for attaching the power cord holder to the projector.

Switching on the projector

Step-by-step guide to power on the projector and begin projection.

When the initial setting screen is displayed

Guide for performing initial setup tasks like focus adjustment and language selection.

Setting the administrator account

Procedure for setting the user name and password for the administrator account.

Making adjustments and selections

Steps for making image adjustments like focus, zoom, lens shift, and input selection.

Switching off the projector

Instructions for properly powering off the projector and putting it into standby mode.

Projecting

Guidance on starting projection, selecting input signals, and adjusting image appearance.

Selecting the input signal

How to switch between different input sources using the remote control or control panel.

Adjusting the focus, zoom, and lens shift

Detailed procedure for adjusting the projected image focus, zoom size, and lens position.

Lens shift range

Information on the adjustable range for lens shift on different projection lenses.

Operating with the remote control

Explanation of how to operate the projector using the remote control's various functions.

Chapter 4 Settings

Menu navigation

Guide to navigating the projector's on-screen menu system for settings and adjustments.

[PICTURE] menu

Settings related to image quality, including picture mode, contrast, brightness, and color.

[POSITION] menu

Settings for adjusting the projected image position, including shift, aspect ratio, and zoom.

[ADVANCED MENU] menu

Advanced settings for image processing, including digital cinema reality and blanking.

[DISPLAY LANGUAGE] menu

Selecting the language for the projector's on-screen display (OSD).

[DISPLAY OPTION] menu

Options for display settings, including color matching, screen settings, and signal adjustments.

[COLOR MATCHING]

Correcting color differences between projectors for multi-display synchronization.

[BACKUP INPUT SETTING]

Setting up backup input signals for seamless switching when the primary signal is disrupted.

Chapter 5 Operations

Network connection

Information on connecting the projector to a network for remote control and monitoring.

Web control function

Enabling and using the web control function for remote projector management.

Accessing from the web browser

Procedure for accessing the projector's web interface using its IP address.

Error information page

Detailed information on errors or warnings displayed by the projector's self-test.

[Basic control] page

Provides basic control functions like power, shutter, OSD, system, and input selection.

[Detail control] page

Detailed control options for the projector, including sub memory and system daylight view.

[E-mail set up] page

Configuration for sending E-mails for warnings or periodic reports.

Updating the firmware

Instructions for updating the projector's firmware via a wired LAN connection.

Updating the firmware via LAN

Step-by-step guide to updating firmware using a computer connected via LAN.

[Set up password] page (For administrator account)

Page for setting or changing the administrator account credentials.

[Crestron Connected(TM)] page

Accessing and controlling the projector via Crestron Connected.

Chapter 6 Maintenance

Light sourcetemperature indicators

Information on projector indicator lights and troubleshooting steps for issues.

Maintenance

Procedures for maintaining the projector's outer case and lens.

Troubleshooting

A guide to common problems and their solutions, with references to relevant pages.

Chapter 7 Appendix

Technical information

Technical details including PJLink commands, Art-Net function, and control commands via LAN.

Precautions for attaching the Ceiling Mount Bracket

Important safety guidelines and specifications for mounting the projector on a ceiling.

Compatible signal

Information on the types of video signals compatible with the projector.

Related product manuals