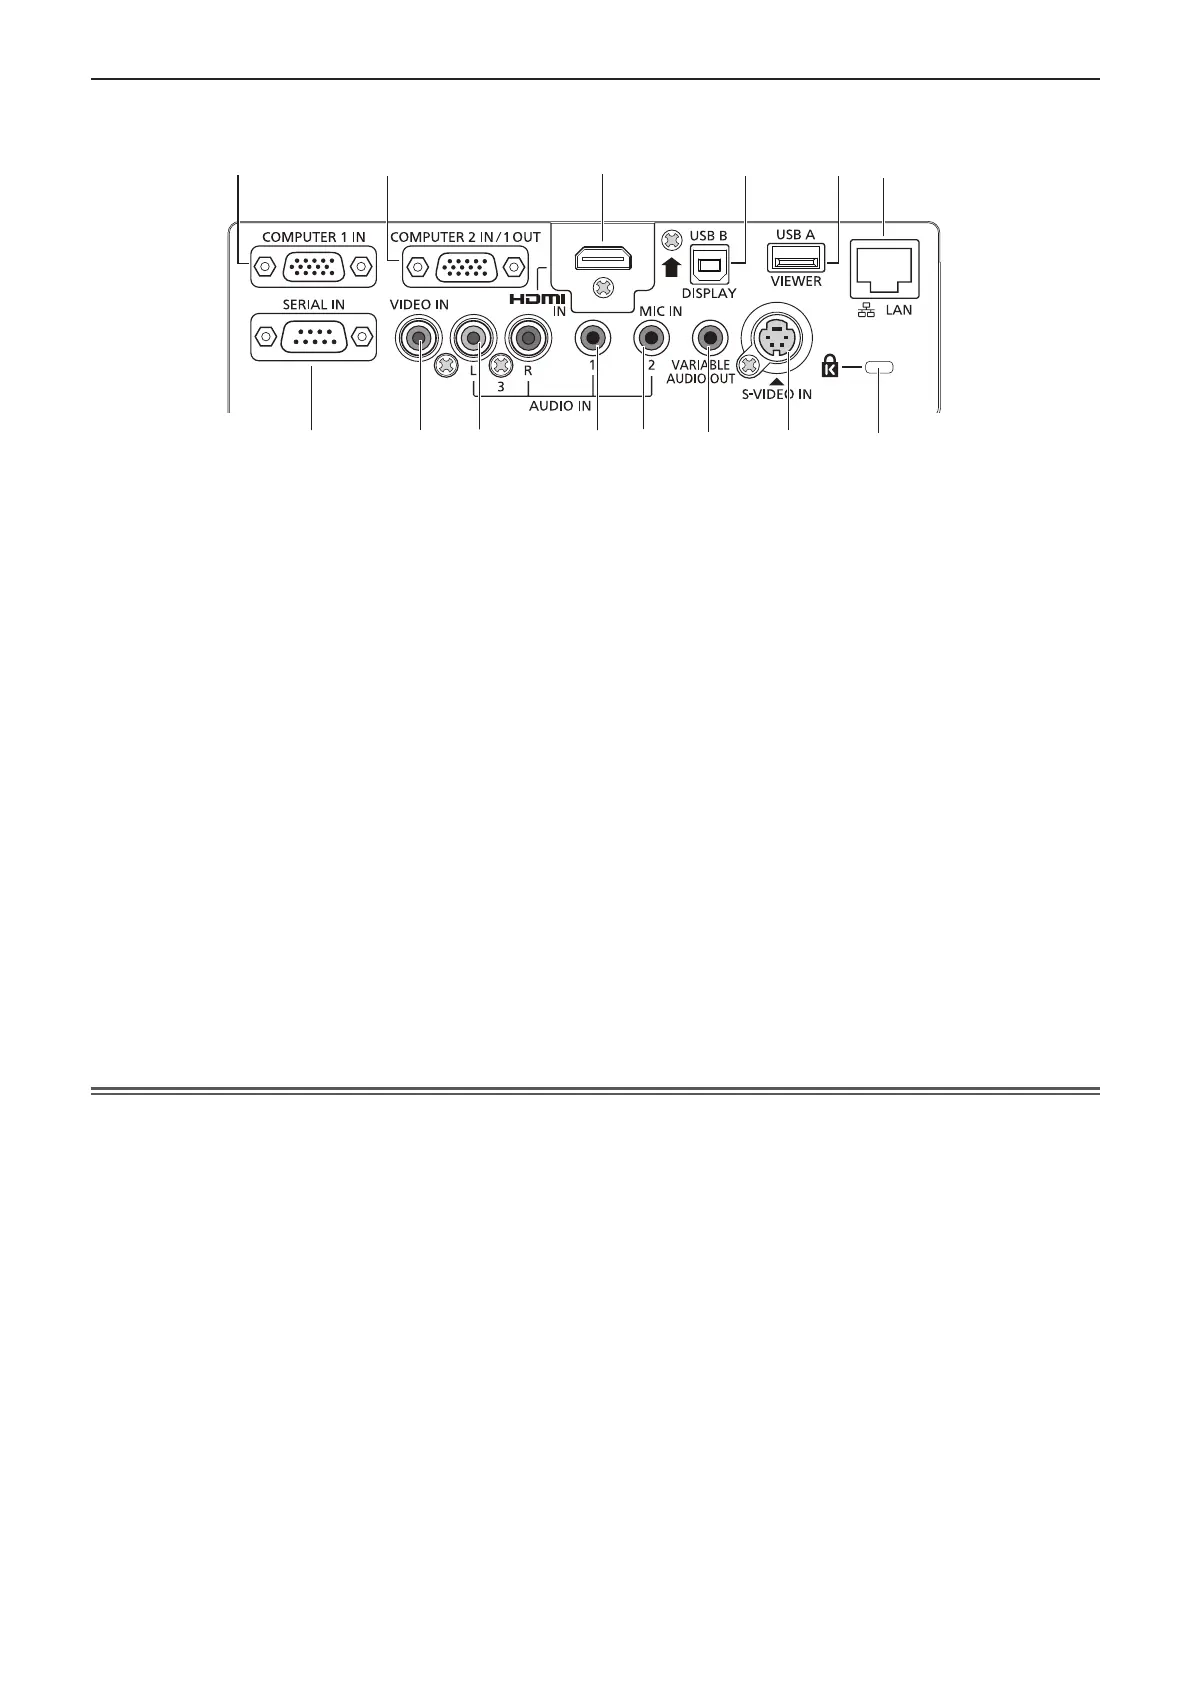
r Rear terminals
Attention
f When a LAN cable is directly connected to the projector, the network connection must be made indoors.
1 <COMPUTER 1 IN> terminal
This is the terminal to input RGB or YPBPR/YCBCR
signals.
2 <COMPUTER 2 IN/ 1 OUT> terminal
This is the terminal to input RGB signals or output the
RGB/YCBCR/YPBPR signals to external monitor.
3 <HDMI IN> terminal
This is the terminal to input HDMI signals.
4 <USB B (DISPLAY)> terminal
This terminal is used to connect the projector to the
computer with a USB cable when you want to use
the "USB display" function of the application software
"Wireless Manager ME6.0".
For details, please refer to the "Operating Instructions-
Wireless Manager ME6.0" in CD-ROM.
5 <USB A (VIEWER)> terminal
This terminal is to insert the USB memory directly.
6 <LAN> terminal
This is the LAN terminal to connect to the network.
7 <SERIAL IN> terminal
This is the RS-232C compatible terminal to externally
control the projector by connecting a computer.
8 <VIDEO IN> terminal
This is the terminal to input video signals.
9 <AUDIO IN 3 (L/R)> terminal
This is the terminal to input audio signals.
There are a left (L) terminal and a right (R) terminal.
10 <AUDIO IN 1> terminal
This is the terminal to input audio signals.
11 <AUDIO IN 2 (MIC IN)> terminal
This is the terminal to input audio signals. Or connect
the
MIC to this terminal.
12 <VARIABLE AUDIO OUT> terminal
This is the terminal to output audio signals input to the
projector.
13 <S-VIDEO IN> terminal
This is the terminal to input s-video signals.
14 Security slot
Attach the commercial shackle lock, manufactured by
Kensington, to protect your projector. Compatible with
the Kensington MicroSaver Security System.
1
2
3 4 5 6
7
8
9
10
11
12
13
14
28 -
ENGLISH
Chapter 1 Preparation - About your projector
 Loading...