88
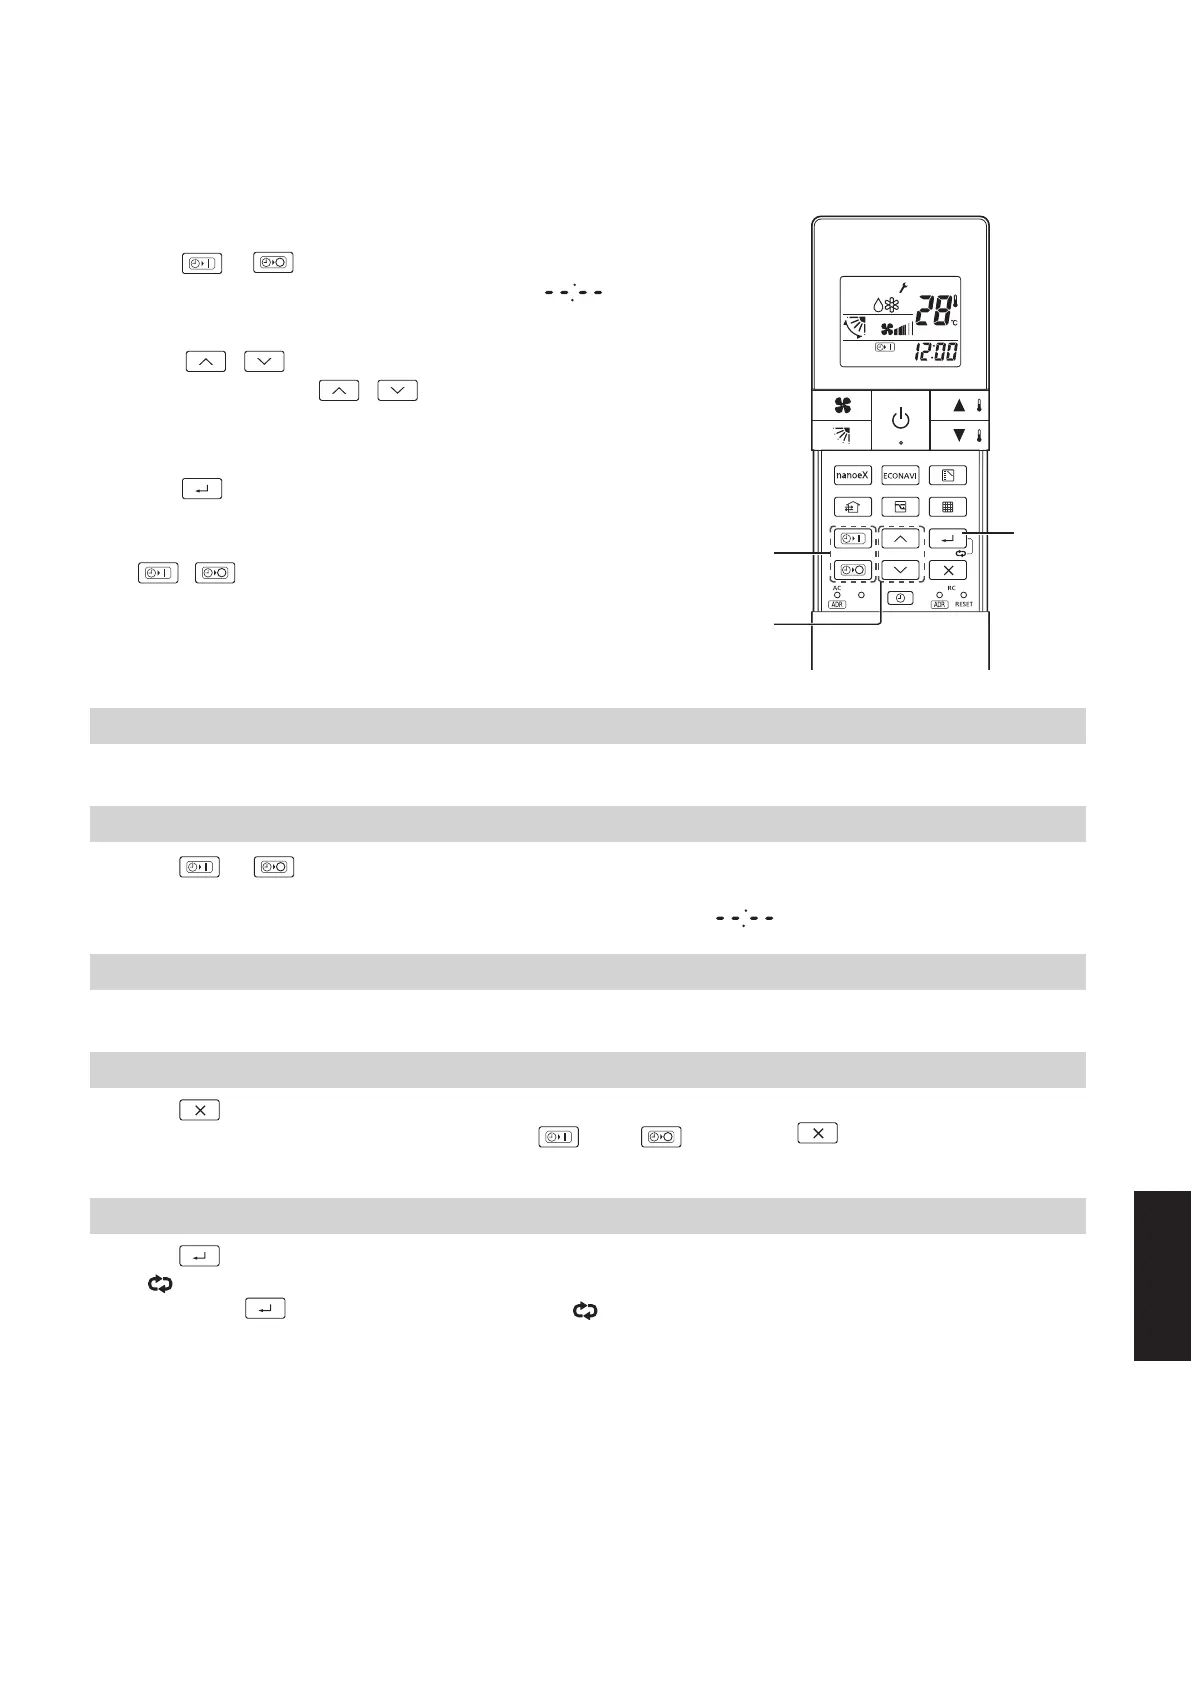
1. Press or twice.
• The time last set on the timer starts blinking. (“ ” blinks
when the timer is not set or after replacing batteries.)
2. Press / to set the timer to the desired time.
• Every time you press / , the time changes in 10 minute
increments.
• If you press and hold the button, the time changes quickly.
3. Press .
• The timer display stops blinking and the display reverts to
the current time after 3 seconds.
• “ / ” is displayed when set.
Combining ON and OFF Timers
1. The ON and OFF timers can be set respectively.
Checking the timer setting
1. Press
or .
• The scheduled time is displayed for 4 seconds.
• When the timer is not set or after replacing batteries, it displays
“
”. (Initial setting)
Changing a timer setting
1. Perform Step 1 to 3 noted above as you did when setting.
Canceling a timer setting
1. Press
.
• If you wish to cancel the setting for either the or the timer,
press
while the scheduled time is
Using the same timer setting every day
1. Press
for 2 seconds or longer.
• “ ” is displayed when set.
• If you press
again for 2 seconds or longer, “ ” goes off and the timer operates only once.
8-2-1-5. Timer Operation
• When setting the timer, make sure the current time on the remote controller is accurate.
• The timer’s clock can only be set when the display of the remote controller is ON.
• After setting the timer, put the remote controller for in a place where its signal will reach the receiver of the indoor unit.
3
2
1
displayed.
8-2-1-5
SM830283-00_欧州向け R32シングル36-71形TD&SM.indb 5 20/01/14 10:04:18
 Loading...