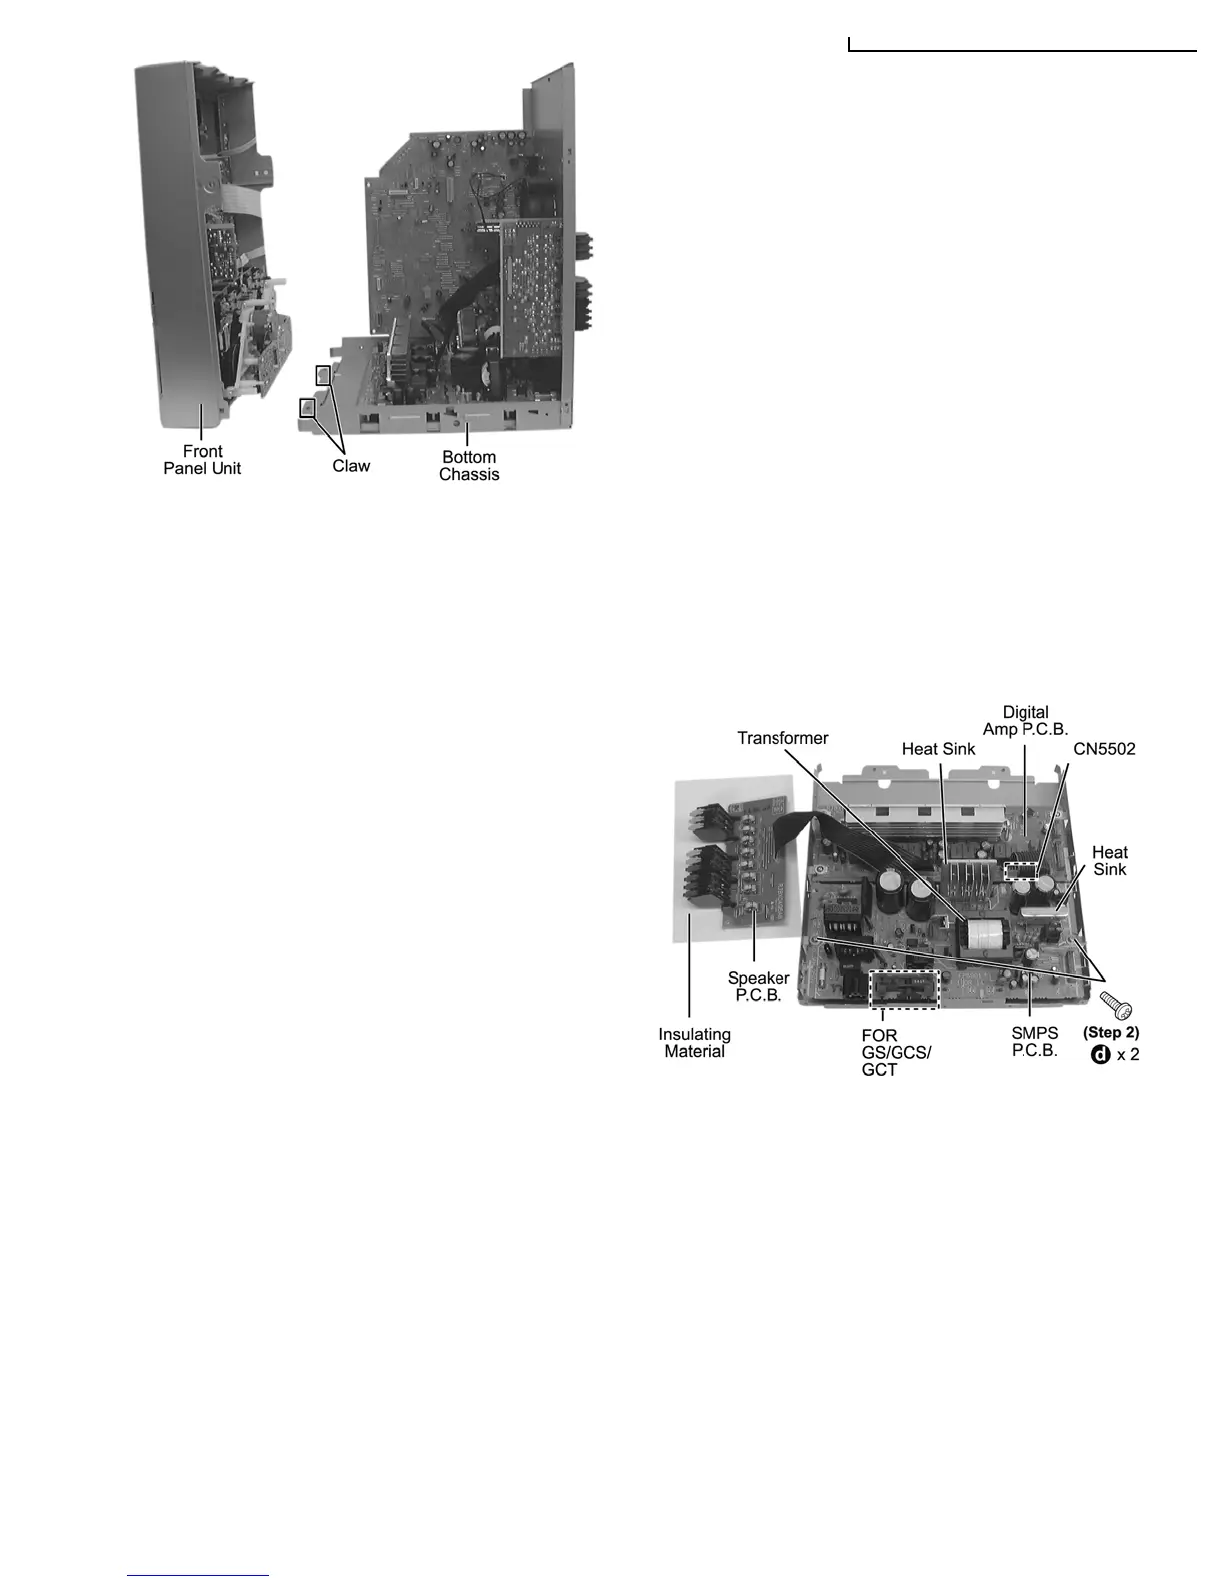
Step 1 Disconnect connector (CN5502 at Digital Amp P.C.B.).
Step 2 Remove 2 screws.
(The below illustration is for GS/ GCS & GCT only.)
Step 1 Remove 1 screw.
Step 4 Remove the front panel unit.
Note: Ensure 2 claws located at the bottom chassis is seated
into the 2 slots at bottom of front panel at 2 catches (one on
each side) of bottom chassis to be aligned to front panel’s slot.
Assembly is secured upon hearing clicking sound.
11.9. Disassembly of SMPS P.C.B.
• Follow the (Step 1) - (Step 2) of Item 11.4 - Disassembly of Top Cabinet
• Follow the (Step 1) - (Step 4) of Item 11.5 - Disassembly of CD/DVD Changer Unit
• Follow the (Step 1) - (Step 4) of Item 11.6 - Disassembly of Rear Panel
• Follow the (Step 1) - (Step 3) of Item 11.7 - Disassembly of Main P.C.B.
• Follow the (Step 1) - (Step 4) of Item 11.8 - Disassembly of Front Panel Unit
11.10. Replacement of Power Amp IC (SMPS P.C.B.)
• Follow the (Step 1) - (Step 2) of Item 11.4 - Disassembly of Top Cabinet
• Follow the (Step 1) - (Step 4) of Item 11.5 - Disassembly of CD/DVD Changer Unit
• Follow the (Step 1) - (Step 4) of Item 11.6 - Disassembly of Rear Panel
• Follow the (Step 1) - (Step 3) of Item 11.7 - Disassembly of Main P.C.B.
• Follow the (Step 1) - (Step 4) of Item 11.8 - Disassembly of Front Panel Unit
47
SA-VK950GC / SA-VK950GS / SA-VK950GCS / SA-VK950GC