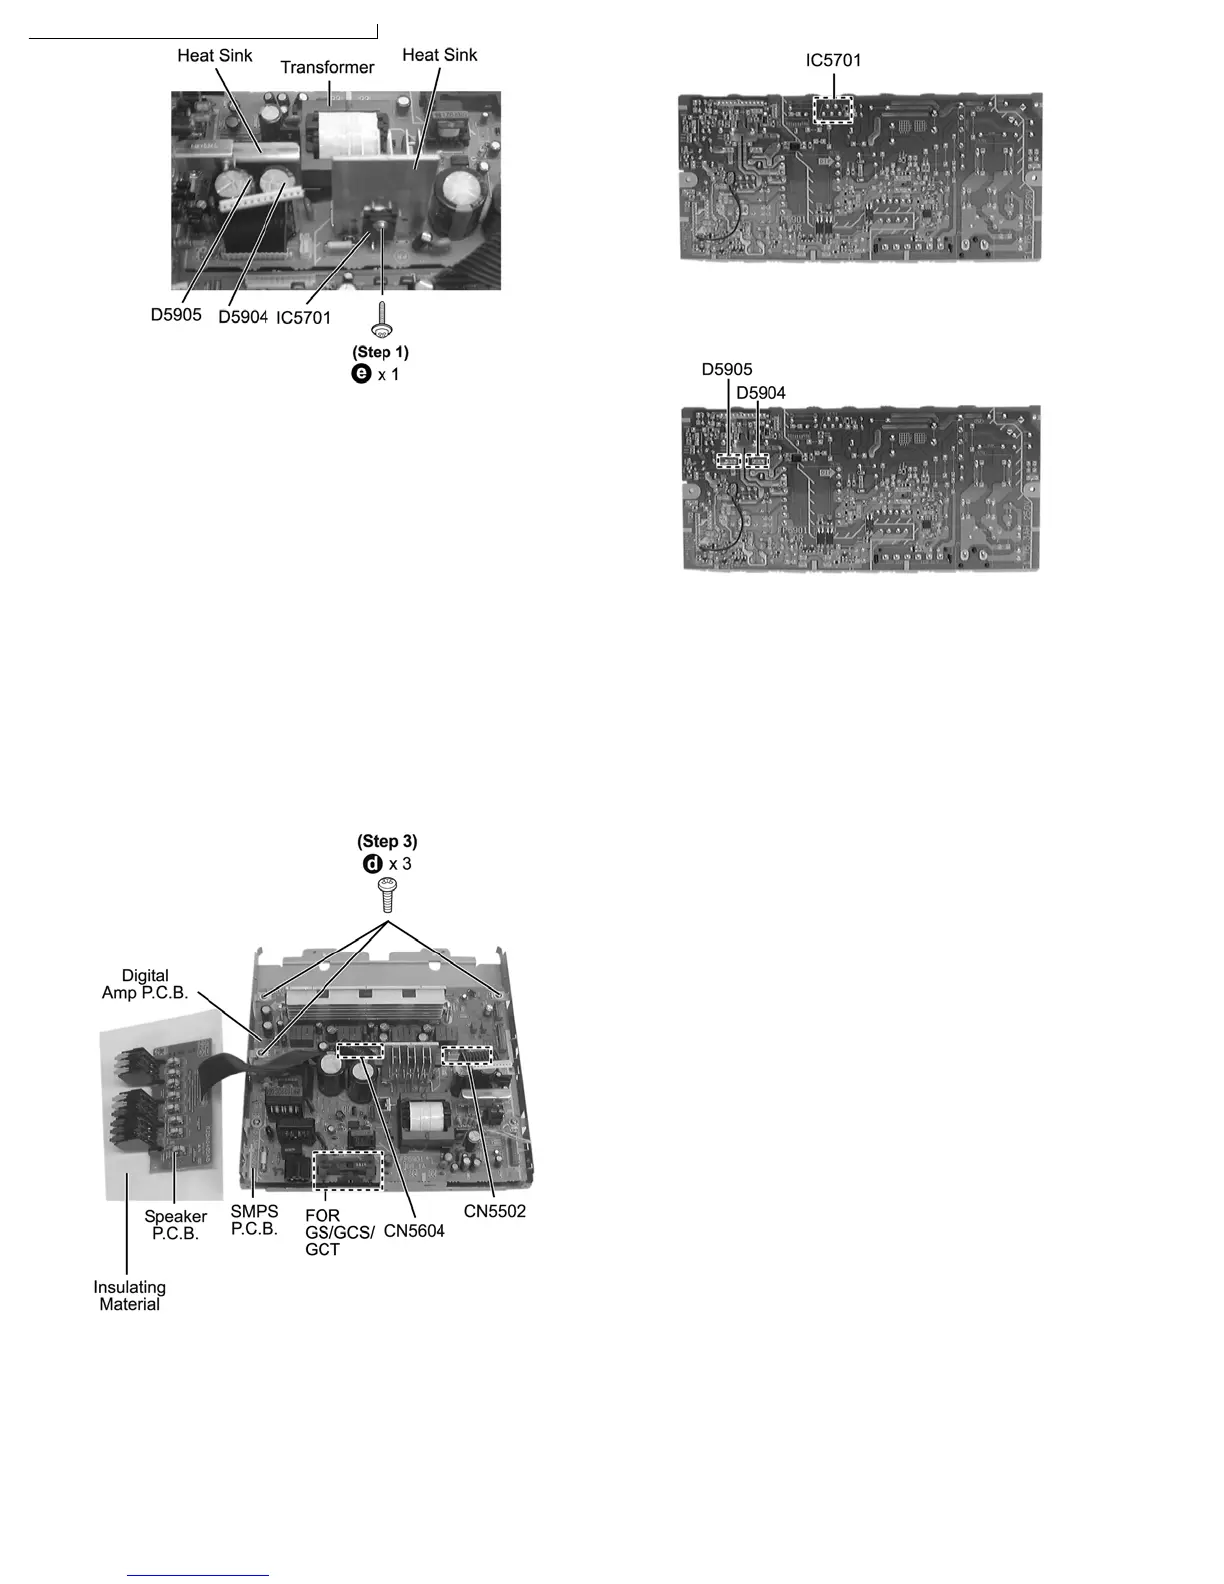
Step 2 Flip over the PCB.
Step 3 Desolder IC5701.
Step 1 Detach cable CN5604.
Replament of Power Amp IC (IC5100)
Step 1 Remove IC clip.
• IC5100
• Relacement of Regulator Diodes
Step 1 Desolder D5904 & D5905.
Step 2 Disconnect connector CN5502.
Step 3 Remove the 3 screws on Digital Amp P.C.B..
Step 4 Remove Digital Amp P.C.B..
Note:
Make sure P.C.B. slot insert to bottom chassis guide.
11.11. Disassembly of Digital Amp P.C.B.
• Follow the (Step 1) - (Step 2) of Item 11.4 - Disassembly of Top Cabinet
• Follow the (Step 1) - (Step 4) of Item 11.5 - Disassembly of CD/DVD Changer Unit
• Follow the (Step 1) - (Step 4) of Item 11.6 - Disassembly of Rear Panel
• Follow the (Step 1) - (Step 3) of Item 11.7 - Disassembly of Main P.C.B.
• Follow the (Step 1) - (Step 4) of Item 11.8 - Disassembly of Front Panel Unit
11.12. Replacement for Power Amp IC (Digital Amp P.C.B.)
• Follow the (Step 1) - (Step 3) of Item 11.11 - Disassembly of Digital Amp P.C.B.
48
A-VK950GC / SA-VK950GS / SA-VK950GCS / SA-VK950GCT
27
service manual SC-TM760


 To Next Page