6
Scanner Overview
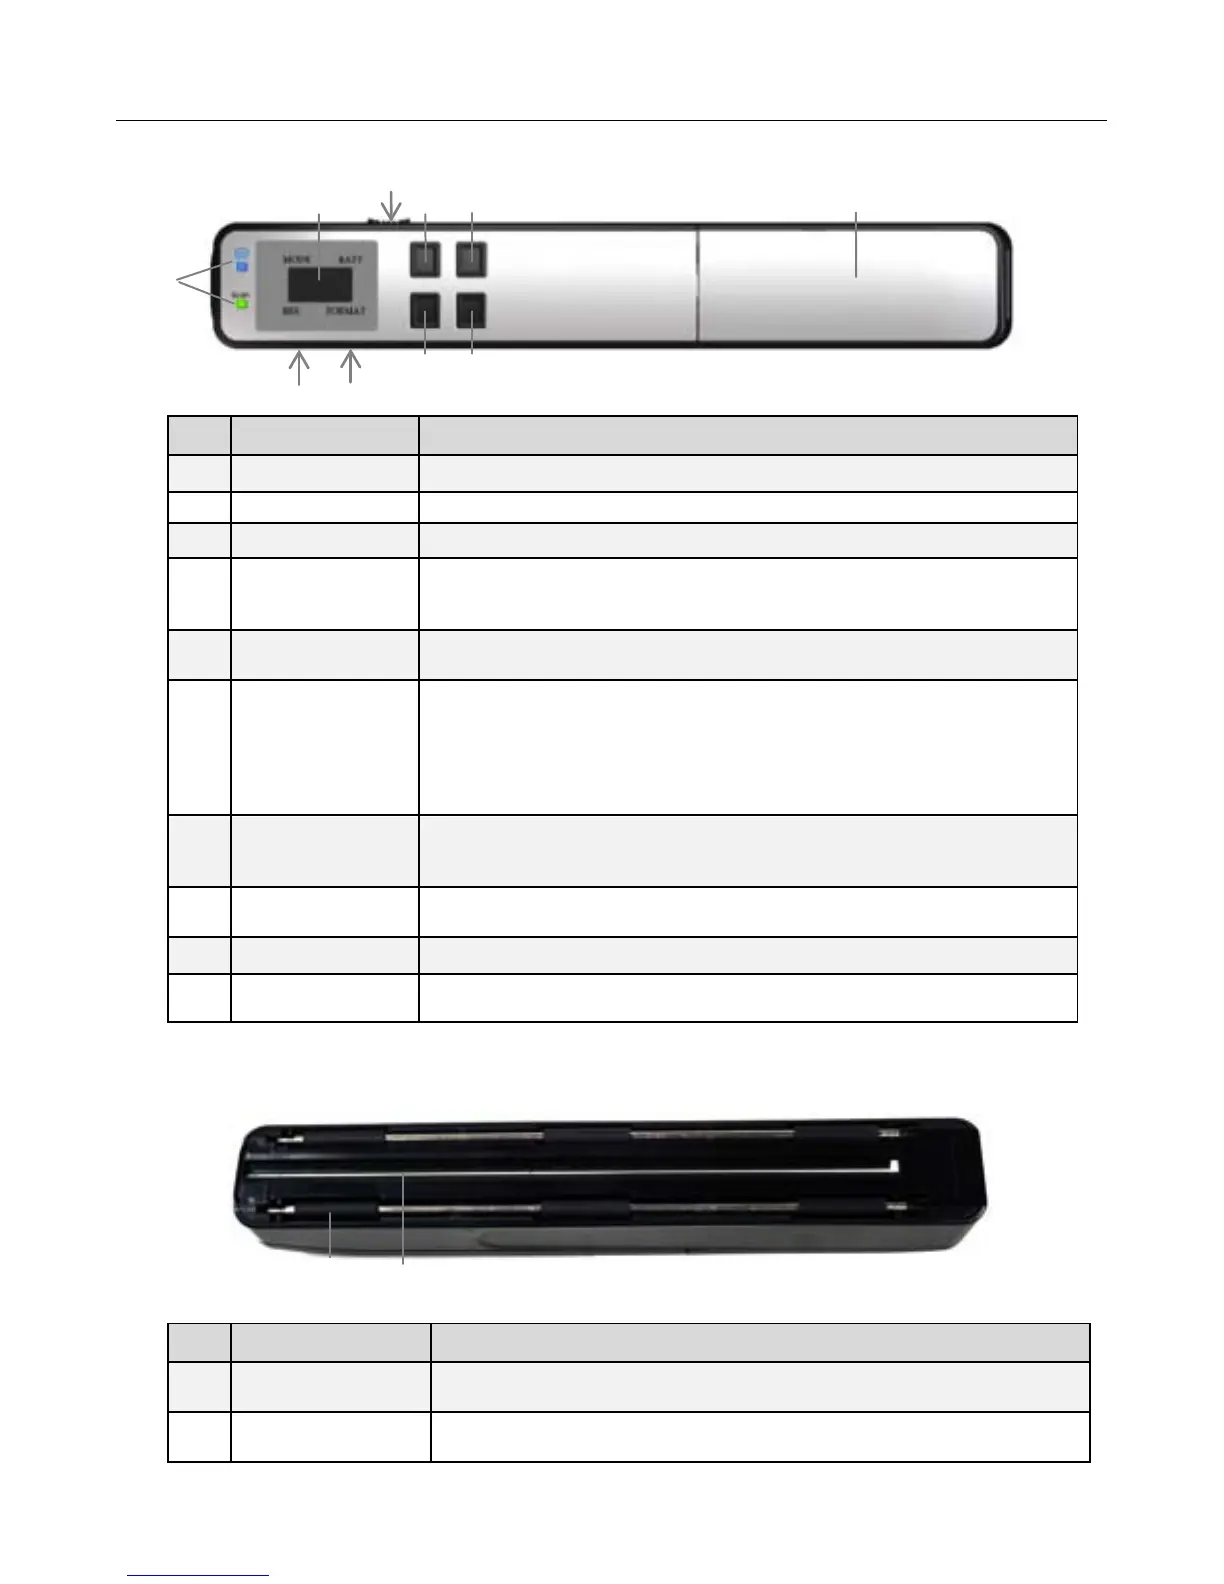
Front
No. Name Function/ Description
Indicator LEDs Indicates the operating status of the scanner and Wi-Fi status.
LCD screen Displays the status of scan settings.
Color BW button Press to select the image MODE: Color or Black &White.
Power& Scan
button
To turn scanner on, press and hold for 1 second.
When power is on, press again to scan.
To turn scanner off, press & hold for more than 3 seconds.
Battery
compartment
Slide cover to remove for battery access.
JPG PDF STC
button
Press to select desired scanned file FORMAT: JPEG (default) or PDF, or
press & hold button for 2 seconds for Stitching mode (SC0 is displayed on
LCD screen, and increments up to SC6 as you scan). Stitching allows
multiple sequentially scanned images with common overlap areas to be
stitched into a panoramic image using Presto! PageManager software
installed on your computer.
STD HQ button
Press to select the scan RESOLUTION:STD = 300dpi (Normal),
HQ = 600dpi (Fine), or press & hold for 2 seconds to set STD HQ = 1200dpi
(Best)
Micro SD card slot
Insert a microSD
card (not included) for increased storage for your
scanned files.
Micro USB port Connect to a USB power adapter or a computer via the microUSB cable.
Wi-Fi Button Wi-Fi ON / OFF switch.
Bottom
No. Name Function/ Description
Sensor Rollers
The rollers are sensors and should only be rolled in one direction. Do NOT
roll back & forth while scanning, except during calibration.
Optical Sensor
While rolling scanner over a document, the optical sensor reads and scans
the image.

 Loading...


