InspectRx200 Operator Guide | 2 - InspectRx Preventative Maintenance Guide | 54
6. Select ‘Ziuz’ ----- ‘Setup Barcode Sync’
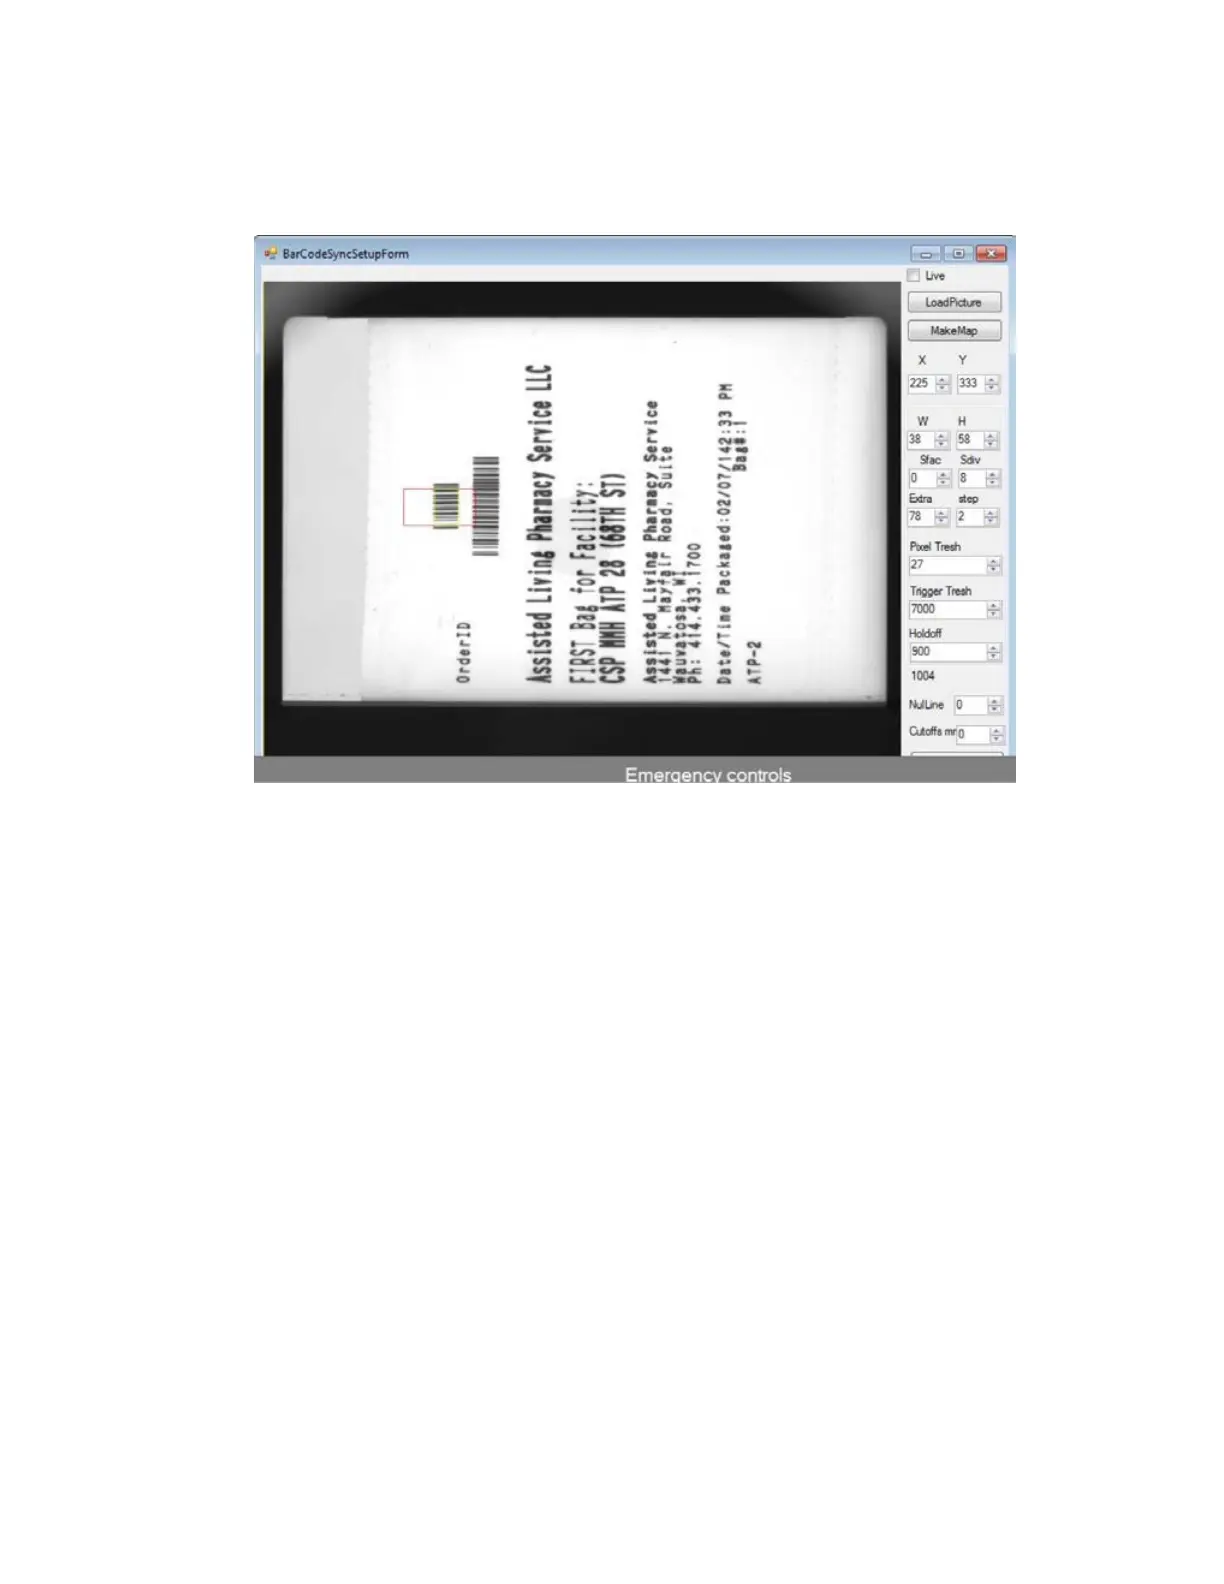
7. Press the shift key to enable settings changes
8. Set all values to values indicated below.
9. Verify Trigger max value (Value above ‘NulLine’) is over 1,000. (if not please verify guppy
diaphragmis set to 4, and perform a focus adjustment)
10. Set Trigger value to 700 (delete final Zero digit from Trigger value)
11. Press the ‘Start’ Button on the INS and press ‘Start’ to use the belt to load bag number 1 under
theviewer and align with the center of Red trigger box
12. Adjust the Y value to align over center of barcode (DO NOT ADJUST X VALUE)
13. Select create map and verify the barcodes are red and solid, no text should show up as red
andtriggered. (if yes, increase pixel Tresh)
14. Select Save
Adjust the cropping
1.
Click on ----‘Ziuz’ ----#’Cropping’
a. Uncheck the selection for ‘use cropping’ This will turn the cropping off.
b. Select ‘OK’
2. On the MAT computer open the Analyzer program and press the 'STOP' button on the lower
lefthand corner (the Analyzer will no longer move files from the Queue Folder)
3. On the INS computer select new batch
4. Select 'New Batch' and run a minimum set of 5 bags through the INS (A long batch may be
stoppedand pulled)
5. Copy the images from the ‘C:\Queue’ to ‘C:\Queue\Uncropped_Images’ Folder
6.
Click on 'Ziuz' -----'Cropping'
a. Load Image